In this tutorial, we will discuss how to take ownership of files in Windows 10. Taking ownership of files if done correctly gives you access to a ton of permissions which are otherwise not available to the standard user – however you must know exactly what you are doing before you proceed with doing so. Following these methods is entirely on your own risk as changing the owner of a folder or file tied to the system files may lead to Windows becoming extremely unstable.
So if you know what you are doing and are willing to take the risk, feel free to follow this guide! Without further ado, let’s get started with the methods to take file ownership in Windows 10.
Method 1: Take File Owners Via The Command Prompt
Step 1: Open an elevated command prompt by typing cmd in the Start Menu, right clicking and selecting Run as Administrator.  Step 2: The command prompt will open up in the standard interface as can be seen.
 We have various commands here which can be used:
- takeown /F “full path of file with file extension” (This will allow you to change the ownership of the file, to the user currently logged on – example shown below)

In the above cmd interface, I have taken ownership of the setup of any video converter which was located in my Downloads folder. - takeown /F “full path of file with file extension” /A (This will allow you to change the owner to administrator with a single command)

You can see in the above command prompt interface that for the same file, I have now changed the owner to the Administrator group.
This basically concludes the command prompt method. This method is although easy but is a bit cumbersome as it needs for you to type in certain commands. Let’s now look at another easier method.
Method 2: Change File Ownership from Right Click Menu:
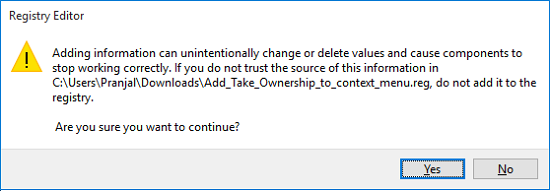
Step 1: Download this registry tweak file. Once downloaded double click on the file and give it permission to modify your registry. The process will resemble below, step by step.
 Click Yes. Now your registry is modified.
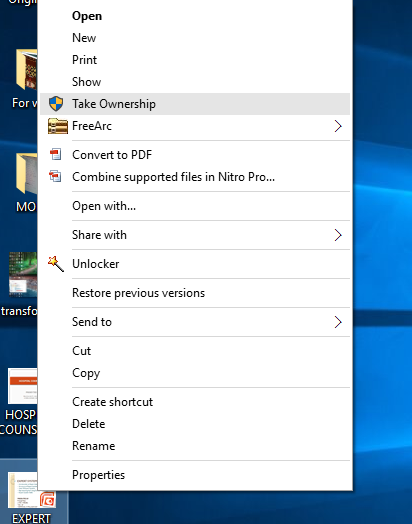
Step 2: Right click on any file you want to take ownership of. Select Take Ownership option. Once you click it, a command prompt window opens up briefly and auto closes. This will grant you ownership to the file!!
Other tutorials you might want to have a look at
Conclusion
So guys, in this tutorial we discussed two methods via which you can take ownership of files on your Windows 10 machine. Use the method which you like the most to achieve the same results. Personally, I like method 2 better as it is much more easier to comprehend. However be warned that you have to use these methods at your own risk as they can seriously mess with the stability of your Windows installation if you take ownership of the wrong system files!
Happy modding!

