In this tutorial, we talk about how to increase effective RAM on Windows 10 using Flash Drive. You will find this tutorial particularly useful if you happen to be using an old system with less RAM, leading to your system performance to stutter. If followed effectively to the end, you will definitely see some performance improvement on your Windows 10 device! For this tutorial, we will need a pen drive with flash memory (USB 3.0 support is recommended), and a system running Windows 10!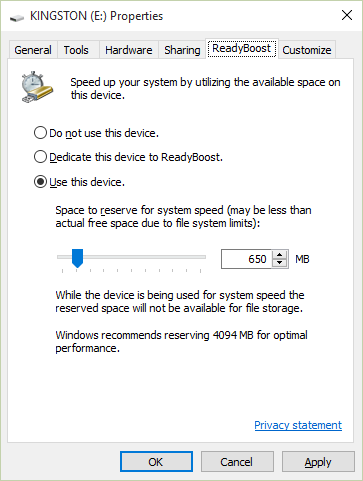
What is ReadyBoost?
ReadyBoost works by reserving a part of your flash memory storage to store SuperFetch data on it. This helps in speeding up system performance particularly on devices with low RAM as this data is normally stored on the RAM chip, but if the RAM available is less, system stutters may occur. Although not a replacement for adding in additional RAM chip onto your device, it surely does have a huge impact on speeding up your system, particularly if you have low RAM on your device. To sum it up, although it doesn’t increase the RAM of your device, it does however increase the EFFECTIVE RAM of your device.
Difficulty
This tutorial is relatively easy to follow and chances of messing up your system even when incorrectly followed are extremely rare.
Tools required
- USB Flash Drive (Higher than 4GB capacity preferable)
- Windows 10 Machine with USB ports.
NOTE: External USB Hard Drives Will NOT Work; We need flash memory devices for this tutorial!
So now, let’s get started with the tutorial itself!
How to Use Flash Drive as RAM in Windows 10:
Step 1: Connect your USB drive to your laptop/desktop’s USB port.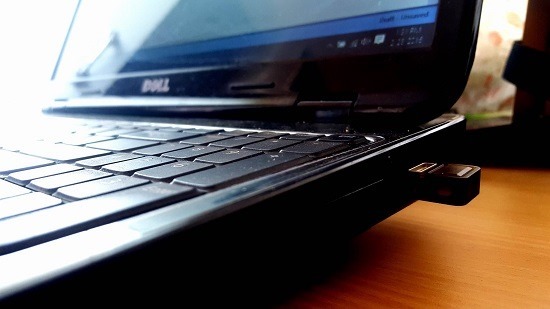 Step 2: Open up File Explorer. When your USB drive shows up, right click on it, and click on Properties.
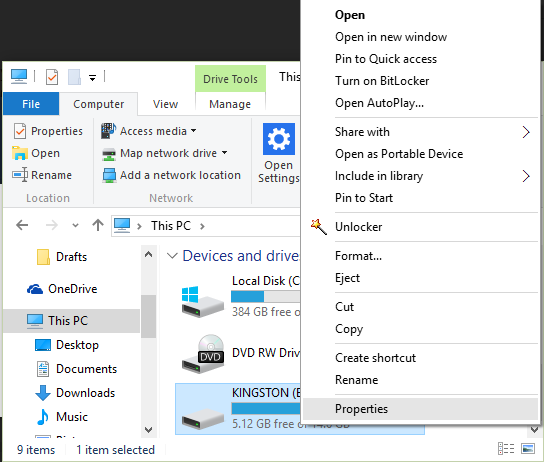 Step 3: Click on the ReadyBoost tab at the top of the properties box which opens up. Click on Use this device.
 Once you have clicked on the Use this device radio button, you will be shown a slider as can be seen in the screenshot below.
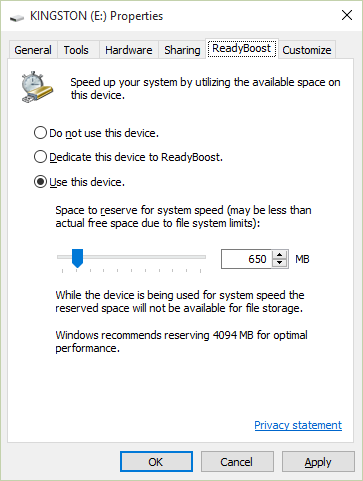
Step 4: In the File Explorer, click on the removable storage device from the pane on the left. Once the file tree opens up in the right side of the screen, you should be able to see a file with the name ReadyBoost.sfcache with the file size of what you have allocated in the properties of the pen drive.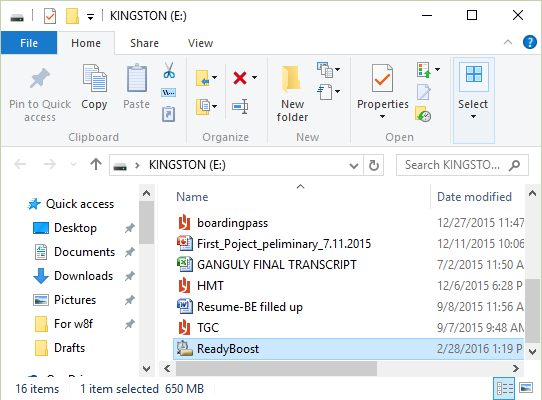 As can be seen above, you can see that the ReadyBoost file has taken up 650MB, exactly the same amount of space that I had set for it to be used. The size of the file is visible at the very bottom of the above screenshot.
That’s it, you have successfully boosted your device by using ReadyBoost on your Windows 10 machine!
Steps to disable ReadyBoost…
Let’s say that your system is fast enough already and you don’t see any noticeable change in your system performance even when you have turned on ReadyBoost, you may now want to disable it. Unfortunatelly turning it off is not as simple as deleting the ReadyBoost.sfcache file on your pen drive, there are a couple steps involved…
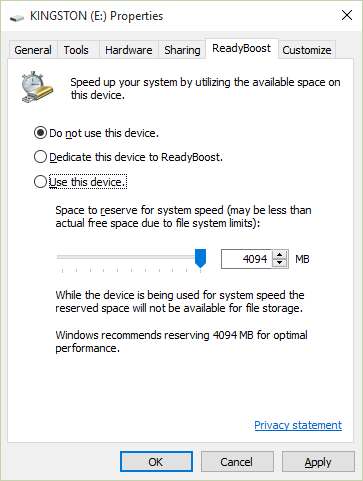
First, follow the steps 1 and 2 from the steps listed under the section above. Now, click on the ReadyBoost tab. Here, click on Do not use this device. 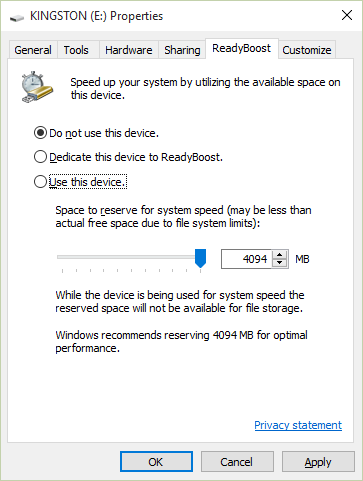 Click on Apply, and then click on OK. You will now get back the space that you have reserved for ReadBoost back on your removable storage media for file storage!
My two cents…
I personally had a system with 3GB of RAM, so ReadyBoost did not have a huge impact on my system speed. I ended up turning ReadyBoost off as the ReadyBoost file was taking up 650MB on my flash memory without effectively giving me any noticeable system performance improvements. Do note that the space reserved for ReadyBoost is not available for file storage, and you are basically compromising on storage space vs system speed.
Give this a shot if you have less RAM to see system performance improvement right away! If you do happen to have higher RAM, although you will not happen to notice a difference right away, yet the load on your RAM sticks will be reduced to a considerable amount.
If you happen to have a few old USB flash drives lying around and were about to throw them away – think twice! You may as well use them for this.