Hey guys! Sensei Pranjal is back with another dojo lesson for you. In today’s lesson, we shall be discussing the process of creation of a Homegroup on your Windows 7 machine. The process is pretty easy, but is a bit lengthy, so get ready for a lesson that’s set to test your patience and skills! Difficult tasks give the best feeling of accomplishment when they are achieved and after all, a true computer ninja must know how to handle the nunchucks of knowledge and geeky-skill required to tweak up your Windows system!
So without further ado, let’s begin!
NOTE: Before you create a Homegroup, make sure that the systems are connected to a common network, i.e, connected directly via lan from one ethernet port of a system to ethernet port of another system, or they are connected to a common Wi-Fi network. Otherwise, the Homegroup feature will not work!
But before we start, do you know what is a Homegroup?
A Homegroup is essentially a group of systems that are interconnected to each other. These systems may be printers, laptops, desktops, tablets etc. connected to each other, and between the systems of a homegroup, file sharing/printing of documents etc. becomes a lot easy. Do note that a homegroup can only be used on a home network.
Now that the basics are done with, lets get started…
Step 1. Click on the Start button, and type “Homegroup” (without quotes) in the search box. Click on Homegroup from the list of options that appear.
Step 2. Upon clicking on Homegroup, you will be presented with a window like the below screenshot. If there is no Homegroup present on your network, you will be presented with an option to create a homegroup. As there was already a homegroup present on my network, I get an option to join a Homegroup instead.
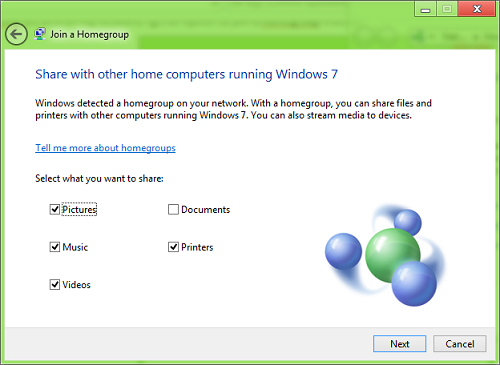
Step 3: Click on Create Homegroup/Join Now, whichever option is present on your screen. Essentially, all steps remain the same even if you get Create/Join option on your screen. Once I clicked on the Join now button, the following screen apppeared for me, which should appear for you as well.
In the above Window, tick whatever you want to share with other users. Click Next.
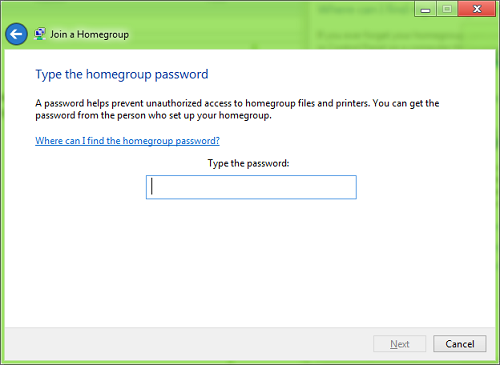
Step 4. Once you click the Next button, you will be prompted to enter the Homegroup password. If you don’t know where to get it from, you can always ask the person who created the Homegroup for the password.
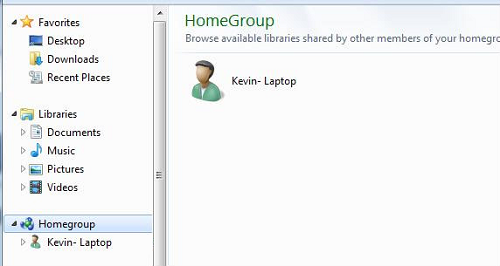
Step 5. Enter the password, and click Next. That’s it. You are now connected to a homegroup, and are now ready to share files/folders between the systems on your homegroup! You can access the Homegroup from the file explorer by clicking on the Homegroup option on the left pane. When you do so, if you have successfully joined the homegroup, you will be able to see the other computers on the homegroup between whom you can transfer files! In the below screenshots, you can see the systems present in my Homegroup.
That’s all. This is all that needs to be done to create a Homegroup connection between various systems on your Network. We hope that you will enjoy using this cool feature of Windows 7!
That’s it guys. Class dismissed! Sensei Pranjal will meet you in the next dojo, with another quick tutorial!
Difficulty Rating?
This tutorial is classified as Moderately Difficult.


