Clipular is a free Chrome extension to take screenshot of a web page and store it online in Clipular website. Taking screenshot with this tool is very easy. You need to press Alt Key twice and then click at the diagonal corners of the area to be grabbed. You can also directly take screenshot of complete webpage. Alongwith screenshot, it also stores URL of the webpage.
Now, there are lot of other screen capture extensions around, but what Clipular excels is in the fact that it seamlessly uploads screenshots to your Clipular account, as soon as you take screenshots (of course, you can save screenshots locally to your PC as well). Once in Clipular, you can organize the screenshots in various collections. You can also directly search for saved screenshots by using notes saved with screenshots.

Clipular is really helpful if you are researching on something and want to store screenshots related to a topic together. In that case, just save your screenshots in Clipular and access them from anywhere.
Clipular also provides basic image annotation tools and image editing tools. In addition to that, it also lets you store notes with your screenshots.
A big limitation with Clipular is that it can store screenshots only. However, when I am researching on a topic, I have to store images, text, videos, etc.; for which I often use Dragdis and Wired Marker. This is where Clipular falls short.
You can access your screenshots on Clipular account with any browser, but you can add screenshots only via Clipular’s Chrome extension.
Get Clipular
Follow the link available at the end of this review to install this app on Google Chrome. After completing the installation process, you will have to sign up with Clipular. You can use your Facebook or Google Account for sign up. After signup, you get a message about how to use Clipular to capture screenshots and the link to install the Clipular extension.
Once you install the extension you get, it adds up as an icon next to Address bar of Chrome (like most of the extensions do). On clicking that icon, you get following options:
- Scissor button and Camera button to grab the screenshots.
- “My Clips” button to open the Dashboard, where all your screenshots are available.
- Sharing and Download options to share or download the last screenshot collected.
- Previews of the recent grabbed images. However, you can’t open the image from here.

Now that you have Clipular installed, let’s see how to go about using it.
How to Use Clipular:
Take a screenshot
- To take a screenshot of a part of a webpage, you need to press Alt Key twice. You can also choose scissor button from the extension’s interface (as shown in screenshot above). After that, you need to click on the diagonal ends of the area that you want to select. The area will be selected, screenshot will be taken, and will be uploaded to Clipular website.
- To capture fullscreen, you need to press Alt Key twice and then Spacebar Key. Camera button on extension button can also be used for the same. In either case, screenshot of the visible part of webpage will be captured and stored to Clipular account. It cannot capture screenshot of complete webpage, if the webpage is long and needs horizontal /vertical scrolling. For that, you can use these extensions.
- URL of webpage from which screenshot was taken is also stores in Clipular website alongwith the screenshot. Page URL is also copied to the clipboard, when you take any screenshot.
Categorize the Screenshots
All your screenshots are available in your dashboard in Clipular website (use the “My Clips” Button on Clipular extension to reach the dashboard). To organize them better, you can use the group option. Just click on “Group” icon available at the top-left corner of Dashboard.
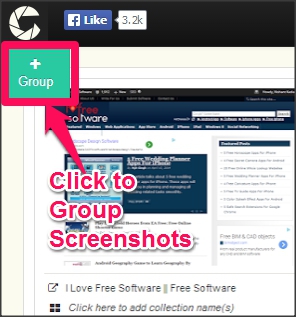
Then select the screenshots that you want to add in the group. After selecting the desired screenshots, again click on Group icon and then a Collection window will pop-up, name the category (or collection) and images will be added to it.
Follow the same steps to add more collections. You can also store same screenshot in multiple collections.
Annotate Screenshots:
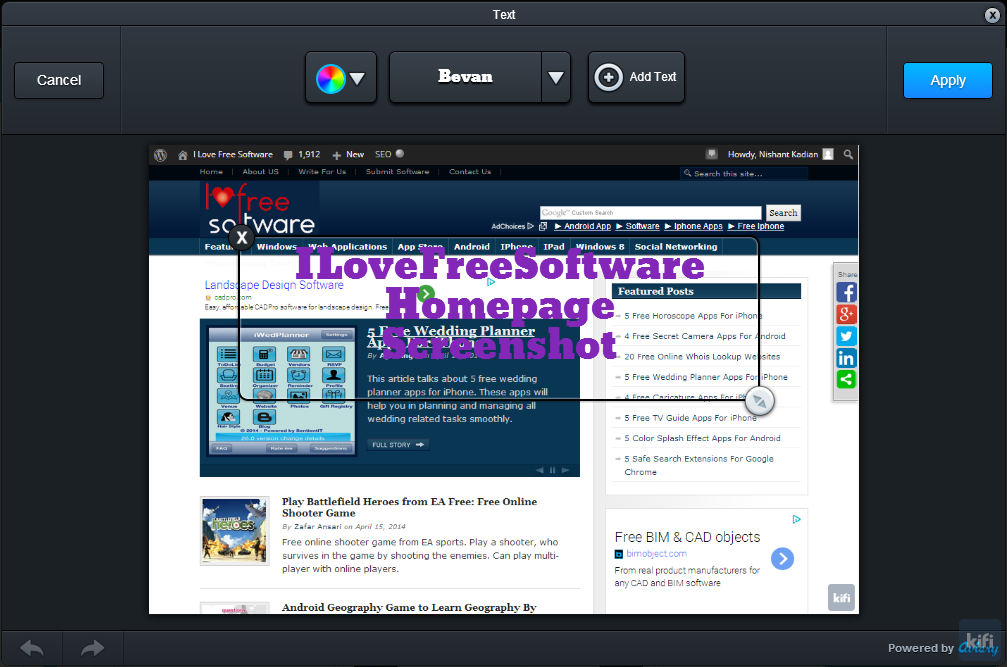
On Clipular’s website, open the image that you want to edit. Then choose the Image annotation option to start editing the image.
Clipular is may not be the leader amongst the Image Annotators but it not far behind in the race as well. It offers almost all the basic image editing tools, like: Text Tool, Pencil, Crop, etc. Additionally, it also has options for adding effects, brightness, contrast, color, and saturation control to give a better finishing effect to the screenshot.
Add Title and Note with Screenshots
Below every screenshot preview on Dashboard, you get an Arrow icon. Click on that icon to reveal the options to edit Title and add notes to it. You can also name the collection / group to which you want to add the screenshot.

Search Screenshots
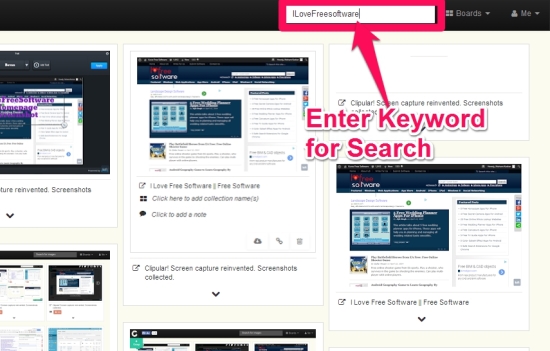
Finding a particular screenshot from a large collection is not an easy task. But Clipular helps you with that as well. On dashboard you get a search option, where you can enter the keyword that you remember about the screenshot. The keyword can be the name of the collection, URL, Title, or note attached with that particular screenshot.
Just enter the keyword, press Enter key and the search results will appear on the dashboard. However, there is no options to refine the search. It would have been better if it offered the option to filter the search to look specifically for URL, Title, note, collection, etc.
Other Options With Clipular
You can open your dashboard from the extension to view, share, and edit the screenshots. Just click on the image that you want to work on. Now, you get options on the top-right corner of the image. You can use these options for:
- Image annotation.
- Share on Facebook, Twitter, Google Plus.
- Email the screenshot. Email will be sent by “[email protected]” and you have an option to enter name (you can enter any name here).
- Download the screenshot.
- Delete the screenshot.
- Option to search the screenshots. It searches for your search query in title and notes of screenshots.
My Take on Clipular:
Most of the screenshots I have used in this review are grabbed using Clipular. Not just to test it but for the ease it offers in taking screenshot of webpage. The fact that you need to click on diagonal corners to take screenshot may not be intuitive at first, but you will like it once you get a hang of it.
Clipular is a good tool to capture screenshots and save them with notes. The feature of being able to search for screenshots is really helpful. I hope it provides option to store text, videos, notes, etc. also to store online.
Did you try Clipular? do let me know in the comments below.