This tutorial explains how to install Android apps in Windows 11 by double-clicking on the APK file. By default, Windows doesn’t recognize APK files, but after some tweaking, you can make Windows install APK files just lie EXE and other executables. To do this, here I will mention a simple script that you can use which works with Android platform tools.
You only have to do a little hard work in the beginning. Once you set the script, then you can always install APK files by simply double-clicking on them. However, for this script t work, you have to make sure that Windows Subsystem for Android is up and running. Otherwise, it will not work.
If you haven’t installed Windows Subsystem for Android in Windows 11 then you can follow this guide here. After that, you can g through the steps mentioned in this tutorial to install Android apps by double clicking on their corresponding APK files.
How to Install Android Apps in Windows 11 by Double Clicking APK?
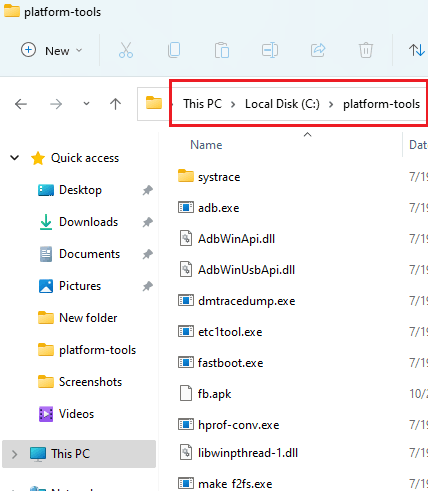
I am assuming that you already have Windows Subsystem for Android and is running. You just go ahead and download Android Platform Tools from here. Unpack the ZIP file and then follow the steps below.
- Copy the unpacked “platform-tools” folder to the C drive.

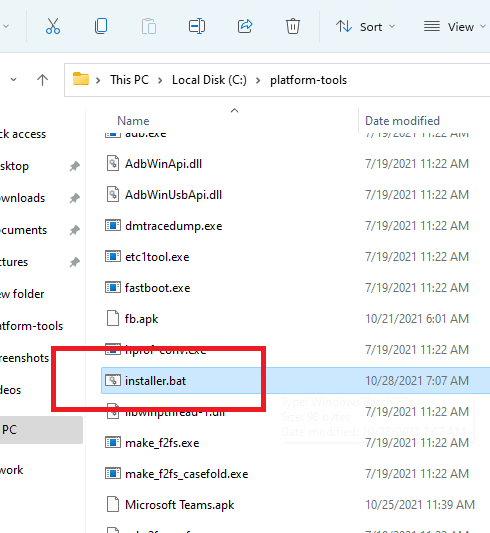
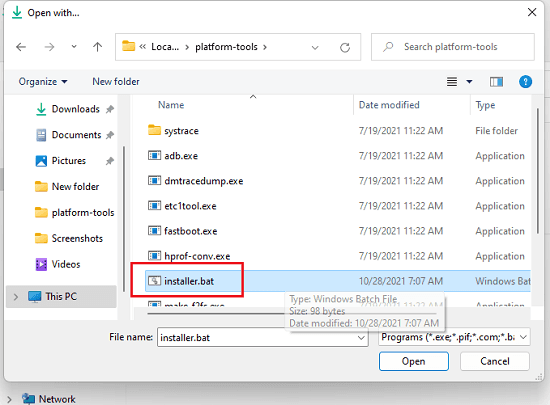
- Now, you download the “installer.bat” file from here. Or, you can just copy and paste the contents and paste them in a new file with any name; just make sure that it ends with “.bat”.
- Paste the “.bat” file in the “C:/platform-tools” folder.

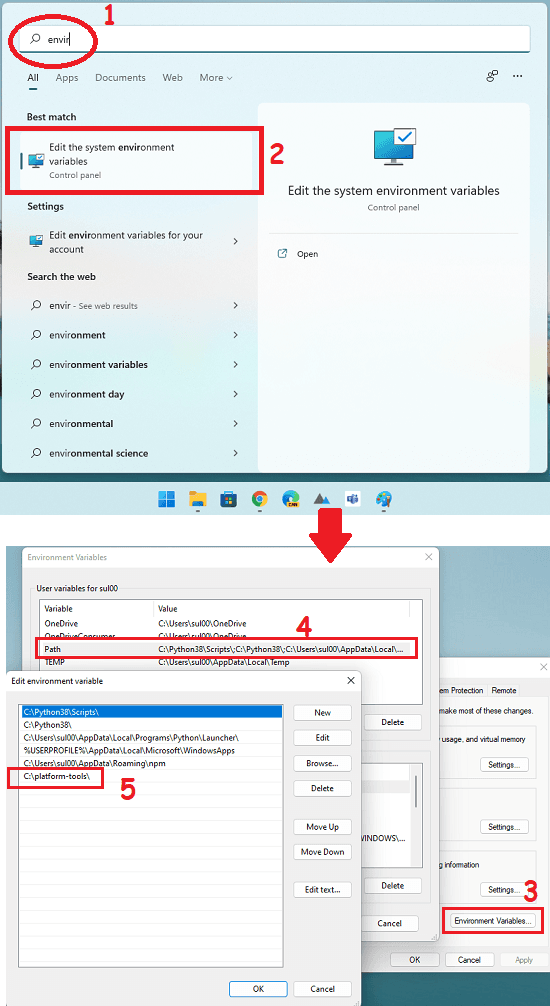
- Add the “C:/platform-tools” folder to the PATH environment variable. You can use some environment variable editor software. Or do it manually.

- Done.
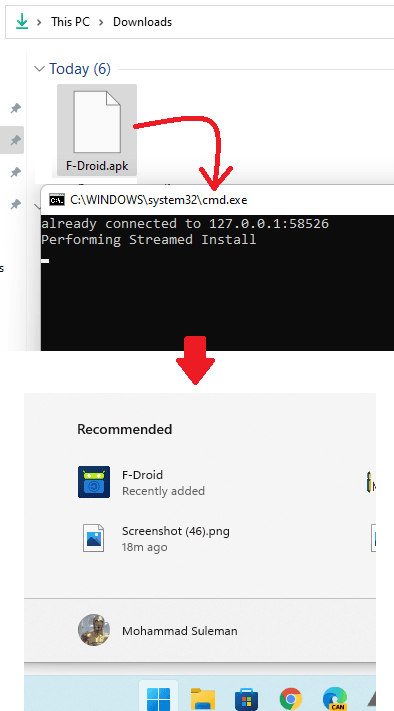
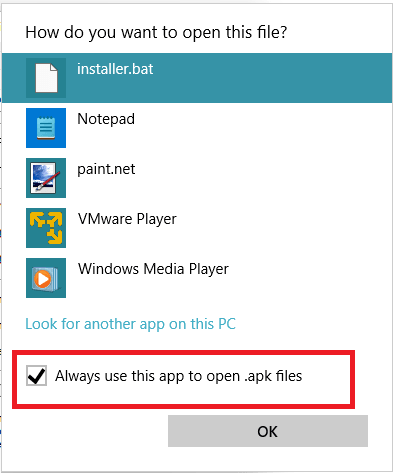
Now, you just double-click on any APK file on your PC. Windows will ask you to choose an app to for this, you simply select the “Look for another app on this PC” option.
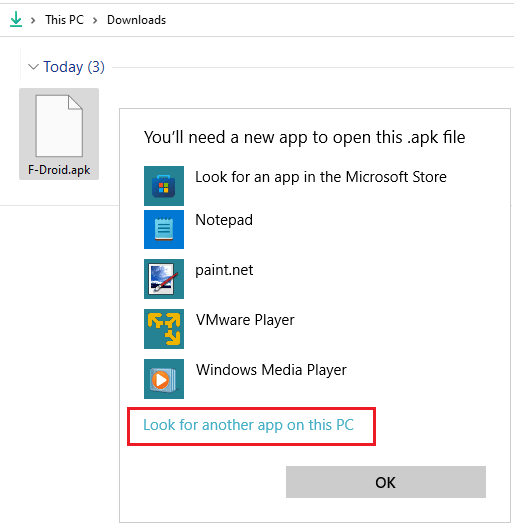
Locate the BAT file that you saved in step 3 above.
Now, a command window will flash and in it, you can see the app installing. When it is done, you can see the newly installed Android app in Start menu. You can then launch it or do whatever you want.
Next time you double-click on any other APK file, just select “installer.bat” and check the “Always use this app to open .apk files” option. From now on, the installation will start automatically when you double-click on an APK file. You can see this behavior in the video I have added in the beginning.
This is it. If you follow this tutorial closely, then you will be able to install APK files in Windows just EXE and MSI. The process is simple and straightforward, and you can do it even if you don’t know advanced technical stuff about computers.
Final thoughts:
If you want to install Android apps with ease on Windows 11 then you will like this simple tutorial here. Just go through the steps I have mentioned here, after that, you will be able to install Android app in the same way you install Windows software.