Here is a small tutorial on how to sync bookmarks between two Chrome Profiles. If you have two Chrome profiles and want to keep bookmarks in sync between them, then just follow steps mentioned in this tutorial to sync bookmarks between them.
Chrome introduced the concept of profiles quite a while back and also added the feature that you can configure multiple profiles in same browser. The best use of it was to have a profile for home and another profile for office, so that extensions, history, etc. remain separate in both. However, many a times, you might want to have bookmarks same in both profiles, so that if you bookmark something in one profile, it becomes available in other profile as well.
Chrome does not provide this option out of the box, but thankfully, there are two interesting Chrome extensions that we can use to keep bookmarks in sync between different Chrome profiles. The best part of these Chrome extensions is that they provide automatic sync feature, to automatically sync new bookmarks to between Chrome Profiles. So, whenever you add a bookmark in one Chrome profile, it will become available in other Chrome profile as well.
Xmarks Bookmark Sync
Xmarks Bookmark Sync is a browser extension that lets you synchronize bookmarks between different browsers. It is available for Chrome, Firefox, Safari, and IE. Its primary purpose is to sync bookmarks between different browsers, but we will “misuse” it to sync bookmarks between Chrome profiles.
Follow these steps to sync bookmarks from one Google Chrome profile to another:
Step 1: Get Xmarks Bookmark Sync from Chrome Store, and install it on your Chrome browser. You will need to install it in both Chrome profiles between which you need to keep bookmarks in sync.
Step 2: Once installed, you will need to create account with Xmarks. Create an account (you can do that from the extension itself). After that, login to Xmarks installed on any of the Chrome profile.

Step 3: Then it will display a “Ready to Sync” dialog box on which you have to click on the “Sync” button, to synchronize all your bookmarks present in Chrome Profile 1.

It quickly uploads all your bookmarks on the server.
After this step, all the bookmarks of Chrome profile 1 would have been uploaded to the server of XMarks.
Step 4: Now let’s go to the second Chrome profile. Double-click the Xmarks extension icon in that, and login with the same credentials with which you logged in to the first profile.
Step 5 : Click on the extension icon, then click on “Synchronize Now” button. This will sync all the bookmarks of the Chrome Profile 1 with Profile 2.

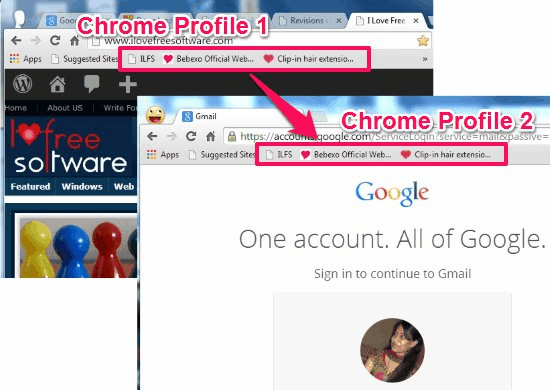
After this step, both the profiles will have bookmarks of each other.
This was one time sync. The best part I like about Xmarks is real time sync.
Once you have setup the Xmarks mentioned above, Xmarks will keep syncing bookmarks between both the Chrome profiles automatically. So, if you add a bookmark to any Chrome profile, it will be synced to other Chrome profile as well, so bookmarks in both the Chrome profiles will always be kept in sync.
Click here for detailed review.
EverSync
EverSync is another Chrome extension that lets you synchronize bookmarks between different Google Chrome profiles. You can use this Chrome add-on to sync, backup, and restore backups of bookmarks.
EverySync works almost in the same manner as Xmarks. Follow the simple steps below to sync bookmarks from one Google Chrome profile to another:
Step 1: Get EverSync from Chrome Store, then install it on your Chrome browser.
Step 2: Then create an account whose bookmarks (Chrome Profile 1) you want to sync with another Google Chrome profile 2. You will also need to verify your email address as a part of account creation process.
Step 3: Click on the extension icon located next to the address bar and click on “Start Synchronization” Button.

Step 4: It quickly displays a box where it provides you three options to synchronize the bookmarks: Merge, Upload, and Download. You can hover your mouse over each option and select the one that suits your requirement. Here, I choose “Merge” option; it quickly merges both local and server data in few seconds.

Step 5: Then to sync bookmarks with other Google Chrome Profile 2, install this same extension on it.
Step 6: Then double-click the extension icon and login with the same credentials that you used to create an account.
Step 7: Then click on the extension icon located next to address bar, and click on “Start Synchronization” Button. This will sync bookmarks of your Chrome profile 1, with profile 2.

As was the case with Xmarks, this one also keeps bookmarks in sync that you add later as well. So, any bookmark added to any Chrome profile will automatically be synced with the second Chrome profile. A limitation of this feature is that auto syncing happens every 30 minutes only, so there could be some time before the bookmark that you add to Chrome profile 1 becomes visible in profile 2 (in case of Xmarks, this happens in almost real time).
As was the case with Xmarks, you can use EverSync to sync bookmarks between multiple browsers as well.
Click here for detailed review.
You’ll also like: 5 Freeware to Sync Bookmarks Between Browsers
Conclusion:
Both the extensions mentioned above do a pretty good job of keeping Chrome bookmarks in sync between different Chrome profiles. Although both offer similar features, I would personally go with Xmarks, simply because it syncs the bookmarks in almost real time, as opposed to every 30 minute schedule that EverSync follows. Other than that, both of these work pretty well.
Do you like to keep your bookmarks in sync between different Chrome profiles? How do you do that? Let’s talk in comments below.