In this post, I will explain the whole process to enable the new Smart Eraser feature of Microsoft Edge. This new feature of Edge is a part of experimental AI tools that are being tested in the Canary build of Microsoft Edge. As an enthusiast of AI tools and a regular Microsoft Edge user, I am sure you will like these new tools and here I will explain how to use them.
We have covered a tool before to remove objects from Photos. But that tool has limitations on number of images you can process with it. But now, the smart eraser feature of Edge is unlimited. You can process as many photos as you want and there is no watermark in the final output image.
How to Enable Smart Eraser in Edge?
To use the new Smart Eraser feature, you need the Canary version of Edge that you can download from here. Since this AI tool is a bit unstable, that’s why you can only try it in the developer build. Let’s see how.
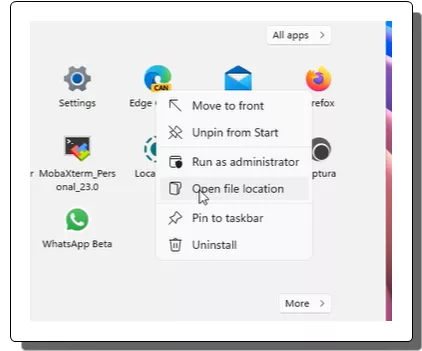
- Now, search Edge canary in Start and then right click to open its location.

- Explorer will open now, and you will see the Edge Canary’s shortcut file. Right click on it and then open the properties.

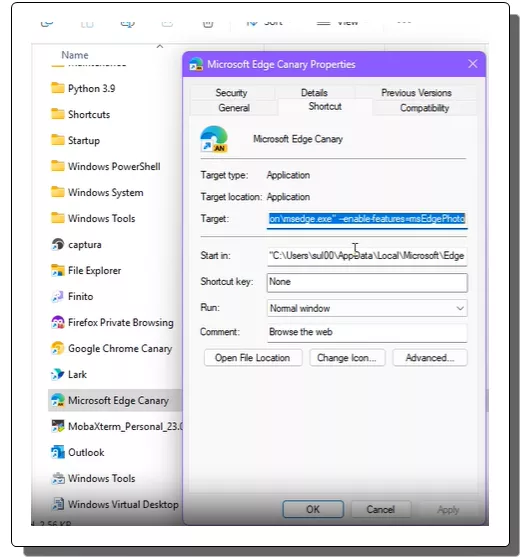
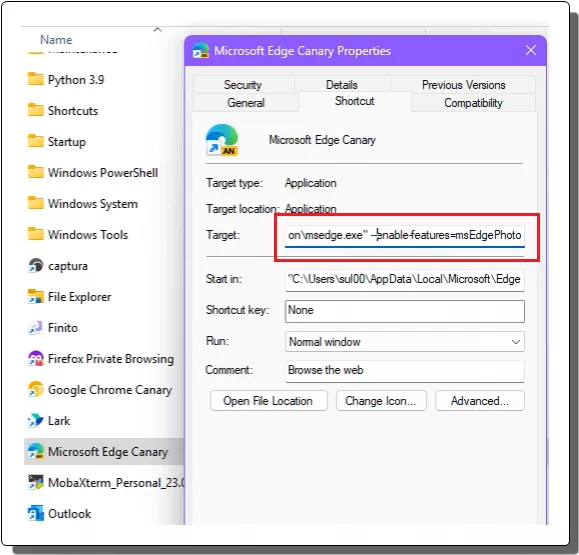
- Now, in the properties window, you just click in the Target field. Just append the following command like this and apply and save the changes.
--enable-features=msEdgePhoto

- Done.
If you follow these steps carefully and as exactly as I have mentioned, then this feature might get enabled for you. In the next section, you will now see how to use it.
How to use Smart Eraser Feature of Microsoft Edge?
To use the new Smart Eraser AI tool in Edge, follow these simple steps:
- Launch Edge Canary and then search for some images.

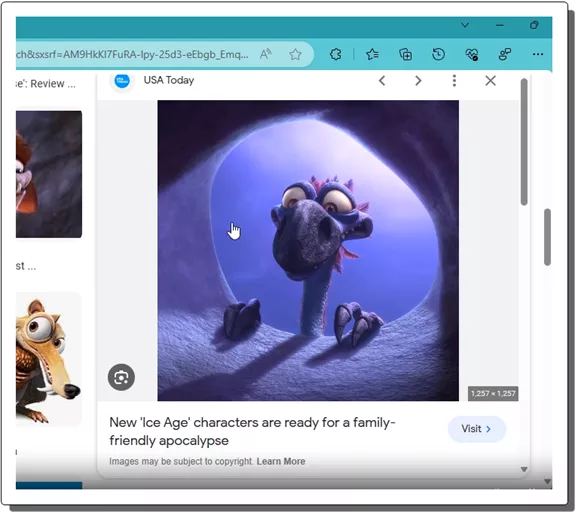
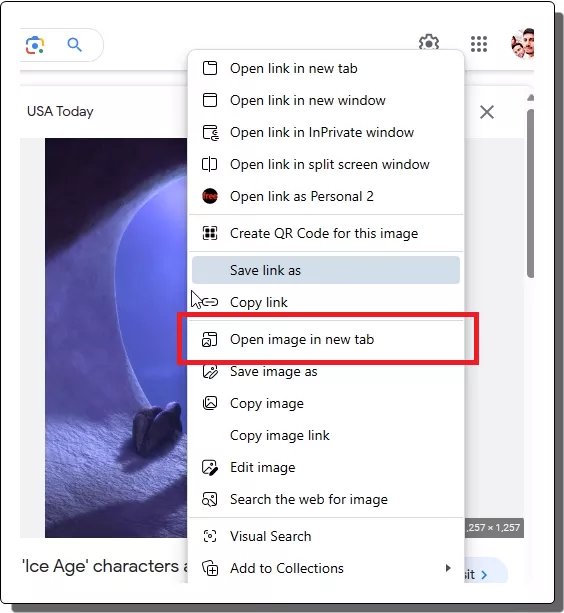
- To open an image in the AI editor, you just right click on it and then select the open image in new tab option.

- The image will now open in Edge Image Editor. From the top side, you can click on the edit button and editing tools will appear.

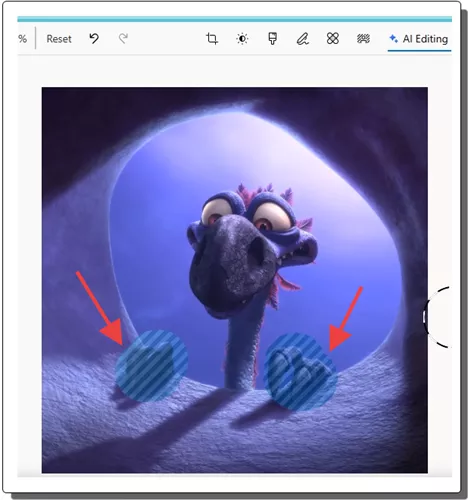
- Now, click on AI editing and then the smart eraser feature will appear. Use the brush tool to select the objects that you want to remove from the photos. You can also adjust the brush size if you want to.

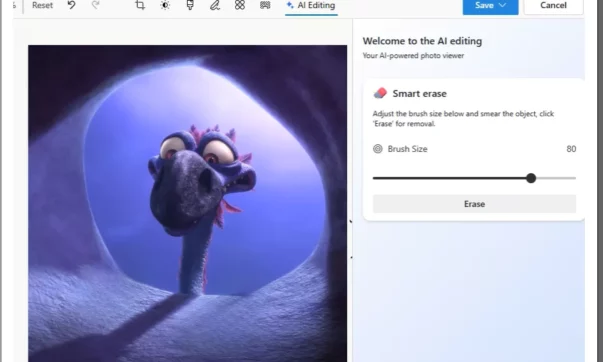
- After selecting the objects, just click on the Erase button and it will remove the objects for you without compromising the original image.

- Done.

Repeat the process and use this new Smart Eraser feature of Edge in this way. Whenever you need to remove some objects from photos, you just use the Edge Image Editor like this. I hope in the coming updates they add this functionality in the stable build of Microsoft Edge.
Closing thoughts:
I am really liking this new streak of Microsoft Developers playing with AI tools across the built-in apps. The background remover and image generator in Paint was amazing and so the background replacing tool of Photos. And now, you have the similar AI based image editing tools in Microsoft Edge as well. Even though the smart eraser AI editing is still in beta phase, it works phenomenally. I really liked the way it works and some more tools that they have added in the Edge Image Editor.