This tutorial explains how to disable auto arrange in folders in Windows 10.
Windows XP has this option to disable auto arrange in folders, but this feature is discontinued in Windows 10 and other versions of Windows. As a result, when we drag n drop a file or folder in a folder, it is arranged automatically and alphabetically. However, those who want to arrange folders randomly or the way they want, there is a solution.
You need to remove a few keys from Windows 10 Registry and download two Registry files. I have covered all the steps in this tutorial to make it very easy for you to disable auto arrange in folders in Windows 10.

Above you can see before and after disabling auto arrange in folders.
Note: Auto arrange in folders can be disabled for Tiles, Small, Medium, Large, and Extra large icons view modes. It won’t work for Details and List view mode.
Also see:
- How To Generate Battery Report In Windows 10
- How To Disable Action Center In Windows 10
- How to Increase RAM on Windows 10 using Flash Drive
How To Disable Auto Arrange In Folders In Windows 10?
Step 1: Open Registry Editor of Windows 10 and access Bags key. It is located at: HKEY_CURRENT_USER\SOFTWARE\Classes\Local Settings\Software\Microsoft\Windows\Shell\Bags.

Step 2: Right-click Bags key and use Delete option. Yes, you need to delete this key.

Step 3: Now access Bags key available in other location. This time, you need to go to: HKEY_CURRENT_USER\SOFTWARE\Microsoft\Windows\Shell\Bags.

Delete this key also. Now you also need to restart File Explorer.
Step 4: Use this link to download a zip file that contains two REG files. Extract the zip file and you will be able to access those two REG files: disableautoarrange and undo.

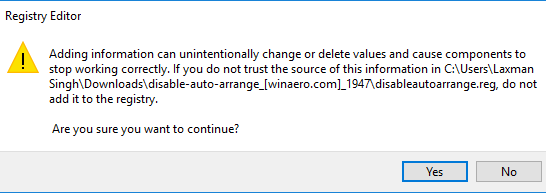
Step 5: Execute disableautoarrange reg file and confirm the action. This file will add keys and values to Windows 10 Registry.
You will also receive a confirmation pop-up that changes are applied successfully.

Step 6: Now Restart File Explorer and then open a folder containing sub-folders and files. Change the view mode to Tiles, Small, Medium, Large, or Extra large icons. After this, drag n drop a folder or file and you will notice that it is not automatically arranging anymore.

Step 7: In case you want to re-enable auto arrange feature, you can execute undo reg file and confirm the changes.
Restart the File Explorer and it will enable auto arrange in folders.
Conclusion:
There are cases when we just add folders to a location temporarily and don’t want that they should be arranged automatically in Windows 10. Natively, Windows 10 can’t help us in such cases, but with few Registry tweaks and the software I covered in this tutorial can help you for sure.