This tutorial explains how to show missing thumbnails for audio video files in Windows Explorer.
Sometimes Windows Explorer is not able to show thumbnails for many audio and video files. To solve that problem, I have found a free Windows software called Icaros. It lets you view thumbnails for almost all types of video and audio files. Using this software, you can even enable thumbnails for incomplete files.
The way this software works is that it tries to extract the embedded cover art from audio / video files and use that as thumbnail. If there are multiple covers detected, it can choose the first landscape cover to make it look even better. And not only that, it can actually take a screenshot from a video file and use that as thumbnail. And it is intelligent enough to detect a black or white frame, and ignore that.

The best part is that it is totally automated. Once you have installed it, just Activate it, and there on you don’t need to do anything else. It will automatically add missing thumbnails of Audio and Video files in Windows File Explorer.
Another thing I love about it is that it supports almost all the popular audio and video formats. Essentially, it supports all formats supported by FFMpeg.
How to Show Missing Thumbnails in Windows Explorer:
This software makes it pretty easy to show thumbnails of all the video and audio files in Windows File Explorer.
After installing and running Icaros, you will view its interface as shown in the screenshot below. The interface is pretty simple, really. The first tab “Thumbnailing” shows the file types that you want Icaros to support. It already has some file types that are defined here. If you want to add any other file type that you are struggling with, feel free to add it here. And then click on on the Tab to Activate it. Icaros is now working for you, automatically finding the missing thumbnails and adding them to Explorer.

This is pretty much all you need to do to get back thumbnails for your audio and video files. If you want to customize this software further, it lets you do that. Follow along.
Other features of Icaros:
As I mentioned above, the tab Thumbnailing lets you specify the file types that you want Icaros to support. This tab actually provides a few more options as well that you can fiddle with:
- Thumbnail Offset can be set in percentage from 1 to 100%.
- Prefer Timestamp option lets you define a time to grab thumbnail from a video. For example, if you want to always skip first 10 seconds, you can do that here.
- Enable Black/White Frame Detection smartly detects dark or bright video frames and skips it to grab the next frame for thumbnail.
- Display Icon Overlays on Thumbnails: I couldn’t figure out what exactly it does.
- Prefer Landscapes Covers option chooses from the first landscape cover for thumbnail from the multiple covers available in video files.
- Use Embedded Cover Arts for Thumbnails option detects cover arts embedded with videos or audios and makes it thumbnail.
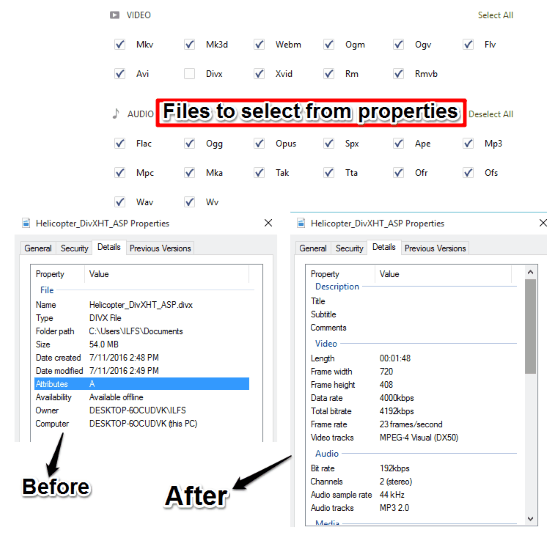
Next tab is Properties tab. Activating this tab helps to view file information, such as Frame Width, Frame Height, Artists, Bit Rate, Frame Rate, etc. in Windows Explorer for checked video and audio files, as displayed in the image below.
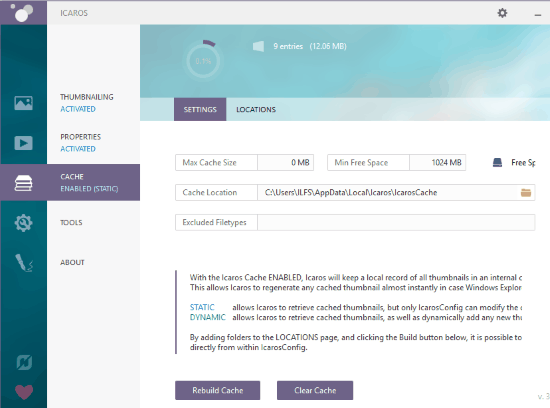
 Next tab you see on interface is Cache. By enabling cache, you allow Icaros to build its own cache of thumbnails, so that Icaros can keep the thumbnails enabled even if the Windows Explorer looses them. In this tab, you can allocate a folder for Icaros cache and set a maximum cache size for Icaros. If you keep maximum cache size to zero, then the the cache size is set to unlimited.
Next tab is Tools. This tab has the option to clear Windows Thumbnail cache and refresh Windows Explorer.
Note: You can always deactivate these thumbnails by clicking on the same option that activates thumbnails. But the thumbnails won’t go after deactivating Thumbnailing in this software. You will need to clear cache from Windows Thumbnails Cache option in Tools tab.
In case the thumbnails are still there, then you will have to manually delete thumbnails with the help of Windows Disk Cleanup tool. Open Disk Cleanup from Windows search bar, select C: Drive in Drive Selection dropdown, then in the Files To Delete section, select Thumbnails and click OK to delete.
Also check: How to clear thumbnails cache in Windows 10.
Verdict:
Sometimes thumbnails for some types of files are not enabled by default, in that case, this tutorial will help you enable thumbnails for such files. If you also face this problem, then you should download Icaros and follow this tutorial for the solution.
Get it from here.