This tutorial explains how to create IceCast streaming server free. In this post, I will talk about how you can setup and get running your own IceCast server and offer live streaming. If you have a little technical knowledge then you will understand this very quickly. Here it will talk about a couple of tools which will help you create your own radio server and then you can live stream on it. For an IceCast server, I will recommend you to either use a VPS or you can locally host it. For example, if you want to create the radio server on your home and office network then you can do that.
You may try other streaming tools for the same thing but IceCast is standard internet radio. You can think of it as a protocol, specifically designed for internet radio streaming. Here using it, you can serve songs on your radio server and you can also opt for live recording in the order you want to broadcast some message. You can engage some other people and talk to them and all this will be served live over the radio. The IceCast gives you a streaming URL then you can give it to your listeners and they can stream it on a music player which supports IceCast, ShoutCast, etc.
Internet Radio is kind of a thing these days as it has always been and if you want to create your own radio then here this post will demonstrate that in full details. You can create a public server and serve live streaming URLs and URLs for online playlists so other users can stream music using them. For sending audio and live recordings, and music playlists to the IceCast server that you create, I will mention a handy software for that as well. You just have to connect to your server and then send content that you want to broadcast.
How to create IceCast Streaming Server Free?
If you have a Windows or Linux server then you can easily create a IceCast server on it. For this post, I will be running the IceCast server on Windows machine. To do this, we will use two different free tools. The first one is the IceCast Server Setup itself and a broadcasting tool known as Butt, which is acronym for “Broadcastoadcast Using this Tool”. So, first we will install and configure the server and I have divided the whole process in two parts.
Part 1: Installing and Configuring IceCast Server
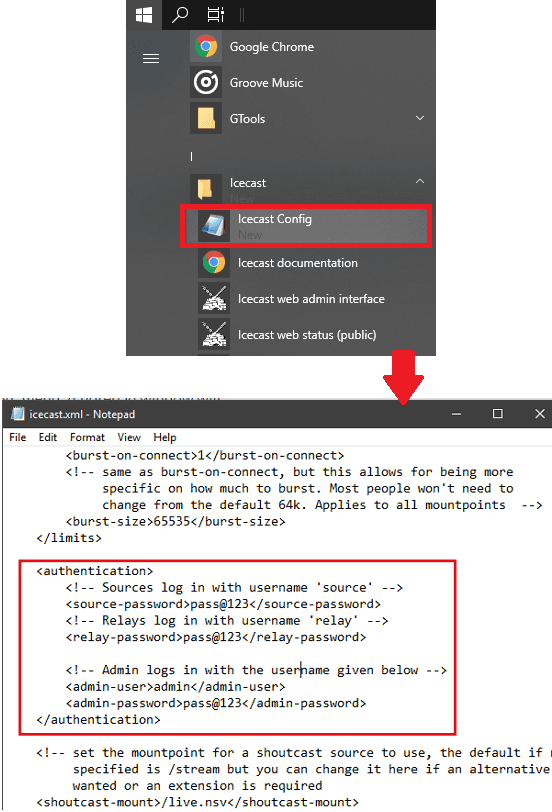
After downloading the IceCast server executable, simply install that. After it installs successfully, you will have to configure. It comes with an XML file in which you can configure a lot of parameters. From admin password to the name of your server, you can tweak almost anything. So, after you install it, launch the configuration file in notepad or in any text editor and then change password fields and some others if you know then. However if you wanna then you can go with default configuration as well.
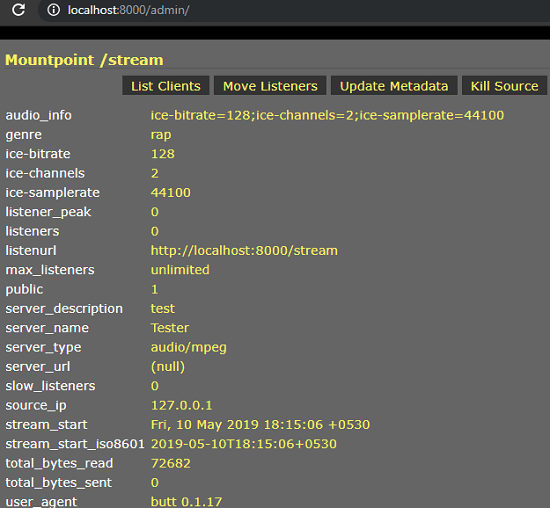
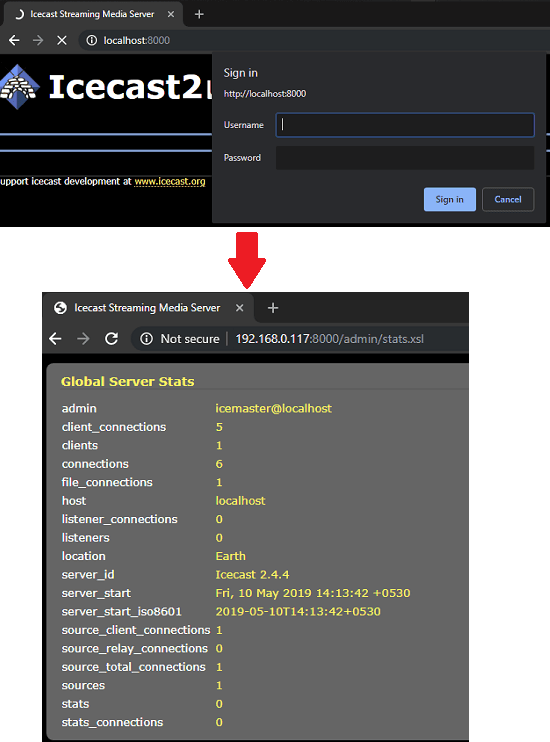
Now, launch the server. Run IceCast console from the Start menu and then allow any Firewall warnings if it gives any. When you see status of the server as up, enter localhost:8000 in the address bar of the browser. The main interface will show up. You sign in your admin panel to see status of the server. It shows the stream URL there as well and all the broadcasting stream will appear there when you send them.
Now, at this point we are done with the IceCast server part. The server is up and running. Only thing we have to do now is to send some music stream to the server. And you can also send live recording to the server, You will speak in the mic and it will stream live, thus serving the purpose of the radio. So, lets see how to broadcast to the IceCast server.
Download IceCast server from here
Part 2: Stream Live Audio Data to IceCast Server
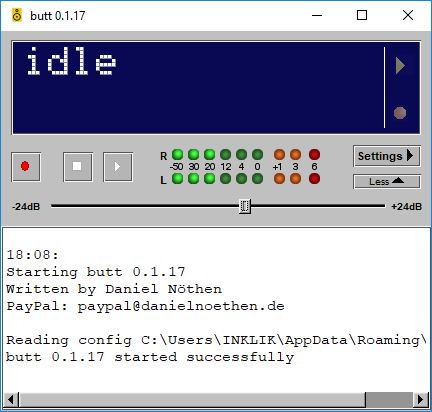
Now, when out has set up, it’s time to send an audio stream to your listeners. You can find some other software out here for this, but I will go with Butt. This is because, it is lightweight and cross-platform and offers you a simple and intuitive interface to configure the radio stream. The best part is that, it can redirect the system audio to the IceCast server easily. System audio including playback and from recording line can easily be redirected and you can see the stats on the interface. It comes with some LED’s to show the status of left and right channels.
This is an open source software which you can use with an IceCast server. After you install and run it, its interface will show up which is like this screenshot.
Now, next thing you have to do is add an IceCast server where you want to send the stream. For that, you click on the “Settings” and then from “Main” tab of the so popped up window, click on Add. Next, specify the server address along with credentials. You have to specify its name as well.

After you have added the server, you are almost done. Now, it’s time to start the stream and let it do the rest. Hit the play button from its main interface and it will start sending stream from your PC to the server. You can see the stats on is main interface. It shows how much stream it has sent.

At this point, you will start hearing the stream on the IceCast server. You can go to the stream URL of your server and then you can distribute that to whoever you want. There are other options in Butt that you can opt for improving the quality of th stream. It allows you to choose format for the output stream as MP3, OGG, etc. Nt only this, but you are free to change bitrate and sample rate as well. There is a record button its interface that you can use to record the stream and save on hard drive.
Final thoughts
This is the whole process of setup of your own IceCast server for live streaming. You can setup your internet radio this way and then share the stream URL to your listeners by social media or by any other means. The server works perfectly and does not consumes so much of system resources. Also, this is one of the reasons to choose IceCast for internet radio. If you follow both sections of this post carefully then you will end up having a up and running IceCast server which you can keep up for as long as you want. You only have to configure it once after that, you can stop it whenever you want.