File backup is something that has to be done on a regular basis. WinDataReflector is a backup tool that you can use to synchronize your already existing backups on internal or external disks, or to create new backups of files and directories. Backup creation and synchronization aren’t the only things that WinDataReflector has to offer, a lot of other advanced options are available which should make file backup a lot more easier task to complete.

Interface is very easy to understand, on the left side you add the directories that you want to backup or synchronize, and on the right side is the destination folder, where data will be saved. Toolbar at the top holds all the important options that WinDataReflector has to offer, so let’s see how exactly are backups created with WinDataReflector.
Step 1 – Creating a first backup
This should be done only by those who already do not have a backup made, if you do, then move on the next step where we talk about file synchronization. WinDataReflector’s two main operations are Backup and Synchronization and each one of them has it’s own tab, which is another great feature of this handy backup tool. To backup files you’re gonna have to make sure that you are in the backup tab, tab title should tell you what kind of tab you have. Once you are in the Backup tab, open the directories that you wish to backup on the left side, and on the right side open the destination directory where you want data saved:
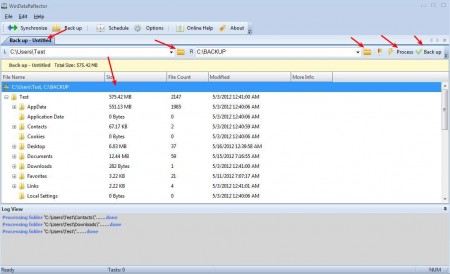
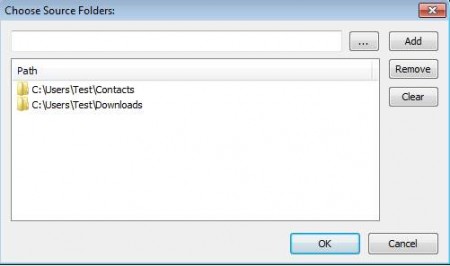
This is how everything looks right before the backup process can be started. To add directories that you want to backup click on the folder icon on the left side, you can add several different directories to the backup list:
Don’t forget to select the destination folder of your backup on the right. After everything is done you can click on Process to load the files in the backup list and then click on Back up so that they are copied.
Step 2 – Synchronizing an existing backup
Synchronizing should be a lot more easier now that we’ve done a backup. Just click on the Synchronize option in the toolbar so that the Synchronize tab is opened. After that, load up the same directories that you want to sync, this is important, they have to be exactly the same, look at the image below:
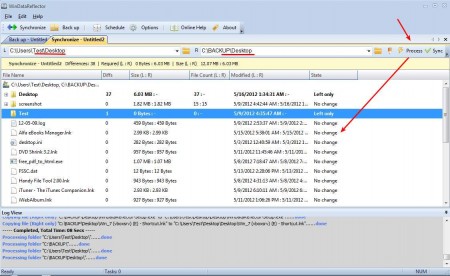
Once the directories are loaded, click Process and a list of file changes that were made to that particular directory will be shown. When you are ready, click Sync and modified and/or created files will be copied to the backup directory.
Advanced file backup options
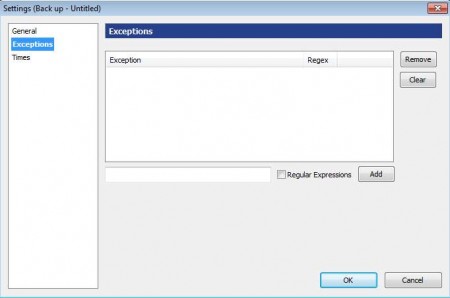
If you click on the little pen icon which is located left of the Process button, you will be presented with advanced options. The one that’s most important would be the Exceptions, where you can specify backup searches with regular expressions:
There is also a Scheduler which you can use to schedule backups. WinDataReflector is very good at what it does and you should give it a try if you need a backup tool.