This tutorial details how to enable File History in Windows 10. As the most recent addition to the Windows clan, Windows 10 packs in a healthy number of new features, and improves the overall usability of a number of old ones. One such extremely useful feature is file history. First introduced in its predecessor Windows 8, the file history feature (as the name itself suggests) of Windows 10 lets you backup your important system files to another location. You can use it to automatically backup copies of your personal files to a location specified by you. You can either backup the files to another disk partition, or an external removable drive.
Let’s see how to Enable File History in Windows 10.
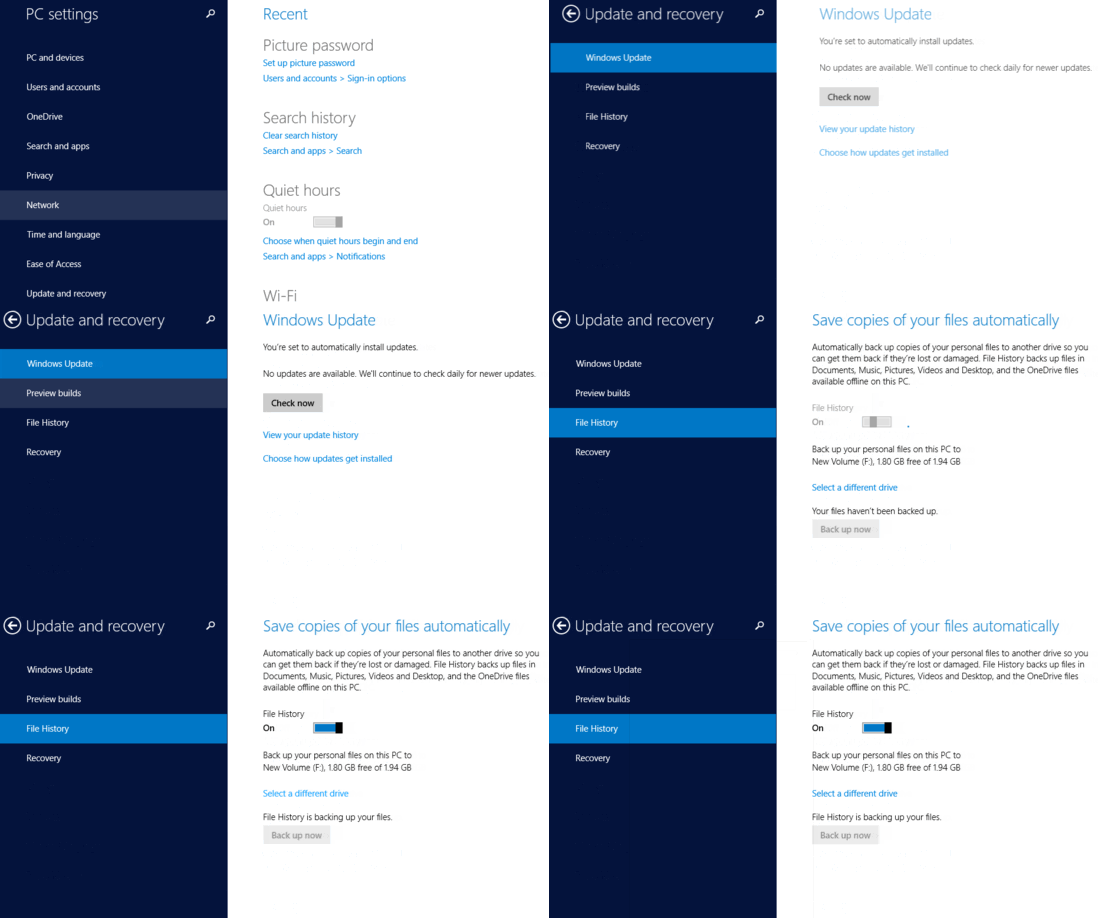
What Exactly Is Backed Up When You Enable File History?
Although I already mentioned in the beginning of the article that enabling file history automatically backs up all of your personal files, but just in case you’re wondering what these personal files are, here’s a little bit more explanation:
File history automatically backs up all of the files in the default system folders of Windows. This includes all the files stored in the Documents, Music, Pictures, Videos and Desktop folders. Apart from that, all of the OneDrive hosted files that are available offline on the PC are also backed up.
How To Enable File History In Windows 10?
Now that we know what file history is and what it does, it’s time for some action. Since the file history feature is mostly automated, there isn’t much user intervention required. The only thing you have to do is turn it on, and let it do its thing. Here’s how:
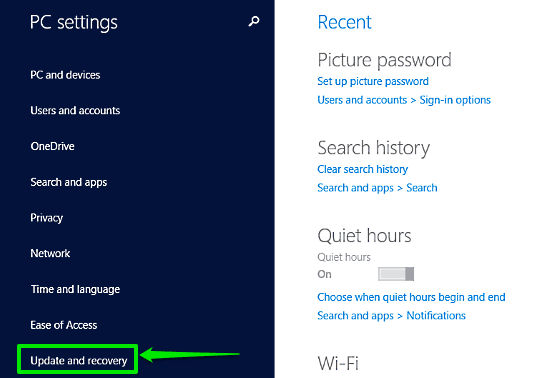
Step 1: Open the PC Settings app. Select the Update and recovery option from the left column.
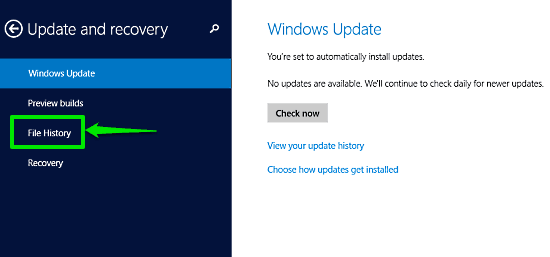
 Step 2: Now that you’re on the Update and recovery section, the left column should display some sub-options. Click on File History, out of these options.
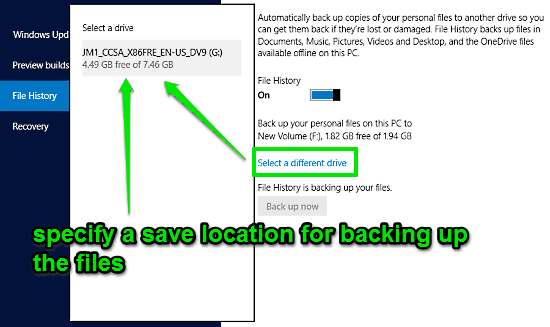
Step 3: The settings for File History should now be displayed on the right column. All you have to do now is toggle the option that says File History to On. Check out the screenshot below:
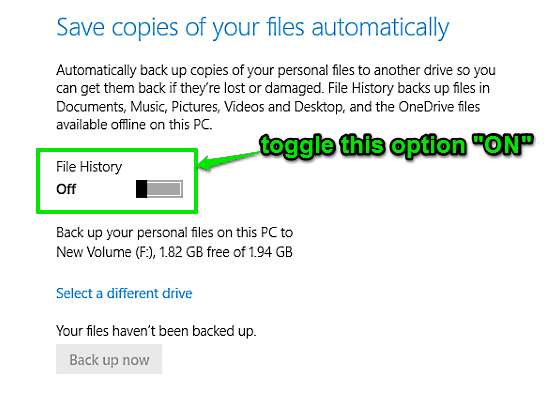
That’s all it takes! All of your important personal files, stored in the default system folders will now be automatically backed up on a regular basis, thanks to File History. The location where the files are backed up is also displayed. If you want to change the save location (to say, a removable USB drive), you can easily do so via the Select a different drive option. Quite good if you ask me!
Also See: How To Pause App Notifications For A Certain Duration In Windows 10?
Conclusion
Automatic backup of all your important personal files via File History is yet another small but very nifty feature of Windows 10. Extremely easy to use and efficient at the same time, File history ensures that you never have to worry about your important files being lost or damaged, ever again.