This tutorial explains how to migrate from G-Suite Mail to Amazon SES. Whether you are an AWS user or not, this migration guide will help you use Amazon SES as your go-to solution for sending emails from your own domain address. AWS offers SES with an amazing email limit for negligible charges, and that makes it one of the best options for people who are disappointed by the Google’s decision to kill its legacy free G-Suite accounts.
Amazon SES also known as Simple Email Service is an emailing platform which provides an easy, low-cost way for you to send and receive emails on your own (domain) email addresses. If you deploy your email front-end or your email application on AWS then you will be able to send up to 62000 emails per month for free. In addition there are some data transfer fees but even then all the cost combined will not get anywhere near what other tools charge.
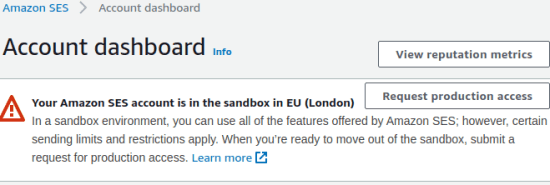
Unlike other tools of its kind, SES can also be configured for receiving emails and not just sending them. You can just verify your domain and then have your account removed out from the sandbox mode. After that, you can use it in the way you want. However, getting your account from sandbox mode can be tricky as you need a working website as well as a ethical way of telling them how you collect email addresses.
How to Migrate from GSuite Mail to Amazon SES?
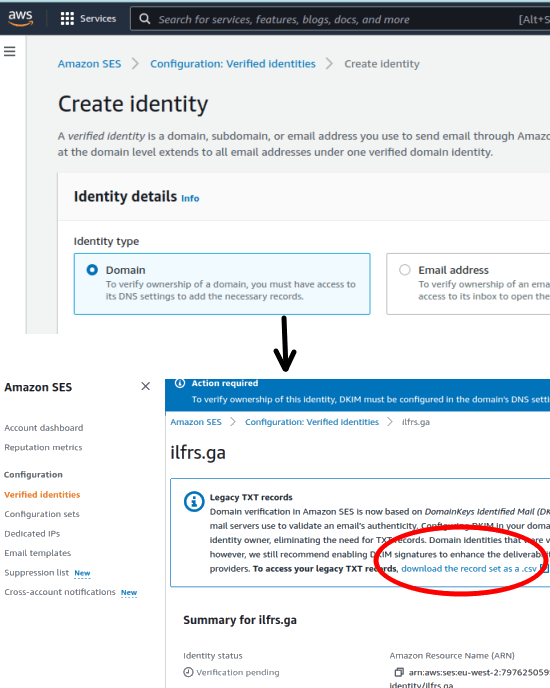
Sign in to your AWS account and then simply go to the SES section. To enable, simply create a sender identity. Here you basically have to create a domain email address from which emails will be sent. To add a sender identity, you have to verify a domain. It will give you a CSV file that contains some DNS records that you have to update on your domain registrar.
After verifying the domain, you can create an email. Or, if you have a domain email address hosted somewhere else such as Zoho or Yandex 360 then instead of DNS verification, you can just verify the email manually. It will send you a verification email and all you have to is click on the link. And by default, it will keep your account in sandbox mode. You will have to manually submit a request to get production access.
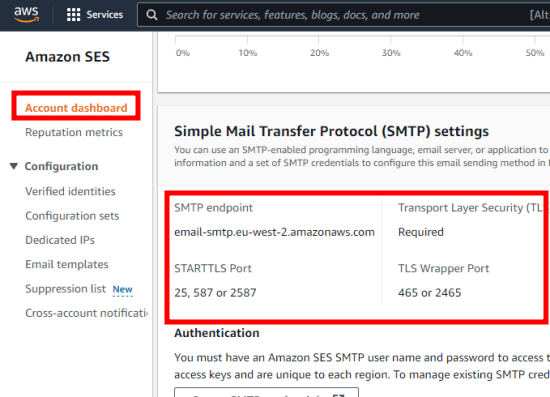
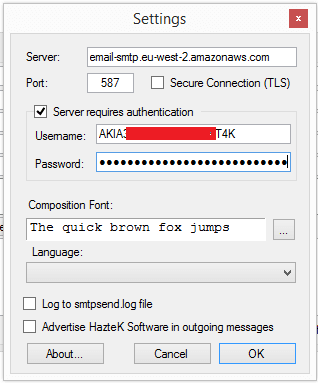
Now, next is what you have to do is generate the SMTP credentials for your SES account. For that, go to the Account Dashboard and then scroll down to the SMTP settings section. Here it will show you all the necessary SMTP settings for SES such as server address and port numbers to use.
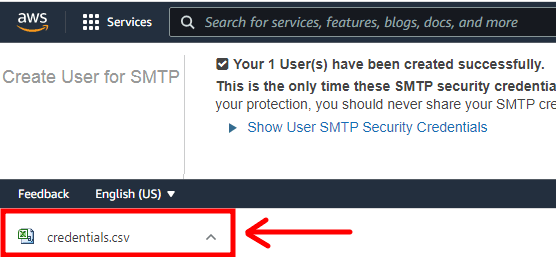
Next thing you have to do is generate the SMTP user and password for your SES account. You can generate from the same SMTP section as shown above. Just click on “Create SMTP credentials” button and then it will take you to the next page. Just hit the Next button and then download the credentials file, which is a CSV. This file has the username and password that you will have to use in the tool or app where you want to configure Amazon SES.
At this point, you have successfully enabled Amazon SES and it is all ready to use. Once your account is removed from the sandbox mode, you can start sending and receiving emails. In the next section, you can see how you can make use of SMTP clients software to send out emails from Amazon SES platform.
How to Send Emails using Amazon SES from SMTP Client?
You can configure an SMTP client software to send out emails using your Amazon SES account. Or, you can configure it in email marketing tools for sending out the campaigns. There are tools like Listmonk we have covered before where you can use multiple SMTP servers and Amazon SES can be utilized there as well.
For simple email sending and testing, you can use a simple tool called SMTP Email Sender. You can download it from here and then just open it up. When you run it for the first time, it will open the settings page where you have to enter the SMTP credentials for SES. I have already mentioned in the above section where you can find the SMTP server address, user, and password in SES.
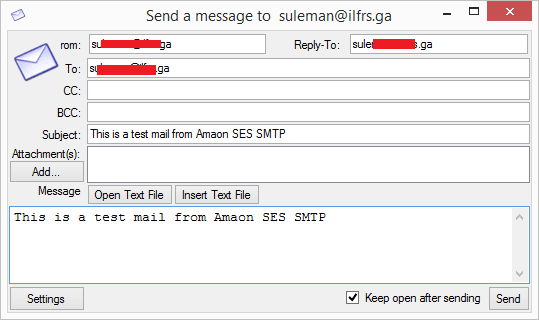
Save the SMTP credentials and then simply return to the main UI of the software. Here you draft your first email. Enter the recipient, address, subject, and then email body. If you wish, then you can also attach files here that you’d like to send along with the email.
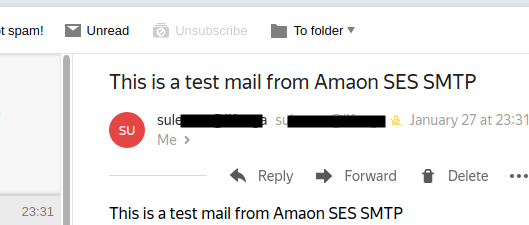
Finally, you can send the email and if it’s a success then you will know it. Otherwise, you can open the log file to see the issue and then take the necessary steps to fix it.
In this way, you can make use of this simple tool to send emails via Amazon SES SMTP. Just enable SES in your AWS account and then simply do what you want. However, if you don’t have appropriate answers to the questions that it asks there, then you may not get SES enabled for your account and will stay in sandbox mode.
Closing thoughts:
With the impressive email limits, Amazon SES can be the best option for so many tools out there. In fact, many people do use it as a backend for email marketing, and there are email marketing tools out there which are actually based entirely on top of it. So, after Google kills G-Suite, then you can use it to send emails; personalized 1 on 1 or bulk. You will be greatly benefitted from it if you were using Gmail for email marketing as here you will not be obstructed by the Google’s 2000 daily email limit.