This tutorial details how to set disk space usage limit for users in Windows 10. Being the newest and the most radically overhauled Windows version ever, Windows 10 packs in an impressive array of new and exciting goodies and improvements. Whether it’s visual enhancements, performance tweaks, or anything else, Windows 10 has something for everyone. However, the best part is that it retains the best features introduced by its predecessors as well, improving them even further.
One such feature, that’s sure to help system administrators, is disk quota management. As the name pretty much makes it clear, disk quota management lets you specify the disk space available to the users of the system. Configurable on a per disk partition basis, disk quota management ensures that a single user cannot fill up the entire hard disk. Sounds interesting? Head past the break to find out how you can set disk space usage limit for users in Windows 10.

How To Set Disk Space Usage Limit For Users In Windows 10?
Using disk quota management to configure the hard drive space to be allotted to users is fairly simple, and takes nothing more than a couple moments to get up and running. When a specific disk quota limit is set for a particular disk partition, it appears to be having only that much total space to the users. That being said, you do need to have administrator level privileges to set disk quota limits. The following illustrative tutorial details how to get it done. Read on:
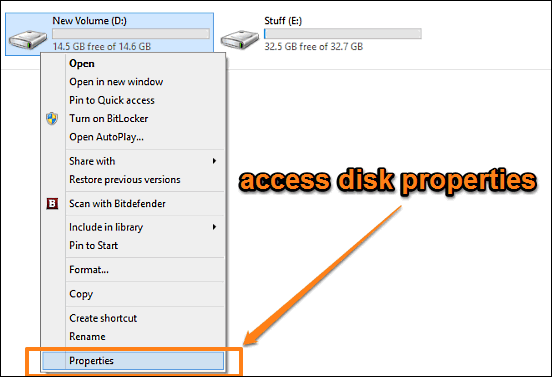
Step 1: Navigate to This PC to view the listing of the disk partitions on the computer. Right click on the one for which you want to enable disk quota management, and select Properties.

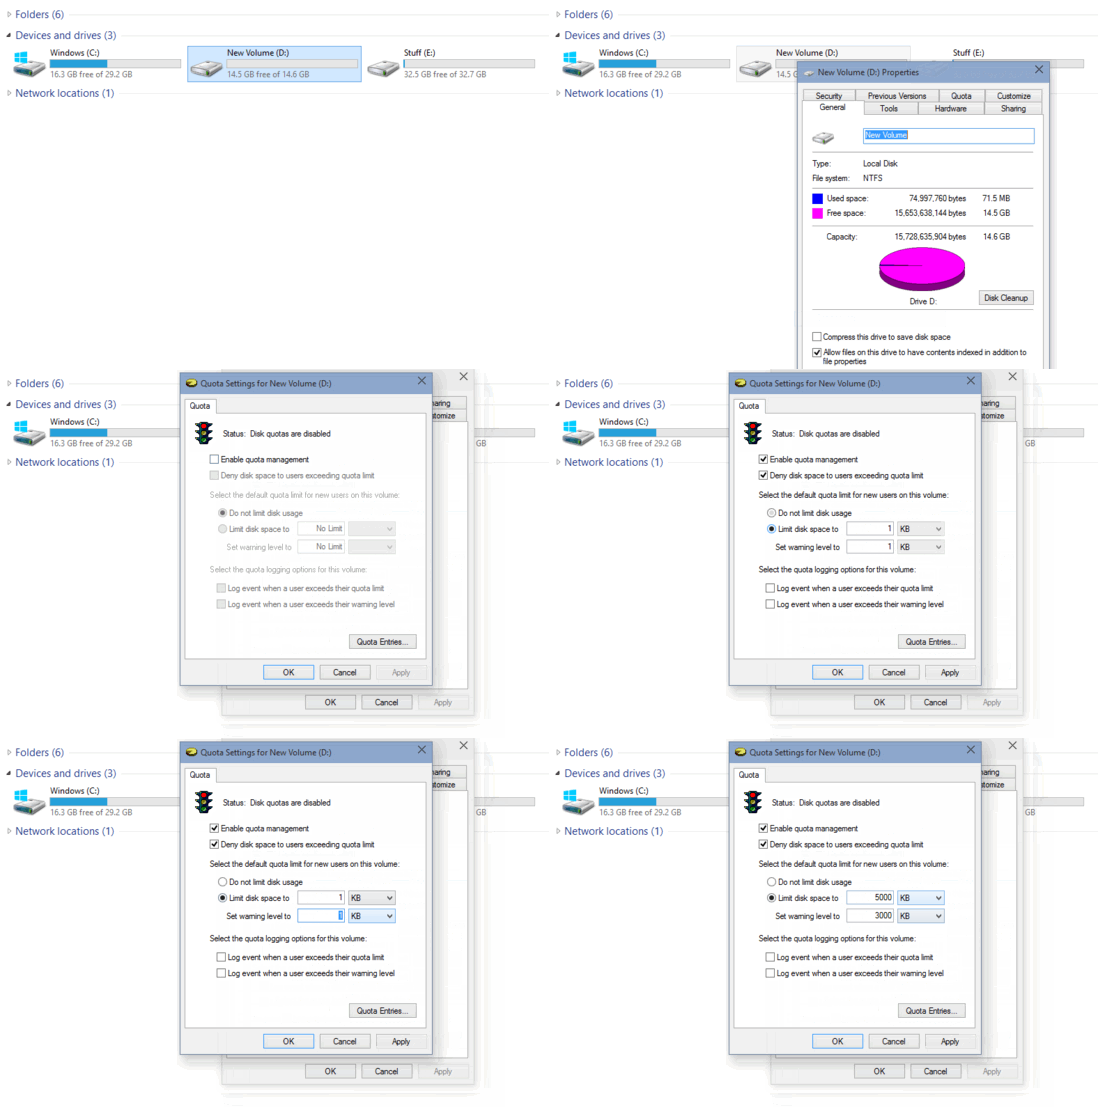
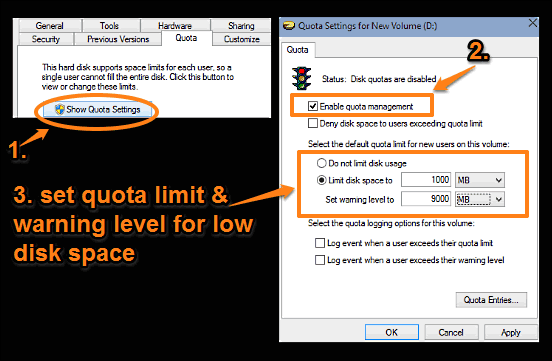
Step 2: The disk properties dialog box should now come up. Click on the Quota tab, and then the Show Quota Settings button to launch the Quota Management pane. Here, you can configure everything regarding the disk quota for the selected partition. To enable it, check the Enable quota management option. Once that’s done, the other options also become available. Next up, you can use the Limit disk space to option for setting up the maximum disk space allowed to users, as well as the disk space at which Windows should show a low disk space warning. In addition to that, you can deny disk space to users exceeding quota limit by checking the namesake option. You can even enable automatic logging for events. Check out the screenshot below:

That’s it. You can use the same method to specify disk quota limits for all disk partitions. Easy, right?
Also Check Out: Specify Maximum Physical Memory To Be Used In Windows 10
Closing Thoughts
The ability to limit disk space usage for users is a pretty nifty feature. While it may not be that useful for single user scenarios, it can come in extremely handy for enterprise environments. Take it for a spin, and let me know your thoughts in the comments.