This tutorial covers how to integrate browsing history with Windows 10 timeline. With April 2018 Update, Windows 10 comes with a whole new “Timeline” feature. It helps to check activities you’ve made for the last 30 days. The activities include applications opened by you (like Notepad, Browser, some photo editor, etc.). Though the feature is good, it doesn’t include your browsing history. That means you can’t see which tabs you opened in Chrome or Firefox browser using Windows 10 timeline. Thankfully, there is some way to make it possible.
To integrate browsing history with Windows 10 timeline, you need to install a free extension “Windows Timeline Support“. This extension is available for Google Chrome and Firefox only. You can install it on any of these browsers and their browsing history will be added to timeline. I have covered this tutorial for Chrome browser. Steps to use this extension for Firefox are almost similar. You won’t face any difficulty.
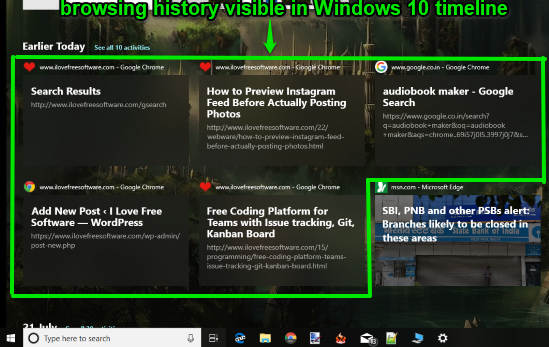
This extension is in beta mode currently but it works pretty well. In the screenshot above, you can see browsing history for Google Chrome is visible in timeline of Windows 10. It isn’t possible until you use this extension.
How To Integrate Browsing History with Windows 10 Timeline?
First of all, make sure that timeline feature is enabled. If Windows 10 timeline is disabled, you need to enable it.
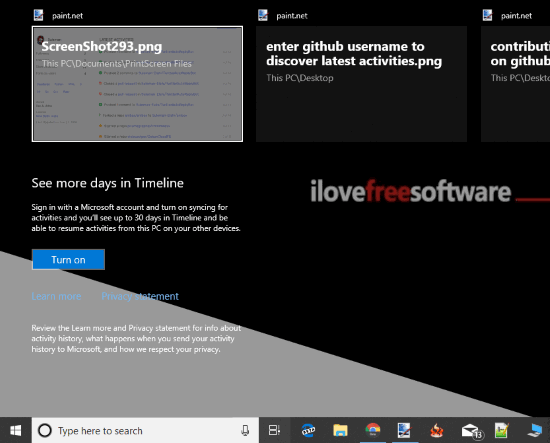
Step 1: In this first step, make sure you are signed in with your Microsoft account in timeline. If not, you need to sign in. For doing this, click the “Task View” button on taskbar and timeline is opened. Scroll down timeline and you will see “Sign in” option. Use that option and sign in with your Microsoft account.
Step 2: Get this “Windows Timeline Support” extension for your preferred browser. If you are a Chrome user, then click on this link to open this extension homepage and install it. Firefox users use this link to open homepage of Windows Timeline Support add-on and install it.
Step 3: Click the extension icon visible on the top right part of browser. A pop-up is opened in which “Sign in with your Microsoft Account” option is available. Click that option and a window will open. Use that window to sign in to your Microsoft account and give this extension permissions. You must sign in with the same Microsoft account which you used for timeline. Otherwise, the extension won’t help you.
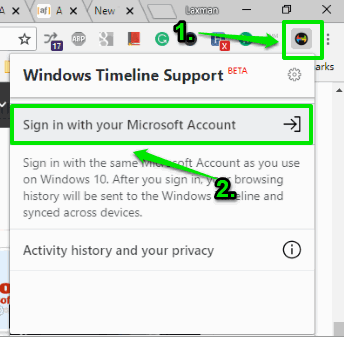
That’s it! Now whenever you will open some tab, it is saved and visible in the timeline of Windows 10.
Step 4: This is an important step. By default, a tab is saved in timeline only when it is opened for 8 seconds or more. You can change this time period. Open the extension pop-up again and click the “Settings” icon. Now you will see a box where you can set the minimum time on page to add that page to activities in Windows 10 timeline.
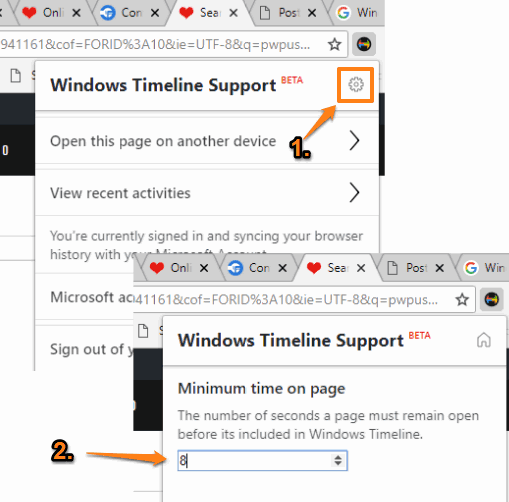
In addition to this, the pop-up of this extension also provides other options, like:
- Access your Microsoft activity history dashboard page in a new tab.
- Open the current tab to some other device connected with same Microsoft account.
- Sign out of your Microsoft account, and
- See the list of recent activities or tabs that are added to timeline.
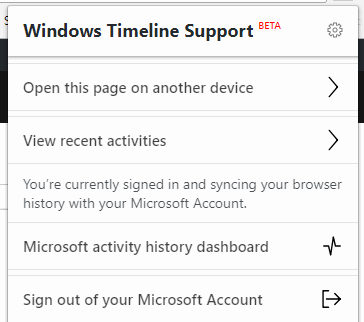
Use options as per your needs.
The Conclusion:
Showing browsing history in Windows 10 timeline should be a native feature, but it is not so (for now). Therefore, this Windows Timeline Support extension is handy which is available for two very popular browsers (Chrome and Firefox). Just configure this extension once and forget it. It will work automatically and integrate browsing history with timeline of Windows 10.