This tutorial talks about how to create a restore point from Command Prompt in Windows 10.
You might have come across dozens of third-party tools similar to System Restore Point Creator and Quick Restore Maker which let you create a system restore point in Windows 10. But, they might get complicated and time-consuming sometimes as you have to configure the settings manually. So, what if you can create a restore point in Windows 10 with a simple command and Command Prompt? Well, that’s what this tutorial is all about.
In this tutorial, I am going to show you how to use Command Prompt in order to create a system restore point in Windows 10. Creating a restore point has never been easier, as all you need to do is type a simple command in Command Prompt and execute it.
You may also like our article on how to manually create a System Restore point in Windows 10.
How to Create a System Restore Point in Windows 10 with Command Prompt:
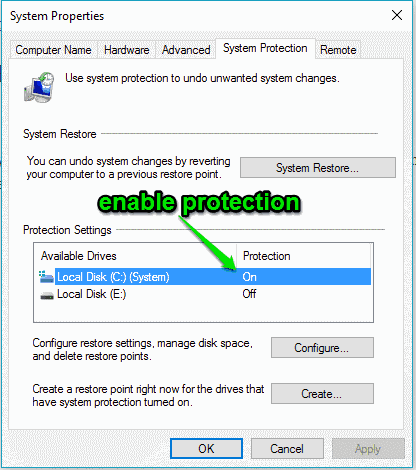
Step 1: Before you go ahead and create a system restore point, you need to make sure that your System Restore Point is enabled. For this, type “Create a restore point” in the search bar adjacent to the Start Menu. After that, open the application and you’ll see a section named, Protection Settings. In this section, check whether the protection is enabled or not for your “C” drive. If not, then click on the drive and select the option “Configure” to enable it.
Step 2: When you’re done enabling the protection for “C” drive, open Command Prompt with admin access. To do this, search for “cmd” in the search bar and right-click to choose the “Run As Administrator” option.

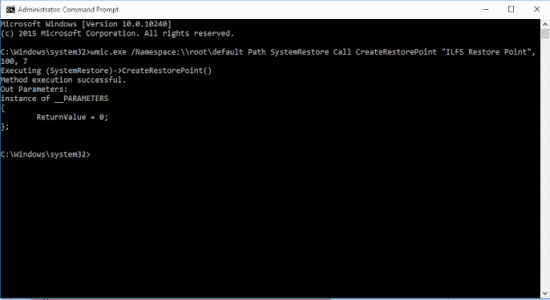
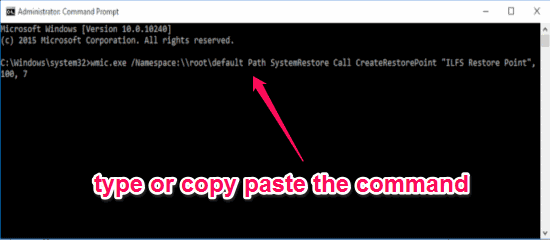
Step 3: Once the Command Prompt is launched with admin access, simply type or copy-paste the following command in the command line.
wmic.exe /Namespace:\\root\default Path SystemRestore Call CreateRestorePoint "My Shortcut Restore Point", 100, 7
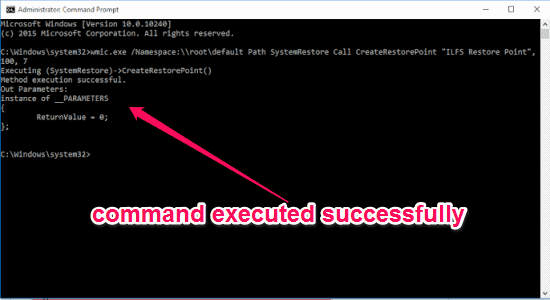
Step 4: After typing or pasting the command, press the Enter key to execute the command. As soon as the command is executed, you’ll see a message “Method Execution Successful” which indicates that the system restore point is created successfully.
Step 5: If you don’t want to open Command Prompt each time you want to create a system restore point and type the command manually, then is a way using which you can create a shortcut of the same command and execute it by clicking the shortcut twice.
Step 6: To create the command shortcut, right-click on your desktop and select New→Shortcut. After that, a window will appear where it will ask you to type the location of the item. In the input field, type or paste the following command and hit Next. Then give the shortcut a name and click Finish to add it on your desktop.
cmd.exe /k "wmic.exe /Namespace:\\root\default Path SystemRestore Call CreateRestorePoint "My Shortcut Restore Point", 100, 7"

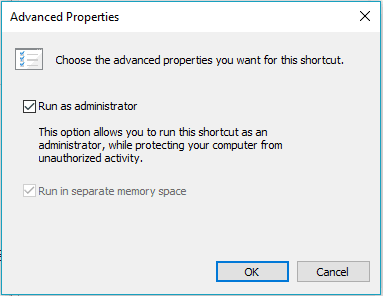
Step 7: After that, right-click on the shortcut and select Properties. In the Properties window, go to the “Shortcut” tab and click the “Advanced” button at the bottom. Now, the Advanced Properties dialog will appear where you need to enable the “Run as administrator” option.
Step 8: That’s it, you can now simply double-click the shortcut to execute the command and create a system restore point.
My Final Verdict:
If you’re looking for an easy way to create a system restore point in Windows 10, then you can try the method explained in this tutorial. You can type a simple command in Command Prompt and create a restore point in a flash.
I hope you find this tutorial useful.