SnoopForms is a free self hosted alternative to Typeform that you can install on your server or local computer. You can use it to create unlimited forms and publish them. It can help you create multi step forms and shows you detailed analytics. In addition it allows you to easily export all the forms responses in Excel compatible file but the best part is that it is in compliance with the data privacy standards such as HIPAA, GDPR, and YMCA.
There are many form builders out there, some of them are even open source but they don’t really offer the functionality of Typeform. If you are looking for a free unlimited alternative to Typeform where you can create surveys and multi-step forms then look no further as SnoopForms is here for the rescue. However, for now it is still in development and thus many features will be in the future releases. But by looking at its roadmap, it indeed looks very promising.
Installing SnoopForms for Self Hosting:
Getting started with SnoopForms is very simple. It uses the simple Docker method for installation and you can set this up on any Linux server by running a few commands. It ships with a default configuration and that will be enough for you to try this out. Before you proceed to install this, you need a SMTP server. So, get the SMTP credentials ready when you are starting to use it.
Now, just clone the GitHub repository of SnoopForms. Next, you just cd into the cloned repository. Run these commands one after another to do this.
git clone https://github.com/snoopForms/snoopforms.git

cd snoopforms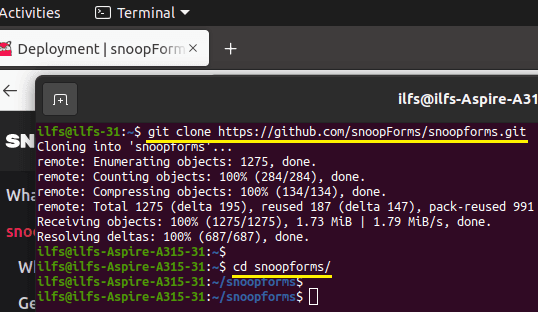
DATABASE_URL variable.
cp .env.example .env && nano .env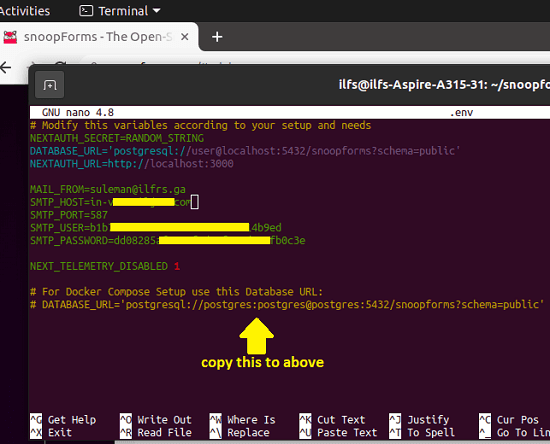
Save the changes in the ENV file and then you simply run the command below to start the container.
sudo docker-compose up -d
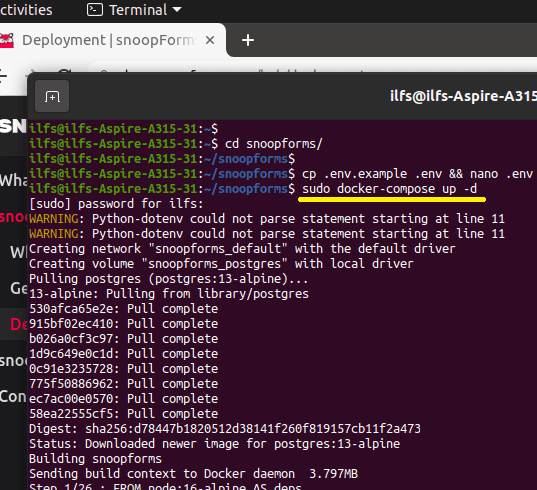
The above command will take some time. You just need to stay patient and when it is finished, you just type localhost:3000 in address bar of the browser. The main login/registration page will show up.
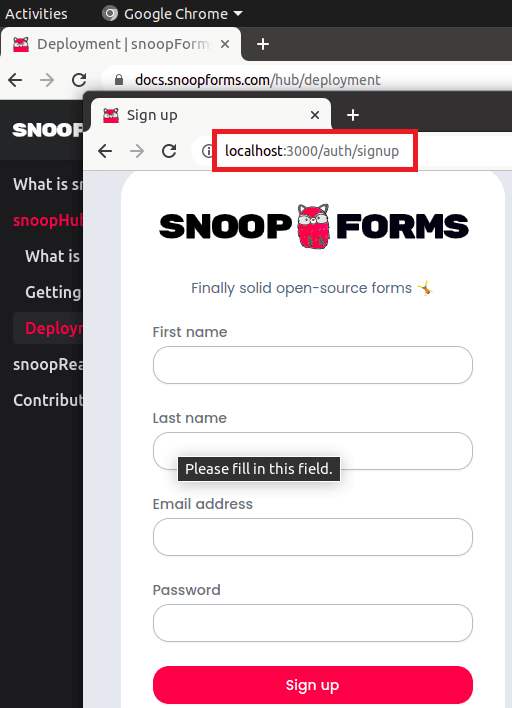
So, sign up and then you will reach the main UI of this form builder which looks like as shown below.

At this point, you have successfully installed SnoopForms. Now, you can just now start creating and publishing forms with ease. Refer to the next section to see how to use this to create your first form.
Creating Forms using SnoopForms and Publishing Them:
From the main dashboard which is kind of blank at first, you just click on the “+” button to create your first form. Give it a name and then proceed further. And during this step, you can also specify whether you want to use a no-code builder or manually code your form. If you know HTML/CSS then this might be a good option for you.

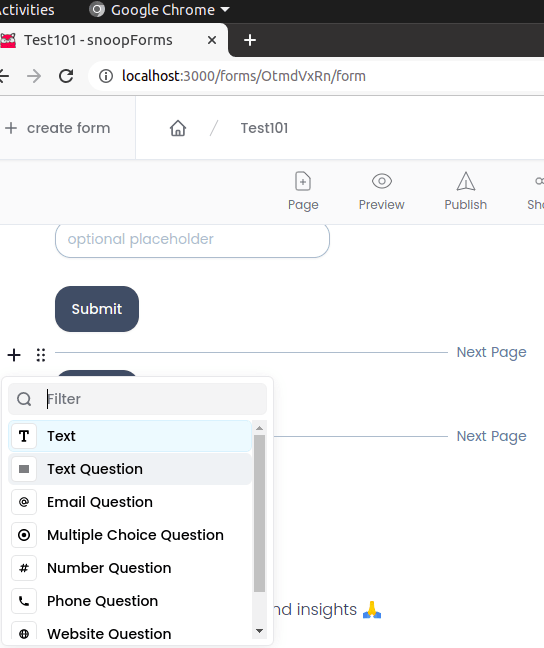
Next, you will reach the form builder which is pretty much like Notion. Here you just create a new step in your form and then add input fields in it. To add an input field, you only need to click on the “+” button and it will show you the different field options such as:
- Text
- Text Question
- Email Question
- Multiple Choice Question
- Number Question
- Phone Number
- Website Question
- Heading
Now, you just keep adding steps as pages and add different input fields. It doesn’t matter whether you are creating a feedback form or a survey, you will be able to create that using the options that it has to offer.
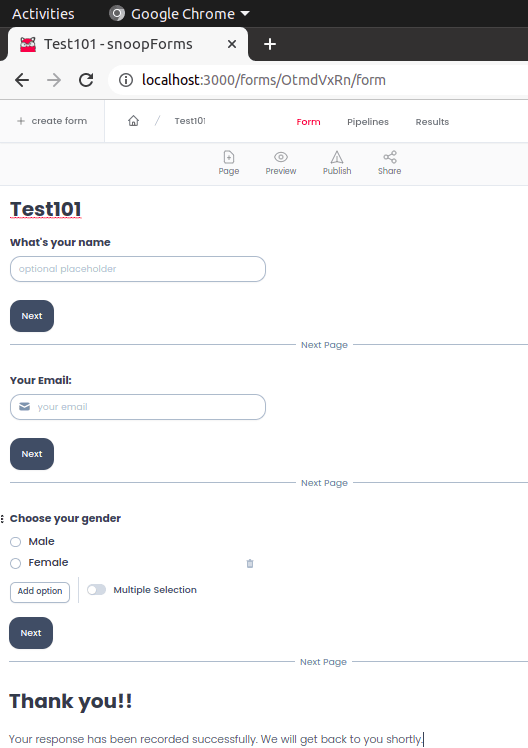
After you have designed the form, you can just preview it. And to finalize the form, click on the Publish button from the top side. It will give you the URL of the form that you can share with anybody.
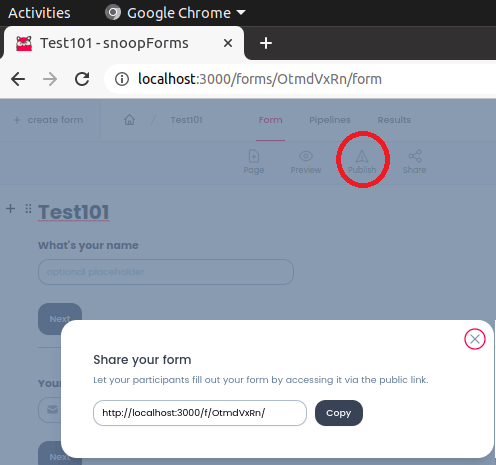
The form when shared looks like this.

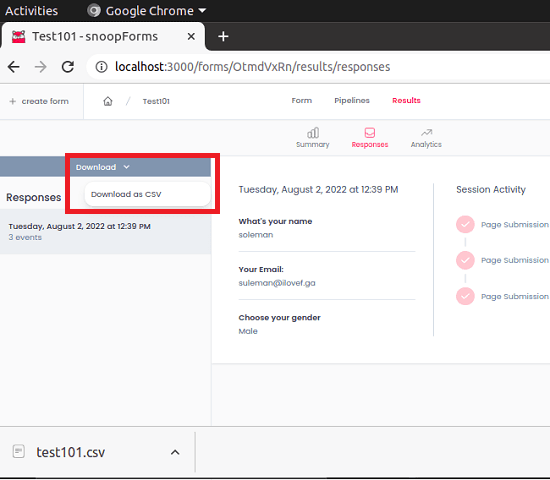
On your end, it will show you the form responses like this. Here you will also find the option to export the form data in CSV format. All the responses are sorted according to the date and time and you can individually open and analyze them as well.
In this way, you can create and easily publish forms using this self hosted form builder. Create and publish unlimited forms and also receive unlimited form responses as well. In the coming updates there will be more features in it starting with the integration of other services such as Airtable. It will also have A/B testing along with drop-offs.
Wrap up…
If you are looking for a Typeform alternative to create multi step forms then you are at the right place. Eve though SnoopForms is commercial software, it is completely free if you decide to self host it. It is cheap and offers almost all the features of Typeform. In the later updates it will be improved greatly as it is inactive development. Personally, I liked it as it doesn’t have any bloat and simple is very intuitive with no distractions.