This post explains how to clear DNS cache on Windows 11. DNS is short for Domain Name System. DNS cache on Windows is a temporary database maintained by the operating system. This database contains records of all the recent and attempted visits to websites and other domains. When we try to visit a website, our computer uses DNS to look up the domain name (like google.com) to find its corresponding IP address (like 192.168.1.1). This is necessary for your computer to connect to the website’s server.
Key Highlights
- How to clear DNS cache using Run dialog
- How to clear DNS cache using Command Prompt or Terminal
- How to clear DNS cache using a Batch File
- How to automatically clear DNS cache using the Registry Editor
Check out Free Secure Private Browser with Kids Mode, without DNS Prefetching and Free DNS Changer to Switch DNS Based on Network Adapter, IP Range.
Clear DNS Cache on Windows 11
There are several methods to clear the DNS cache on Windows. Let’s go through these methods one by one.
Method 1: Clear DNS Cache using Run
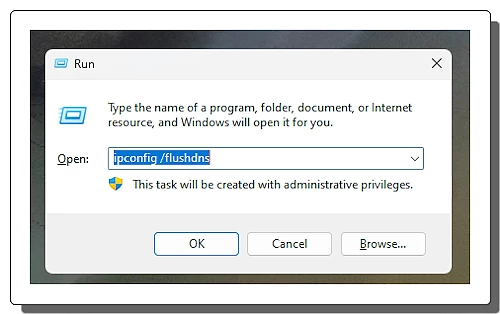
One of the easiest methods to clear the DNS cache on Windows 11 is using the Run dialog. All we have to do is open the run dialog on the PC by pressing the Windows key and R key together. Type ipconfig /flushdns and click the OK button.
Method 2: Clear DNS Cache using Command Prompt

The second method to clear the DNS cache is using the Command Prompt or Terminal on Windows 11. We can simply open the search for Command Prompt or Terminal and open the respective application. Then we just need to type ipconfig /flushdns and press the Enter key to run the command.
Method 3: Clear DNS Cache using Run using a Batch File
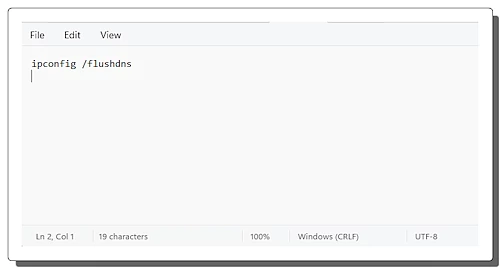
Another method to clean the DNS cache on Windows is using a batch file. A batch file is a text file containing one or a series of commands that the Windows command line interpreter executes sequentially. Using the same command covered in the above methods, we can create a batch file to clear the DNS.
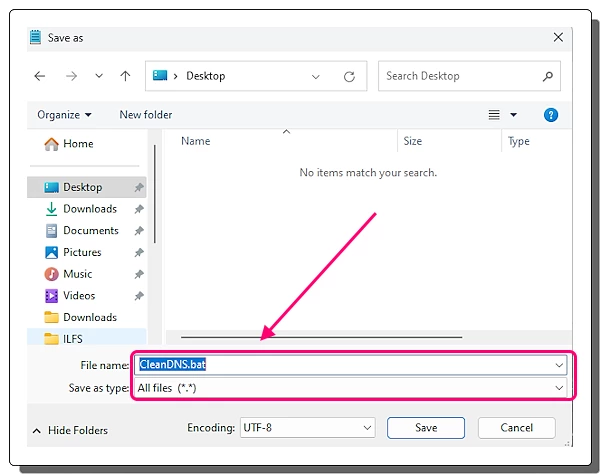
We can type the command in Notepad and save the file with *.bat extension instead of *.txt. Also, we have to change the Save as type to All files (*.*). After that, we can just double-click on the saved file to run the command and clear the DNS cache.
Method 4: Automatically Clear DNS Cache
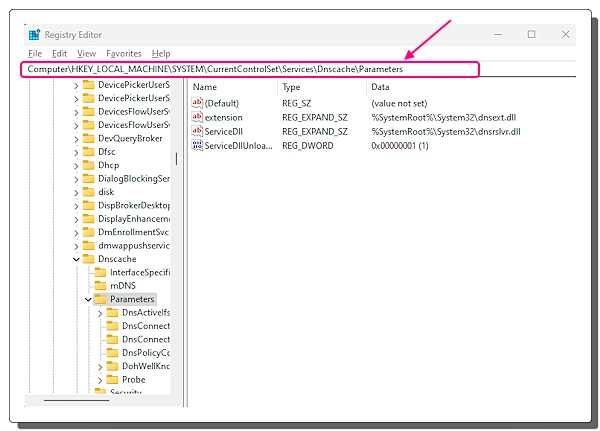
This method allows us to set Windows 11 to automatically clear the DNS cache on a set schedule. To do that, we must create two new keys inside the Windows Registry. First, we search Registry Editor and open the program. Then we navigate to the following location by copy-pasting it in the address bar at the top:
HKEY_LOCAL_MACHINE\SYSTEM\CurrentControlSet\Services\Dnscache\Parameters
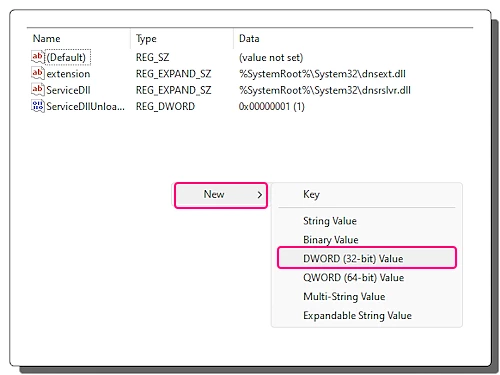
On the right side section, right-click on the empty space and select New. Then pick DWORD (32-bit) Value. Name the new value MaxCacheTtl.
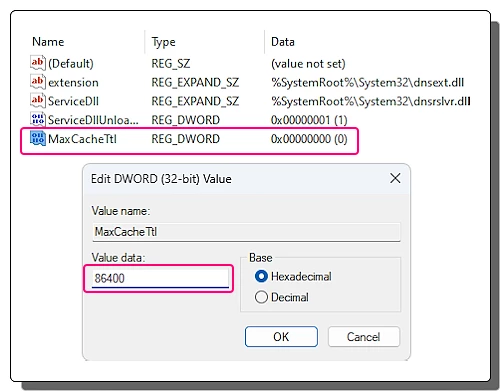
Now double-click on the created MaxCacheTtl key and set the Value data to the amount of time (in seconds) between clean up. For example, if we want Windows to clear the DNS every 24 hours then we’ll have to enter 86400 in this value field.
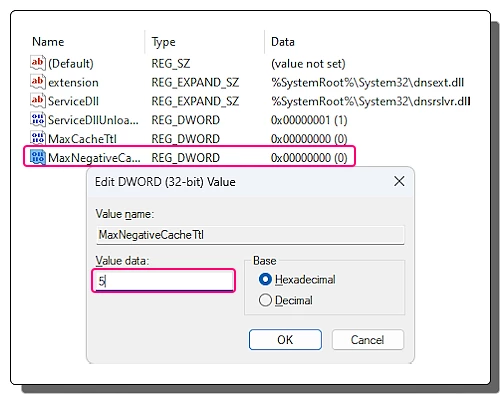
Similarly, create another new DWORD (32-bit) Value and name the new value MaxNegativeCacheTtl. Double-clicked on the created key and set the Value data to 5. After saving these two values, we can close the Registry. Now, Windows will automatically clear the DNS after 24 hours.
Why Clear DNS Cache?
Clearing the DNS cache removes outdated or corrupt entries. This is beneficial for resolving connection problems and ensuring that your computer can accurately and quickly access websites. It’s particularly useful after changing DNS settings or when experiencing issues accessing web pages due to incorrect or outdated DNS information. Flushing the DNS cache forces your computer to update these records with the latest information thus enhancing your browsing experience by ensuring connections are based on current, correct data.