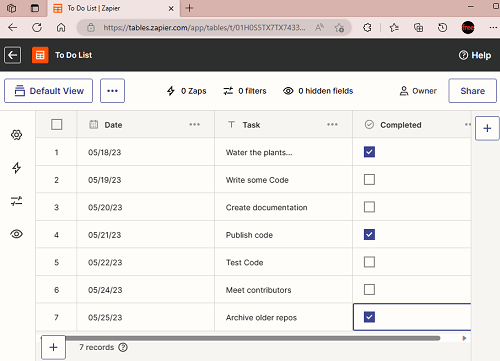
In this post here, I will talk about how to use Zapier tables to store data and integrate Zaps. Tables are the new beta feature of Zapier that you can use to store data in tabular records and use that in your Zaps. With Zapier tables, you will not have to reply on the external tables in Google Sheets or Airtable.
The best part about Zapier table is that they are actionable. You can opt to create a Zap based event that occurs in the Zapier tables. For example, you can opt to send an email when a field is changed or send a request to webhook when a new row is added. This spreadsheet by Zapier is actionable and supports various templates and data types to make your life easier.
Apart from creating Zaps from Zapier Tables, you can use these tables in other Zaps as well. From your existing Zaps, you can access the table, read records and update those records as well. It can also work as a dedicated database for your Zaps. However, for now, you can only have 1 table in your account with limit of 2K rows and 25 fields. You can include all the Zapier actions in the Zaps involving these tables.
Zapier Tables are shareable as well. If you often work with your team, then you can invite them here and work together on a table.
How to use Zapier Tables to Store Data and Integrate with Zaps?
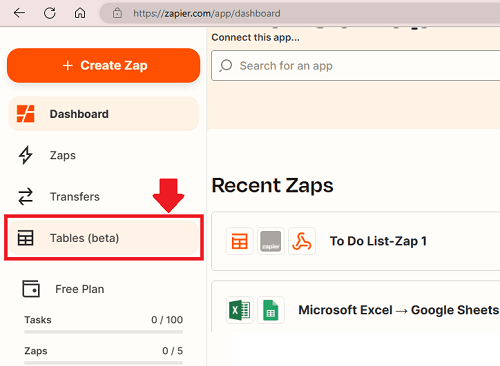
It is very easy to get started with Zapier Tables. You just need to have a Zapier account and then you create your first table. On your Zapier dashboard, you can find the new Tables option in the sidebar on left.
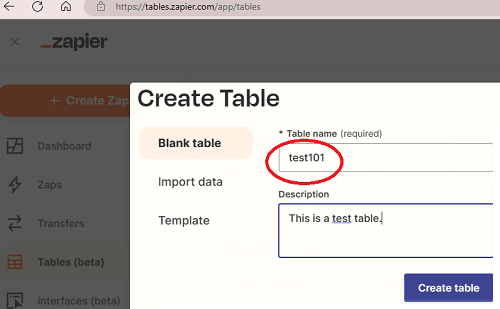
Create your first table now and then choose an existing template for it. Or you can also create a blank table to start with. For now, there is only 1 template available but in the coming days there will be more.
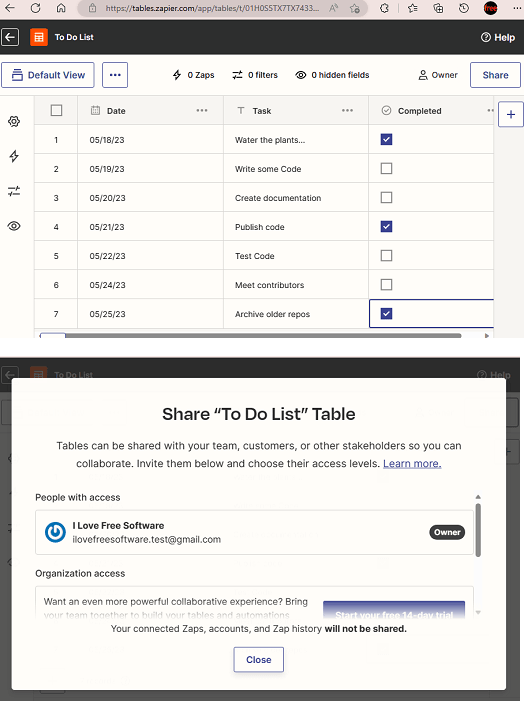
After creating your table, you can add some data in it. And after that., you can invite your teammates to collaborate on it. Use the Share button and then add the email addresses of the people you want to invite.
Once your table is ready and team is invited, you are free to do what you want. Create/edit/update data just like you do in other tables. Or you can also go ahead and create your first Zap. Start specifying with the event such as data updating or insertion of a new record.

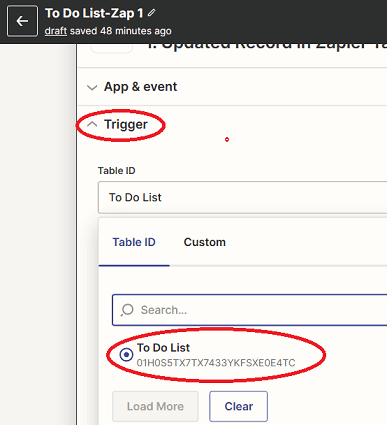
Next, you need to choose a trigger. Here, you need to select the table and field that you want it to monitor for a change and trigger an action.
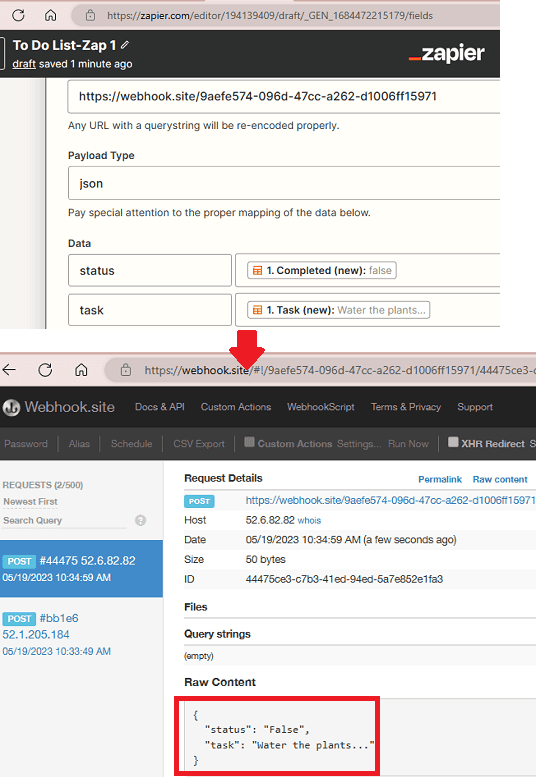
Finally, you specify what action you want to perform. Here, I have chosen Webhook. This action will POST the name and status of a field when it is updated to my API. You can choose some other action as well such as SQL database update, fire an email alert, SMS alert, or something else that is supported in Zapier.

Save the Zap now and forget it. Whenever the event that you have specified happens, a POST to webhook action will be triggered and you will receive the data in JSON format to whatever format you chose.
This is pretty much about Zapier Tables that you need to do. Without complicating things, you can use them in your Zaps and store data about anything.
Closing:
As a Zapier user, I am sure you will like this new tool by Zapier. If you want to store some intermediary data in your Zaps, then Tables is the answer. Or you can also use it to store some other important data and automate it as well. What I liked the most about it is the ability to create Zaps from Tables. So, go give it a try and let me know if you think it is a helpful addition by Zapier.