This tutorial explains how to add Windows 11 acrylic effect to Windows 10 context menus. AcrylicMenus is a free and open-source tool which can help you do this with ease. It brings the Mica effect from Windows 11 to Windows 10. Specially to the context menus. After launching this simple utility, it will turn the context menus to a bit translucent. It will make those context menus look nice and it works on all the context menus on any build of Windows 10.
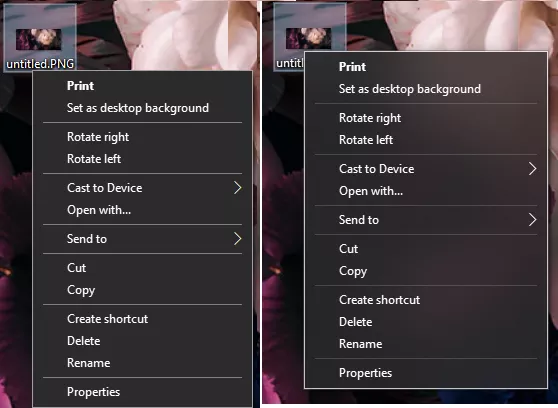
Recently, I covered a tool that brings the Windows 11 Mica effect to the File Explorer’s background. And now, in this post, I will show how to expand that effect to other components of Windows 10, context menus for example. If you like customizing the look and feel of desktop then you are at the right place. For now, AcrylicMenus works on Windows 10 and it does not matter if you are using a stable build or insiders. It will work on all of them. See the before (left) and after (right) comparison below to compare yourself how it works.
How to Add Windows 11 Acrylic Effect to Windows 10 Context Menu?
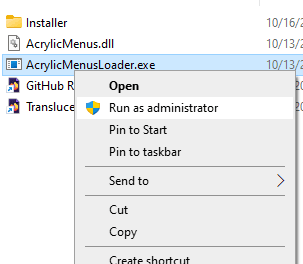
You can download AcrylicMenus from GitHub here. After that, you just extract the ZIP file and the find the EXE file. It will launch it instantly. There is an “Installer” and you find the “Install.cmd” file in this and then double click to install it. It gives you other CMD files in this folder that you can use to install it for yourself only or for all users.
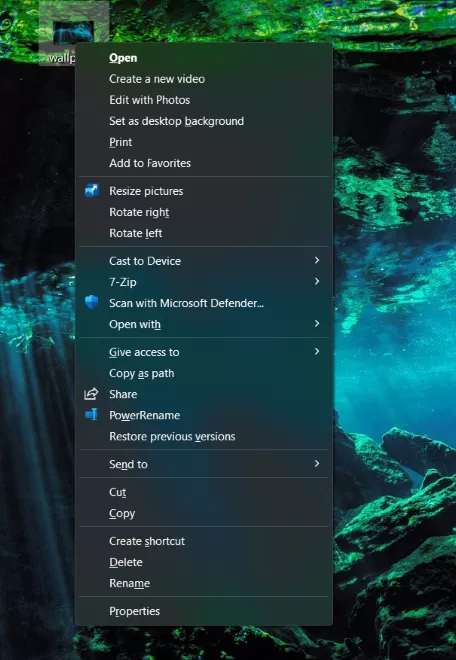
You don’t have to restart PC or Explorer to see the changes. Just come back to desktop or any other location on your PC. Just open the right click menu for any file or the desktop itself. It will now show you the modified context menus. You can see one in the screenshot below.
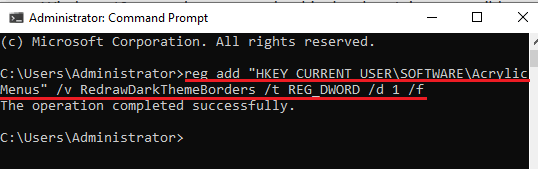
Apart from this, you can execute the following command in the Terminal or Run. This command will help you get rid of the white borders that are left behind after the tool runs. Those white borders will be visible in the dark mode of Windows 10.
reg add "HKEY_CURRENT_USER\SOFTWARE\AcrylicMenus" /v RedrawDarkThemeBorders /t REG_DWORD /d 1 /f
In this way, you can use this simple open-source utility to add Windows 11 acrylic effect to Windows 10. It does a great job at that and you just need to run it once and sit back relax. When you decide to remove then there is an “Uninstall.cmd” file in the folder and you just need to run it.
Closing thoughts:
If you want to have translucent context menus on Windows 10 then this post here will help you. All you need to do is just run the application mentioned here and it will take care of the rest. I liked the fact that there is no system restart or Explorer restart required.