This tutorial details, how to batch install multiple applications in Windows 10. Operating Systems have advanced a lot in the course of their development over the years, getting better and more powerful with each subsequent iteration. In fact, most modern Operating Systems (including, of course, the brand new Windows 10) are incredibly powerful on their own, and come with a whole bunch of applications that can take care of pretty much all your productivity needs.
But even then, almost all of us use a number of third party software applications (e.g. anti-virus programs, image editors), installing them one after another, every time while setting up the computer after getting the OS up and running. And while this is something that has to be done, installing a multitude of programs time and again can be quite frustrating, don’t you think?
Not a problem, as a simple web service called Ninite, can easily solve this problem. Intrigued? Let’s head past the break and find out how to batch install multiple applications in Windows 10.

How To Batch Install Multiple Applications In Windows 10?
Ninite is a powerful web-based service that makes easy work of installing multiple applications on your Windows 10 computer. The way it achieves this is also pretty unique. Ninite’s homepage consists of a pretty expansive listing of all the major commonly used applications. These are divided into categories, such as browsers, messaging clients, image editors, and a lot more. All you have to do is select the application(s) that you want to install, and Ninite will instantly generate a customized installer that can be used to install all the selected applications, together. Here’s a little step by step tutorial, illustrating how to get this done:
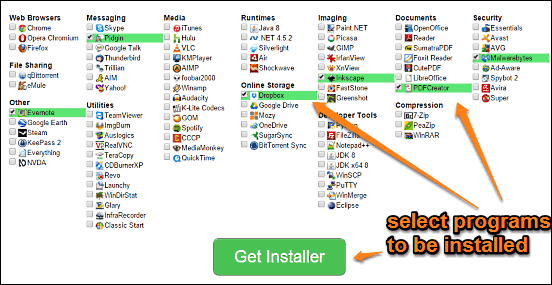
Step 1: Head over to Ninite’s homepage, and scroll a bit down. You should see a columnar listing of pretty much all the commonly used applications, segregated into categories such as runtimes, document editors, and file sharing. Each listed application also has a checkbox against it. Click on the program(s) that you want to install in a batch, and click the green Get Installer button.

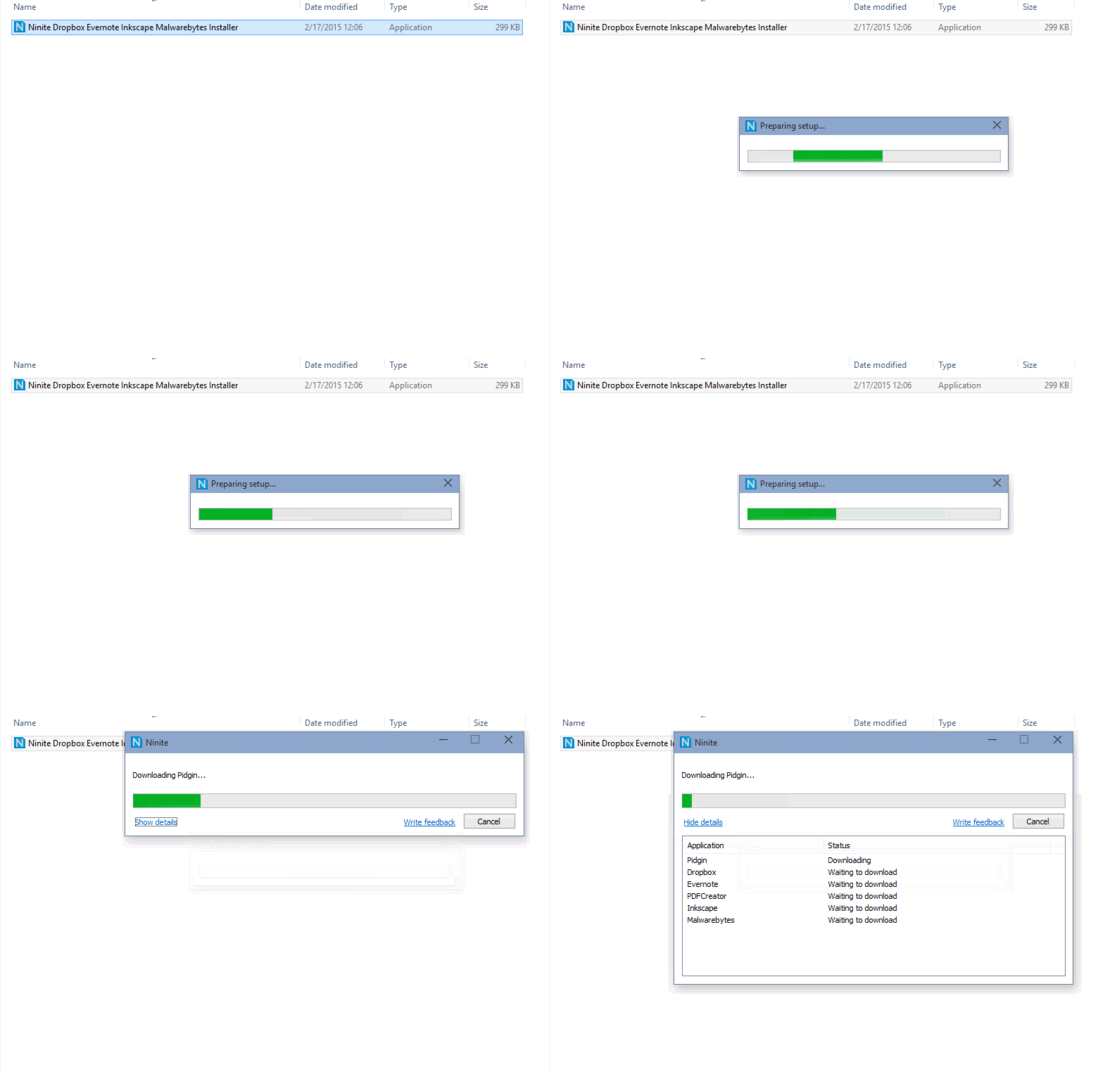
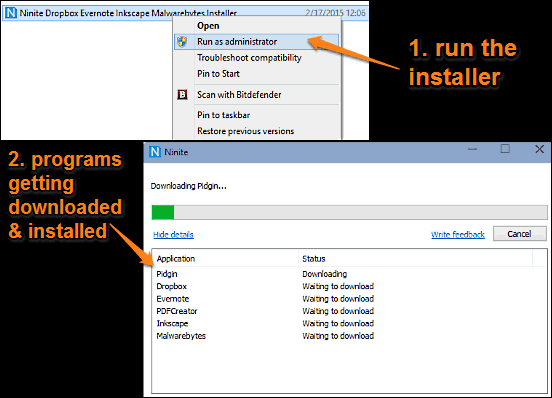
Step 2: Once you do that, Ninite will instantly generate a customized installer that will be downloaded to your computer. All you have to do now is run this installer (preferably with administrator privileges) and it will automatically start downloading and installing the selected programs one by one silently, without requiring any user intervention. You can check the download/installation progress. What’s more, you can run the same installer at a later date to automatically update all of the installed applications to their latest versions. Awesome, isn’t it? Here’s a screenshot:

Also See: How To Always Get Open With Dialog For Unassociated File Types In Windows 10?
Wrap Up
Even though modern Operating Systems like Windows 10 are immensely powerful on their own, third party software applications are always required to get the most of our systems. And useful services like Ninite ensure that installing and setting up multiple applications doesn’t get on your nerves. Try it out, and let me know your thoughts in the comments section below.