Cloudy for Gmail is a free extension for Google Chrome which allows you to easily add attachments from Dropbox, Box, SkyDrive and dozens of other file hosting services to emails composed in Gmail. When you click on the Compose button in Gmail, after of course installing Cloudy for Gmail extension, you’ll get an additional button which after clicking on it allows you to access files that you have uploaded on supported file hosting services, and to add them directly as an attachment.
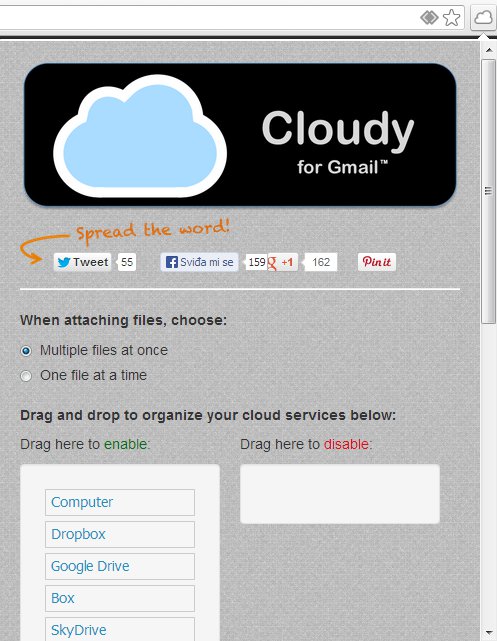
Cloudy for Gmail is also added to the Chrome’s toolbar in the upper right corner of the interface, where addons usually go. This is where you can control which services are gonna be offered to you when click on the Cloudy button from the Compose email menu in Gmail.
Similar software: Kloudless.
Supported services are:
- Dropbox
- Google Drive
- Box
- SkyDrive
- Gmail (existing attachments)
- Evernote
- Flickr
- Image Search
- Picasa
- Github
On top of these services, you also have additional options of recording and attaching the created videos with your webcam, taking pictures, inserting links, attaching files using WebDAV protocol and also FTP. Here’s a few pointers to help you get started.
How to attach files from file hosting services directly to Gmail with Cloudy for Gmail Google Chrome extension
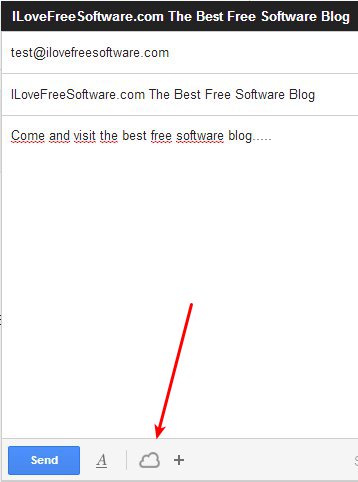
Addon can be installed from the Chrome store. Once you have it installed, open up Gmail, and click on Compose to create a new message. Down below at the bottom you should see the Cloudy icon, same one that can be seen in the top right corner toolbar. Click on it and you should see a list of available file hosting services pop up in a new window.
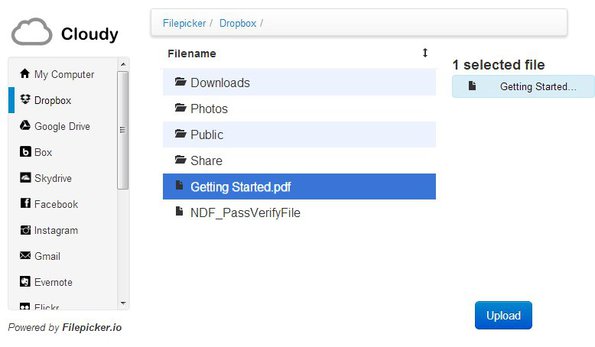
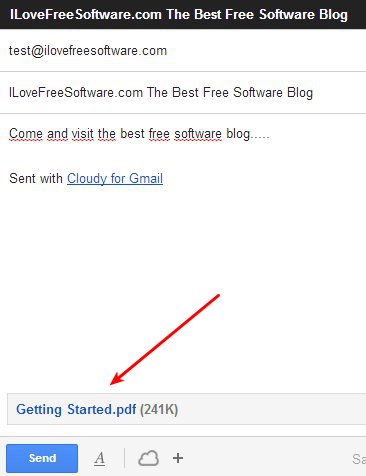
Services which are gonna show in the left sidebar can be selected from the toolbar service selection window of Cloudy, the one that can be seen on the first image from the top. Select a service and connect to it. When you’ve done that, you should see list of files for the connected service listed in the right section of the window. Multiple files can be selected by left clicking on them. Upload button starts the file transfer and attaches selected files to your email.
How long the transfer lasts depends of course on the file size, but it shouldn’t take too long. Keep in mind that the same restrictions for attachment size apply when uploading file the regular way still apply here.
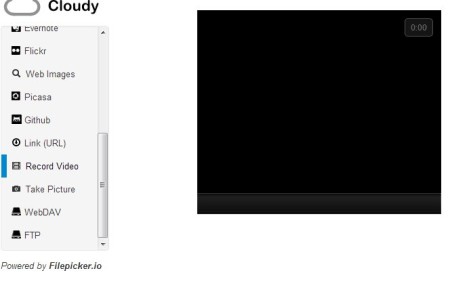
The most interesting part of Cloudy is that it can be used to directly record videos and take pictures with your web camera and then add the recordings as attachments. You’ll find these options, as well as FTP and WebDAV uploads near the end of the list in the sidebar on the left.
Conclusion
Cloudy for Gmail will save you a lot of time and bandwidth, because you won’t have to re-upload files that you already have added to Dropbox, Box, SkyDrive and all the other supported file hosting services. It’s integrates nicely into Gmail and everything works just fine. Give it a try and see how it goes.