This tutorial covers how to permanently disable activity history in Windows 10. This activity history is a built-in feature of Windows 10 which comes under Timeline. In this feature, your per day activities like browser opened by you, images opened in an image editor or viewer, applications opened, etc., are stored for later use. If you don’t want that your activities should be recorded, then you can disable this feature with two built-in options.
To permanently disable activity history in Windows 10, I have used Group Policy and Registry Editor options here. This change will remain permanent as long as you want. You can also enable Windows 10 activity history anytime you want. Settings window is also there to turn off activity history, these two methods directly block or disable this feature. After that, no one can turn on activity history from Settings as long as you want.
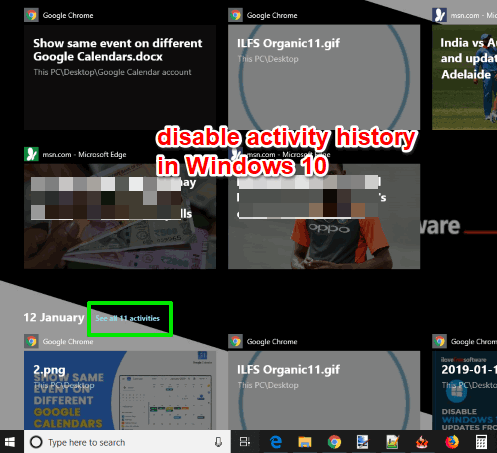
Note: These two methods won’t remove the already stored activity history. Instead, these methods prevent from storing new activities. You need to manually clear all PC activity.
A video demonstration for both the options is also created by us. You may have a look at this:
Option 1: Permanently Disable Activity History in Windows 10 using Group Policy
Windows 10 Pro and Enterprise users can go with this easier option. Those running Windows 10 Home, they need to use the second option because gpedit.msc (Group Policy) is not present in Home version.
Step 1: Open the Group Policy by typing gpedit.msc in Search box.
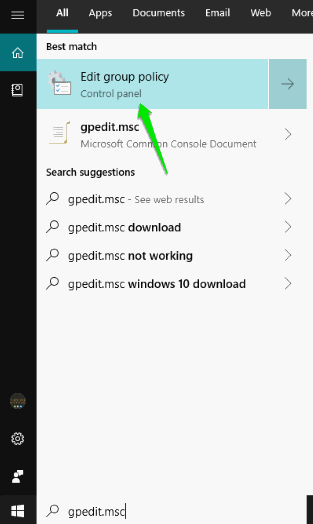
Step 2: There is “OS Policies” folder in Gpedit.msc. Go to that folder. The path is as follows: Computer Configuration main menu → then access the folder named Administrative Templates → System → and select OS Policies.
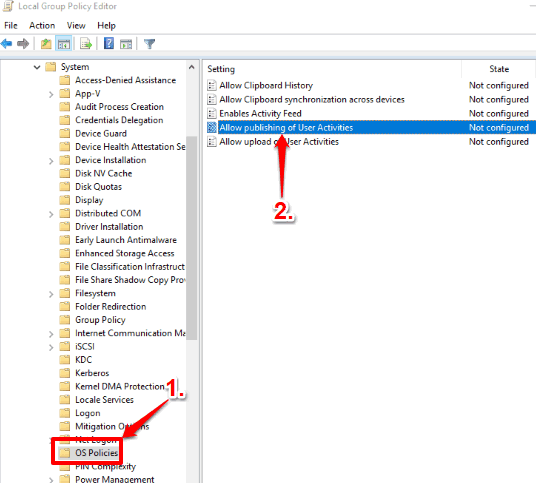
Step 3: On the right-hand side, double-click the “Allow publishing of User Activities” option. See the screenshot added above. A separate and big window will open.
Step 4: To disable activity history feature in Windows 10, use “Disabled“, as visible in the below screenshot, and then save it.
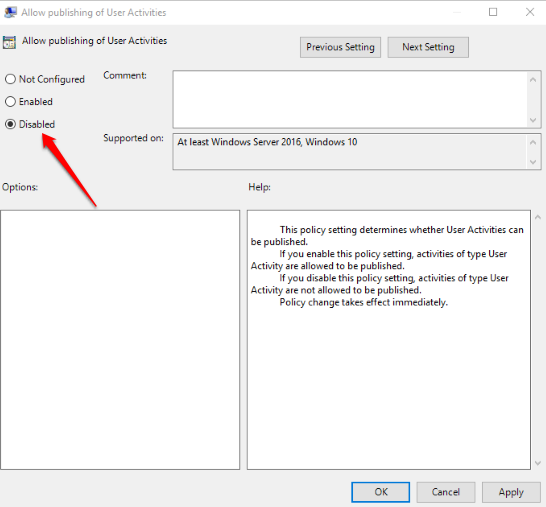
Now you can either restart PC or Windows 10 File Explorer to apply the changes.
To undo all the changes, you can use “Not Configured” in the same window and save this new change.
Option 2: Disable Activity History in Windows 10 using Regedit (Registry Editor)
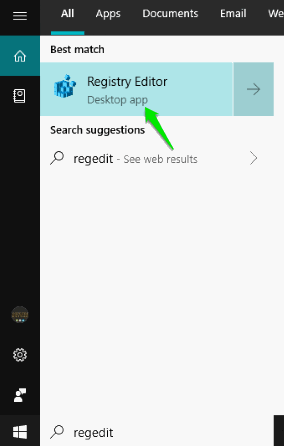
Step 1: This step is similar to step 1 of Option 1. The only difference is that you need to open the Registry Editor window. You can type regedit in Search box to open the Registry Editor window.
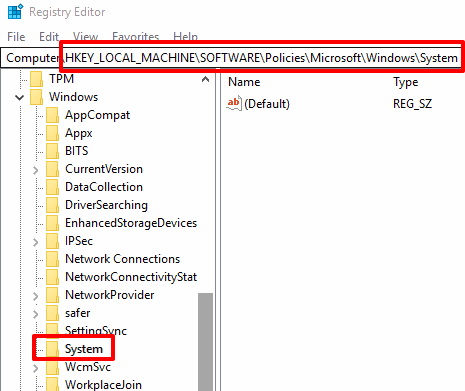
Step 2: There is System key that you need to access. Its path is as follows: first open HKEY_LOCAL_MACHINE which is the main key → continue the path and explore SOFTWARE → Policies → continue this path and expand Microsoft → Windows key → and there you will get System key.
Step 3: In System key, create DWORD value using the right section. Creating a key is similar to creating a folder. Right-click on the empty space, use that New option, and tap on DWORD option. When the DWORD value is ready, rename it to “PublishUserActivities“.
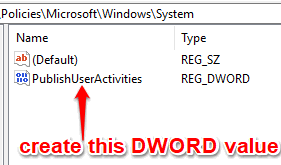
To permanently disable activity history, PublishUserActivities value must be ‘0‘. Since it is already set to ‘0’ by default, you don’t need to do anything. Just restart File Explorer/PC and it will be done.
To enable activity history feature again, you can simply delete the DWORD key.
The Conclusion:
If activity history is important to you and you use it regularly, then you don’t have to do anything. However, if you rarely use this feature and doesn’t want to let your activities get recorded and stored, then it is a good step to permanently disable activity history in Windows 10.