This is a quick tutorial to explain how to screen share Zoom windows. In the latest update, Zoom has added an option in the In meeting settings that allows you to share your Zoom windows during screen share. This is helpful in case you want to show the webcam or profile picture windows of the people who are in your meeting. This feature can also be turned off if you want to.
If you Zoom a lot then you probably know this that Zoom windows aren’t included in the screen sharing session. But now you can show them to other participants with the help of new option. It may also be useful in case you are a teacher and during class, you are teaching your students about Zoom or different aspects of it.
How to Screen share Zoom Windows?
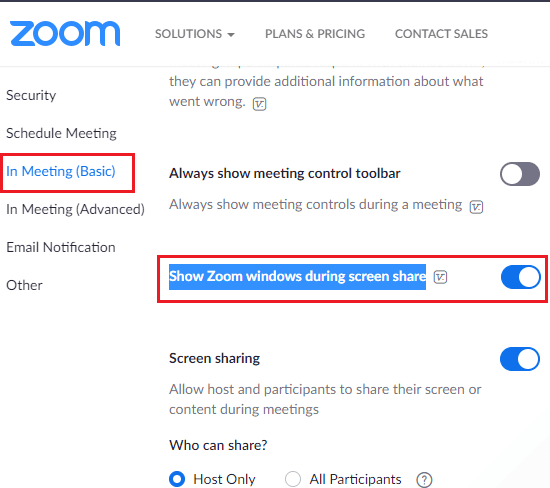
To enable sharing Zoom windows and control bar, you need to first sign in on the Zoom website. After that, you simply go to the settings and then navigate to the “In Meeting (Basic)” section. From here, you just slide the switch next to “Show Zoom windows during screen share” option. You can see this in the screenshot below.
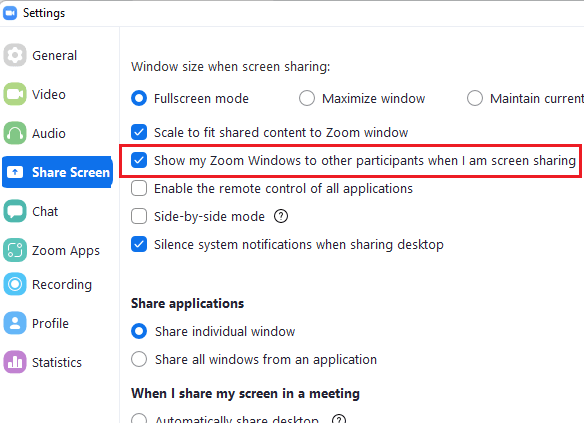
Now, you have to make a small change in Zoom Settings in the desktop client. After you enable Zoom Window sharing on the website, a new option will become available that is: “Show my Zoom Windows to other participants when I am screen sharing“. Just enable it and then you are done. This is as simple as that.
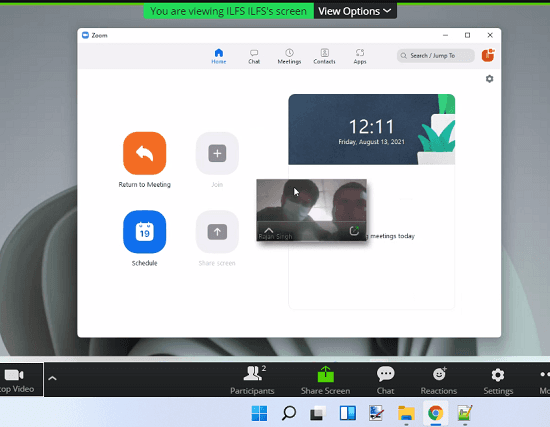
Now, whenever you screen share in Zoom, you will see that the control bar and participant window will be shown to the other people in the meeting. Even though, you will have the option to disable this behavior, you can just keep it enabled if really want to share all Zoom Windows with everybody.
Closing thoughts:
If you are looking for a way to enable screen share Zoom windows, then you are at the right place. This post will help you know what options to enable in order to have that functionality. And when you no longer need it, then you can always disable it in the same way you enabled it.