uWall is an amazing free software application to create encrypted partitions on removable disks. Utterly lightweight and fast, uWall supports removable disks of all types (standard external hard disk drives as well as USB flash drives). You can encrypt as many removable disks as you want, and a removable disk can have multiple encrypted partitions. Each partition created with uWall is secured by AES-256 grade encryption. In addition to that, each encrypted partition has its own password. uWall even lets you mount/dismount encrypted partitions on the same removable drive individually, and change passwords on the fly. To top it all off, uWall is available as a standalone portable application. Looks like just what you need to secure that flash drive full of important information you lug around all day? Let’s find out more.
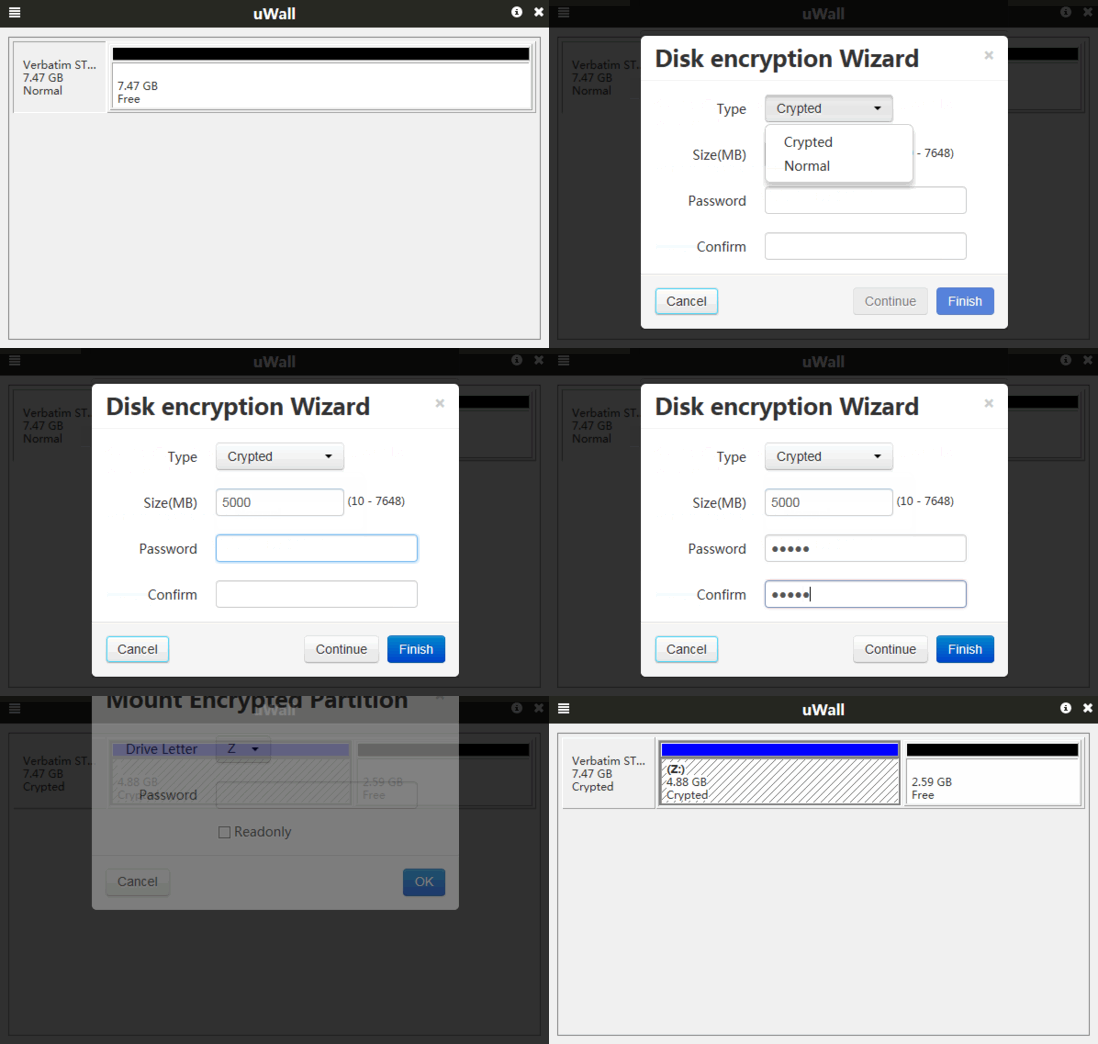
uWall: User Interface
As mentioned in the beginning of the article, uWall is available as a standalone portable application. This means that there are no cumbersome setups or configurations. All you have to do is download uWall from its homepage, and fire it up. Here’s what it looks like:
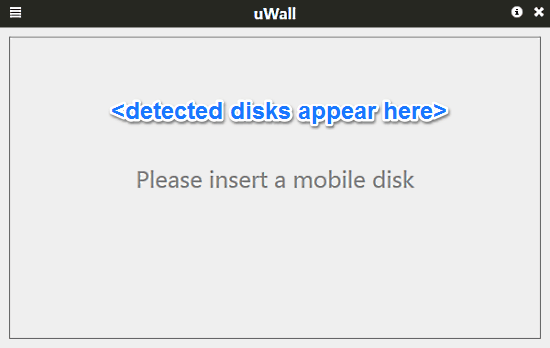
Not really much in terms of a user interface, don’t you think? But given the fact that uWall is an insanely lightweight application (just about 570 KB), it looks pretty good. As illustrated by the above screenshot, uWall features a pretty basic (ok, maybe a bit too basic!) interface. In fact, there isn’t anything except for a simple notification asking you to plug-in a removable disk to your computer. There is just a simple menu button on the top left corner (with maybe one or two options). An information button and a close button on the top right corner complete the Spartan UI of uWall. Simple and good looking!
How To Use uWall To Create Encrypted Partitions On Removable Disks?
Alright, so we’re on to the focus of this thing. So uWall is incredibly lightweight, and features a user interface that has next to nothing. That’s all well and good, but how this thing works? It’s actually really simple. Here’s a little step by step process, illustrating how to get started with uWall:
Step 1: Start up uWall, and plugin a removable drive. It can be either an external hard drive or a USB flash drive. The moment you do that, you should see a screen like this:
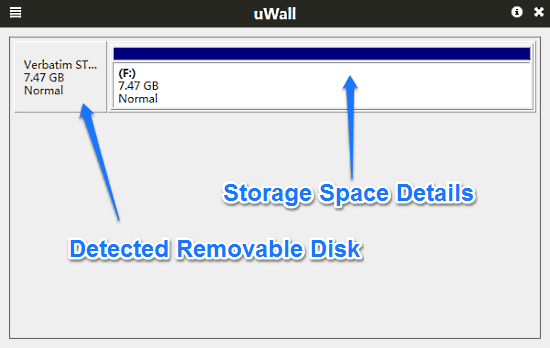
As you can see, uWall automatically detects the removable disk (a USB flash drive, in this case) plugged into the computer. It also provides additional details such as the removable disk’s manufacturer name, total capacity, any existing partitions that it might be containing, and things like that!
Step 2: The next step, obviously is to create encrypted partition(s) on this removable disk drive. Here, you can choose between two options. You can either encrypt the entire storage capacity and then create partitions, or create individual encrypted partitions one by one (using the encryption wizard). We’ll go with the latter approach, as it illustrates the power of uWall better.
Step 3: Right click on the disk’s label and click Disk Encryption Wizard from the context menu. The first screen of the wizard pops up, asking you to confirm the format. Select Yes to proceed to the next step.

Step 4: The next screen requires you to enter detailed information about the encrypted partition that you want to create. You can create a simple or encrypted partition, although only the latter can be encrypted (which should be obvious!). Apart from that, you can also specify the size of the encrypted partition in MB, and the password to be used for encryption. When all set, click Finish.

Step 5: That’s it fellas! uWall will now create an encrypted partition of the selected size. Once created, it’ll show up on the disk summary screen with the label Crypted. Check out the screenshot below:
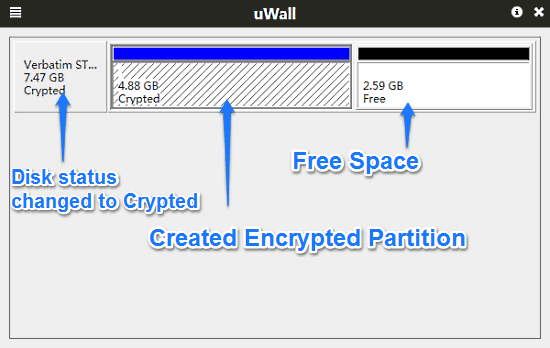
As illustrated by the above screenshot, the summary screen now lists the entire removable drive as encrypted. The encrypted partition just created shows up with a blue header. To create more partitions from the free space, simply right click on the Free Space info bar, and follow the above explained steps again. As simple as that!
How To Access Encrypted Partitions And Revert A Disk To Normal?
Whenever you create one (or more) encrypted partitions on a connected removable drive, they can no longer be accessed regularly via the Windows explorer. Instead, you have to use some mounting/dismounting magic. Here’s how to access your encrypted partitions:
Step 1: Plug-in the removable drive and wait for the encrypted partitions layout to show up in uWall’s interface. Then, right click on the selected encrypted partition that you want to access, and select Mount from the context menu.
Step 2: The next screen asks you to select an available drive letter as the mount point for the encrypted partition. Select the letter from the list, and supply the password used for encryption. If you want, you can also optionally choose to mount the partition as read-only. Click OK.
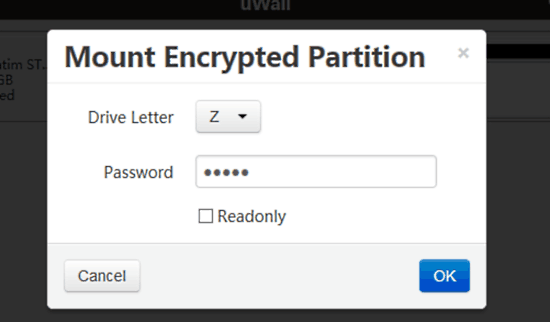
Step 3: The selected encrypted partition will now be mounted at the drive letter specified by you, from where you can easily access it via Windows Explorer (Although you might have to format it once before use).
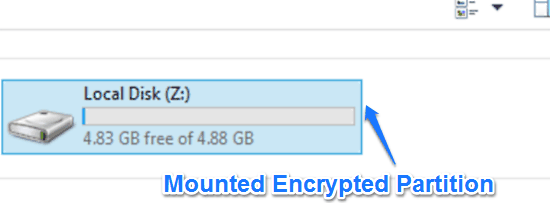
That’s it! You can now easily read/write data to this encrypted partition. When you’re done with your work, simply open up uWall again, right-click and select Unmount to secure access to the contents of the encrypted disk again.
If you want to revert the removable disk back to its original state from the encrypted state, simply right click on the disk information pane and select Restore to Normal Disk. This will format the contents of the entire disk and revert it to a regular unencrypted disk. How cool is that?
Also See: 5 Best Free USB Encryption Software
Conclusion
uWall is a great freeware software application to create encrypted partitions on removable disks. It’s ridiculously lightweight, easy to use and works just fine to secure any and all kind of sensitive information stored on your removable disks. Features like individual password based AES-256 grade encryption, separate mount points etc., make uWall a must have tool. Add to it the fact that it’s portable and can be used anywhere, and uWall becomes even better. If you’re looking for a simple yet powerful encryption application for your removable disks, look no further than uWall.