Expensify for Android is a free app which allows you to keep track of your expenses in a smarter and more efficient way. Keeping track of expenses is easier with Expensify. You can avoid wastage of paper and your time by using this expense tracker app for Android. Expensify for Android allows you to capture receipts, create expense reports, record business travel expenses, and track mileage or time. This is mobile app for popular Expensify website, which we earlier reviewed here.
The app is simple to use, which makes it handy. Also, the interface of the application is visually polished, resulting in nice overall feel. The interface of the app is really touch friendly with four big buttons on the home screen.
One of the really amazing feature of this app is SmartScan, using which you can take photo of receipts and then it automatically generates the receipt as an expense. But this feature has limitation of 10 free scans per month. However you can always enter this expense manually when you run out of free scans.

How to get started with Expensify for Android: Installation and signup
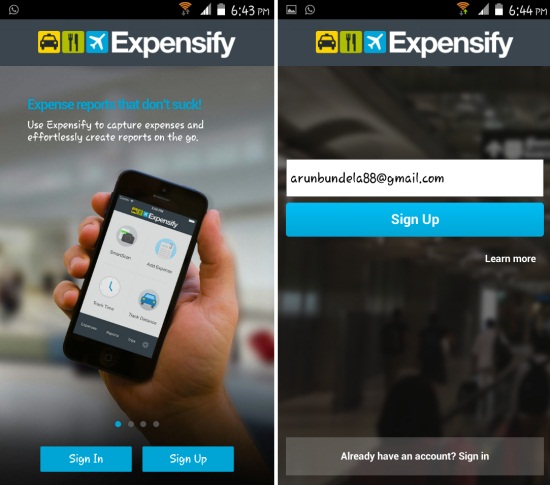
You can get Expensify for Android from the link provided at the end of the article. The link will re-direct you to the Google Play Store from where you can install this app to your device. After installation, launch the Expensify and you will have the interface as shown above. If you already have an account on Expensify, just sign-in with that, or create a new account. The sign up process is fairly simple for the app, all you need is a valid email address. Once you have signed in, you will have the interface as shown in the first screenshot of this review and you can start managing your expenses with ease.
Also check out other expense manager apps we reviewed earlier for Android, iPhone, and Chrome.
Using Expensify for Andorid:
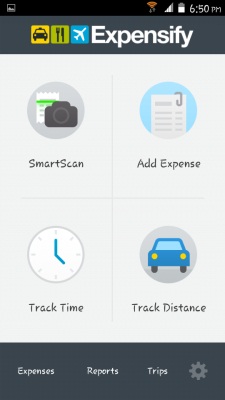
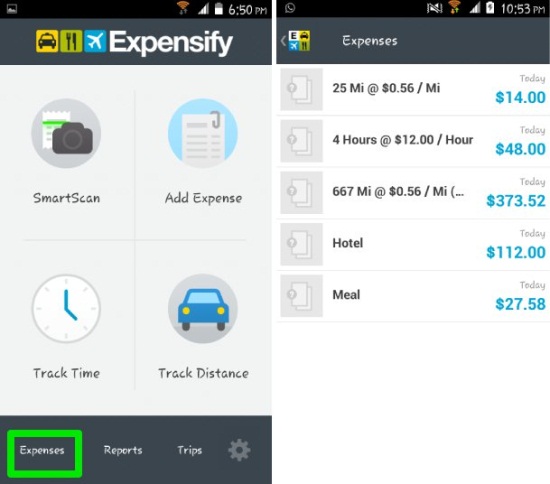
When you start the app, you will basically have four options for adding expenses. You can see these options below.
Add Expenses by Scanning a Bill or Receipt:
The SmartScan option allows you to add expenses using the camera. Simply take a picture of the bill and Expensify will automatically scan the bill and add it to the expenses.
Add Expense Manually:
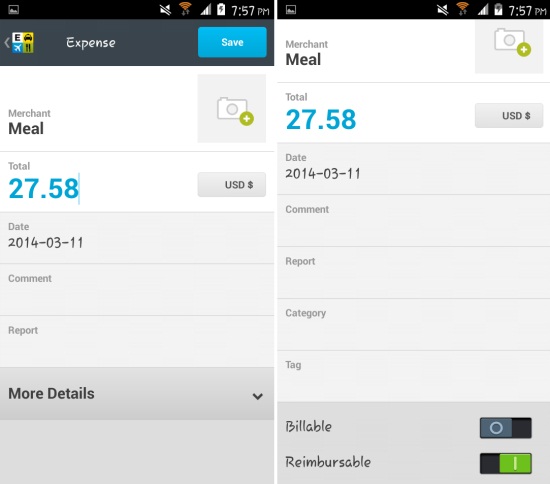
To add an expense manually, simply click on the ‘Add Expense’ option and you will be presented with the interface as shown below. Enter the name of the merchant or simply name the expense and then enter the total amount of the expense. The app also allows you to the add the expenses in different currencies. Click on the save button and this expense will be added. If you want more options, then click on “More Details”. The app will show more options; as you can see on the right side in screenshot below.
Add Hourly Expenses by Track Time Option:
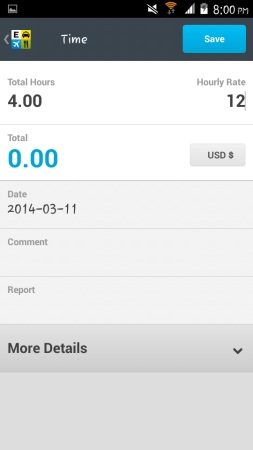
Expensify for Android also provides the ability to easily calculate and add expenses which cost by the hour, such as rent of a car or some service. To do so, simply click on the ‘Track Time’ button from the main screen and you will have the options as seen below. Simply enter the total number of hours and the hourly rate and click on ‘Save’ and the total calculated amount shall be added to the expenses.
Add Travel Expenses By Distance Traveled:
The Track distance feature of the application offer the ability to track traveling expenses in detail. Click on it and you will have three tracking methods: distance, odometer, and GPS. These options can be seen below in the screenshot. Choosing each one of the options provides an interface which allows for tracking distance and the expenses which can be seen below.
![]()
You can see the total expenses anytime by clicking on the expenses button located on the main interface, as shown below. This will bring up the whole list of expenses as seen in the screenshot on right.
Conclusion:
Expensify for Android is very easy to use and I really liked that the app gives several ways of adding expenses. Also, most of the features of the app are completely free and paid upgrade gives you extended features. This is a really good expense tracker, especially if you are travelling.
Get Expensify for Android from here or scan the QR code below: