This tutorial demonstrates how to keep Dropbox and Google Drive in sync. After going through this tutorial, you will be able to keep all your data in Dropbox synced with Google Drive. Not only that, you can even keep your Google Drive data in sync with Dropbox.
In this tutorial, I will explain 5 different services which allow you to keep Dropbox and Google Drive in sync. Among all these services, CloudHQ and MultCloud supports two-way sync, which means you can use them to keep your Dropbox data in sync with Google Drive and also sync the Google Drive data with Dropbox. All the other services offer one-way sync and can only be used to sync Dropbox data with Google Drive.
Also, some of these services let you even sync file changes, so if you make changes to an existing file in Dropbox, then those changes are also synced to Google Drive. I have mentioned with each service which supports this feature.
Do note that some services let you sync new as well as existing files, while other services (like IFTTT, Zapier, etc.) will only sync the newly added files. That means if you want to sync your existing files as well using those services then you have to first transfer existing data from Dropbox to Google Drive. And once done, you can use these services to sync any newly added file.
Now, let us get started with the services and see how to use them for keeping Dropbox and Google Drive in sync.
How to Keep Dropbox and Google Drive in Sync with CloudHQ:
CloudHQ is probably the best service to keep Dropbox and Google Drive in sync. The free version of CloudHQ lets you keep as many files as you want in sync between Dropbox and Google Drive. However, the maximum size of a file is limited to 150MB in the free version. That means if the size of the files is 150MB or less, then you can easily sync them between Dropbox and Google Drive without any hassle. One of the best features of CloudHQ is that apart from letting you sync existing and newly added files, all the changes which you make to the existing files will also sync between Dropbox and Google Drive.
Now, let me show you how to keep Dropbox and Google Drive in sync.
Step 1: To get started, simply go to homepage of CloudHQ and create a new account. After that, the dashboard will be visible on which you have to click on the “Sync & Backup” tab. When you do that, click on the “Add New Sync Pair” button and then choose “Single User Setup → Sync Two Clouds” option.
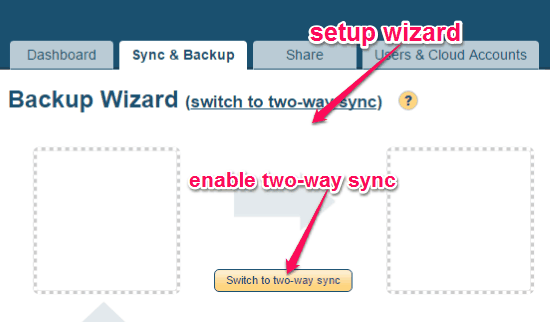
Step 2: Once you have done that, a setup wizard will appear with two blank boxes, and a button to switch sync methods from “One-Way” to “Two-Way”. To keep Dropbox and Google Drive in sync, you would need to switch the sync method to “Two-Way Sync”, as shown in the above image.
Step 3: After that, drag and drop the Dropbox icon on the first box from the “Select Service” section and connect your Dropbox account. Then it will ask what you would like to sync between Dropbox and Google Drive. It lets you select the entire Dropbox data, any specific folder, or create a new folder on Dropbox to sync.
Step 4: When you’re done with that, drag and drop the Google Drive icon on the second box of the setup wizard. Then connect your Google Drive account and select whether you want to sync the entire Google Drive, any specific folder, or create a new folder to sync. For this, I would recommend you create a new folder in Google Drive to keep Dropbox data in sync. In case you want to sync both Dropbox and Google Drive completely, then you need to select Entire Google Drive.
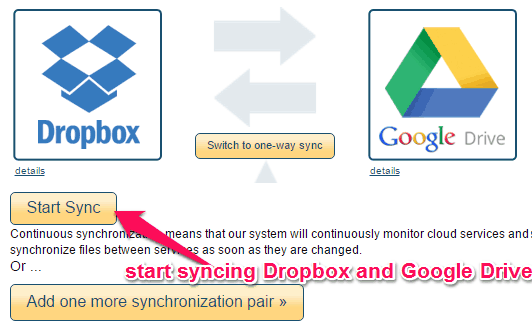
Step 5: As soon as you’re all set, simply hit the “Start Sync” button at the bottom of the setup wizard. This will instantly start syncing the selected folder in Dropbox with the selected folder Google Drive automatically. It will also keep all the newly added files in sync between Dropbox and Google Drive. Whatever changes you make to the existing files will also sync.
CloudHQ is really the best free option to keep Dropbox and Google Drive in sync. I especially like it because of the fact that it provides two way sync, and is able to sync changes to existing files as well.
Here is a summary of this service:
- Sync Dropbox to Google Drive: Yes
- Sync Google Drive to Dropbox: Yes
- Transfer Existing files between Dropbox and Google Drive: Yes
- Sync Changes to Existing Files: Yes
- Limitations: Max file size that can be sycned is 150 MB.
How to Keep Dropbox and Google Drive in Sync using MultCloud:
MultCloud is another useful service which can be used to keep Dropbox and Google Drive in sync. The free version of MultCloud lets you keep 2TB data in sync between Dropbox and Google Drive. Unlike CloudHQ, it doesn’t allow you to sync any specific folder, which means it will sync the entire source (Dropbox) with the target (Google Drive). But, any file that is modified in one service is replicated to the other service, similar to CloudHQ. So, any file changes in Dropbox are synced with Google Drive, and vice versa.
Let me explain how to use MultCloud for syncing data between Dropbox and Google Drive.
Step 1: First, visit the homepage of MultCloud and then sign up for a new account. After that, you can go ahead and connect your Dropbox and Google Drive accounts by clicking on the “Add Cloud Drives” button on the main window.

Step 2: After you’re done connecting Dropbox and Google Drive, simply click on the “Cloud Sync” button at the top. When you do that, it will ask you to select a source drive and a target drive for syncing. In the source section, you can select “Dropbox” and then choose “Google Drive” in the target section.
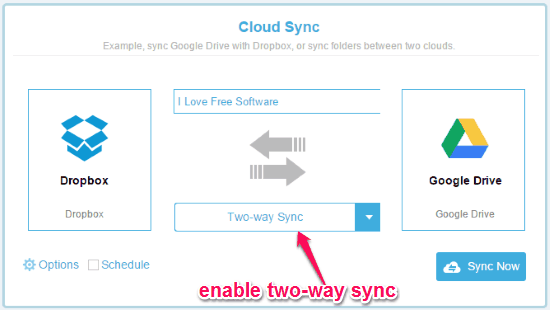
Step 3: Once you do that, simply give a name to the task and then choose the sync method as “Two-Way Sync”. Now, simply hit the “Sync Now” button and it will start syncing all the existing files from Dropbox to Google Drive. Apart from that, all the newly added files, modified files, and deleted files either on Dropbox or Google Drive will also sync automatically.
MultCloud is better than CloudHQ in the sense that there is no filesize limit. However, one limitation is that you have to sync entire Dropbox with entire Google Drive; I wasn’t able to find option to sync specific folders only.
Summary:
- Sync Dropbox to Google Drive: Yes
- Sync Google Drive to Dropbox: Yes
- Transfer Existing files between Dropbox and Google Drive: Yes
- Sync Changes to Existing Files: Yes
- Limitations: 2 TB data can be synced. No option to sync specific folders.
How to Sync Dropbox and Google Drive using Microsoft Flow:
Microsoft Flow is actually an automation service which allows you to automate various tasks like you can get Slack notifications for Github issues, automatically tweet newly added Dropbox photos, and more. So, you can also use Microsoft Flow to keep Dropbox and Google Drive in sync. But, it only lets you sync the newly added Dropbox data with Google Drive and doesn’t allow to you sync Google Drive data with Dropbox. That means the existing files will not sync automatically until you transfer them manually from Dropbox to Google Drive. A good feature of Flow is that if any changes are made to existing files, then those are synced as well. Remember, the free version of Microsoft Flow is limited to 750 flow runs per month.
Follow the steps below to sync files between Dropbox and Google Drive.
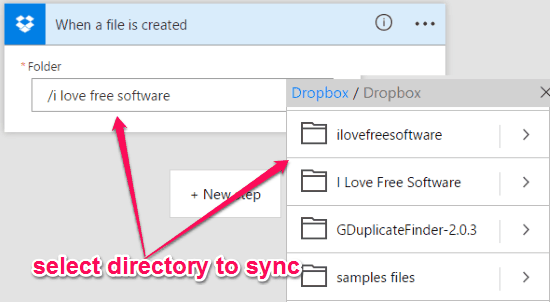
Step 1: Open up Microsoft Flow and then click on “My Flows → Create from blank” to create a new flow. First, it will ask you to select a trigger service where you would need to choose and connect Dropbox. After that, click on the trigger that says “When a file is created”. Once you do that, you will be able to choose any folder you want on Dropbox or the root directory to sync.
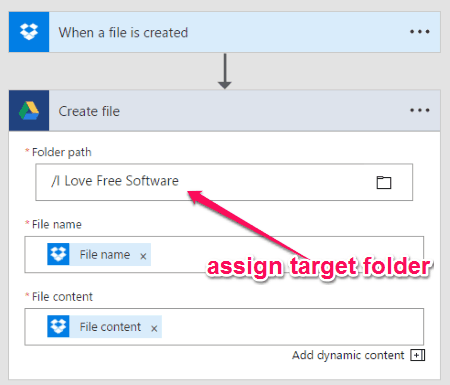
Step 2: In the next step, click on the “Add an Action” option and connect Google Drive as the action service. After that, you need to choose “Create File” as the action in response to the trigger which you have created in the first step. Then you can choose the target folder in Google Drive to which you want to sync the source folder selected on Dropbox. In addition to that, make sure you have selected the file name and the file context in the input fields, as shown below.
Step 3: When you’re all set, simply save the flow and it will start running automatically. That means whenever a new file is added to the source directory on Dropbox, it will automatically sync with the target directory in Google Drive.
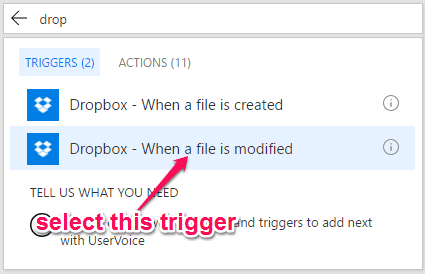
If you also want to sync the changes which are made to the newly added files on Dropbox with Google Drive, then you can create a separate flow for that. In this flow, everything will be the same including the trigger service, action service, and the action. But, the trigger will be different. Instead of “When a file is created” you have to select “When a file is modified” as the trigger.
This means now you will have two flows running. One flow will sync new files from Dropbox to Google Drive, and the second flow will sync changed files from Dropbox to Google Drive. Of course, the biggest limitation of this service is that it can only sync from Dropbox to Google Drive, but cannot sync from Google Drive to Dropbox. So, if you are looking for one way sync only, then you can try this out.
Summary:
- Sync Dropbox to Google Drive: Yes
- Sync Google Drive to Dropbox: No
- Transfer Existing files between Dropbox and Google Drive: No
- Sync Changes to Existing Files: Yes
- Limitations: Maximum 750 flow runs per month.
How to Sync Dropbox Data with Google Drive with IFTTT:
IFTTT is also an automation service which allows you to create applets by connecting multiple services to perform automated tasks. Similar to Microsoft Flow, you can only sync the Dropbox data with Google Drive as it doesn’t provide any option for two-way sync. The changes which you made to the existing files in Dropbox will also not get updated in Google Drive.
To sync Dropbox data with Google Drive using IFTTT, follow the steps below.
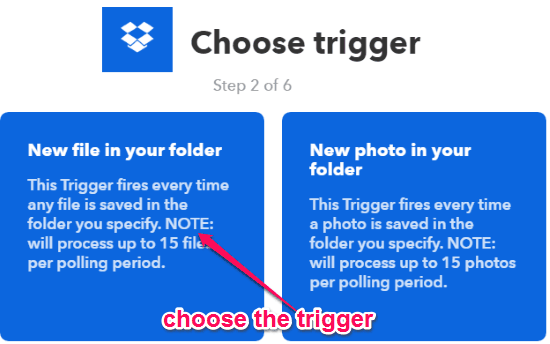
Step 1: After you open up IFTTT, simply click on the “My Applets” option at the top and then select “New Applet”. Then click on the “This” option and choose Dropbox as the trigger service. After that, you will see a trigger named “New file in your folder” which you need to select to proceed.
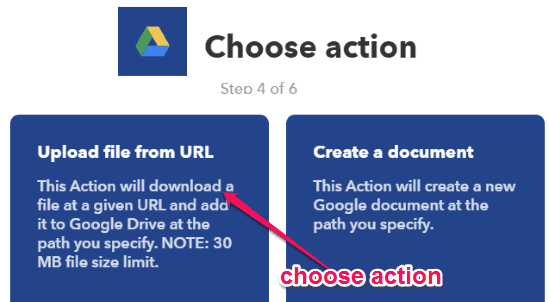
Step 2: When you’re done selecting the trigger, you can proceed and click on the “That” option to select an action service. Here, you would need to select Google Drive and then choose the action as “Upload file from URL”. After that, it will ask you to select some applet parameters like File URL, File Name, and the Drive Folder Path to which you want to sync the file.
Step 3: As soon as you’re done with the applet, simply save and activate it. Now, each time you upload any file to Dropbox the action will automatically run and create a new file in Google Drive.
Limitations of this service are that if any existing file changes in Dropbox, then those changes will not be synced to Google Drive. And of course, the syncing is one way only: from Dropbox to Google Drive.
Summary:
- Sync Dropbox to Google Drive: Yes
- Sync Google Drive to Dropbox: No
- Transfer Existing files between Dropbox and Google Drive: No
- Sync Changes to Existing Files: No
- Limitations: None
How to Use Zapier to Sync Dropbox Data with Google Drive:
Zapier is another automation service which can help you keep Dropbox and Google Drive in sync. Unlike Microsoft Flow and IFTTT, this one lets you sync both ways which means you can sync Dropbox data to Google Drive and Google Drive data to Dropbox. However, you have to create two separate Zaps (automated tasks) for that. One in which you will sync the Dropbox data with Google Drive, and the other Zap to sync Google Drive data to Dropbox. Another interesting feature of Zapier is that it lets you sync changes made to the existing files. But, this feature only works when you’re syncing data from Google Drive to Dropbox. The free version of Zapier is limited to 100 Tasks per month (everytime it finds a new file in Dropbox and transfers it, it is counted as 1 Task).
Let us see the steps required to sync Dropbox data with Google Drive using Zapier.
Step 1: Simply, browse Zapier and then click on the “Make a Zap” button at the top. After that, you will see two different sections named, “Trigger” and “Action” on the left panel using which you have to setup the trigger and action for the Zap.
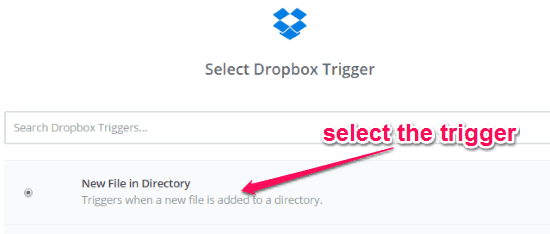
Step 2: On the “Trigger” section, the first thing you would need to do is select “Dropbox” as the trigger app. When you do that, simply select the trigger as “New File in Directory” and then connect your Dropbox account. Then you can select any of the folders or the root directory for syncing.
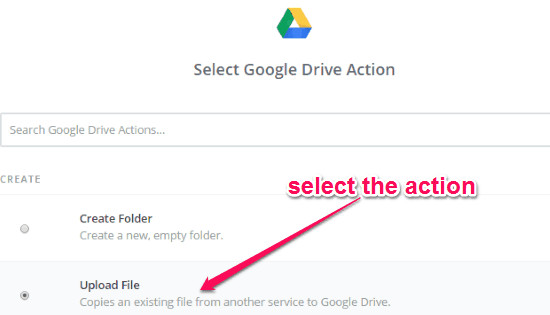
Step 3: After that, move to the “Action” section and select Google Drive as the action app. After that, you will see various actions from which you have to select “Upload File” as the action for the Zap. When you do that, it will ask you to connect your Google Drive account and also edit the template of the Zap. While editing the template, you will be able to assign the folder to which you want to sync the Dropbox data and many other file parameters like file name, path, share link, size, etc.
Step 4: After you’re done editing the template, simply give a name to the Zap and activate it. Now, each time a file is added to the selected directory in Dropbox will automatically sync in the target directory which you have chosen in Google Drive. Similar to IFTTT, this one also doesn’t sync any changes made to the existing files on Dropbox.
Now, to sync Google Drive data with Dropbox you would need to create a new Zap. In this Zap, you have to choose Google Drive as the trigger app and select “New File” as the trigger. After that, simply select Dropbox as the action app and “Upload File” as the action for the Zap. When you do that, each time a file is uploaded to Google Drive will sync with Dropbox.
As mentioned above, it also syncs changes made to the existing files in Google Drive to Dropbox. For this, you have to again create a new Zap in which the trigger app will be Google Drive, but you need to select the trigger as “Updated File”. Remember, the updated file must be inside of any specific folder and not subfolders of the primary folder. After you’re done with the trigger, you can go ahead and choose the “Upload File” as the Dropbox action. This will sync all the changes made to the files in the selected folder in Google Drive with Dropbox.
Summary:
- Sync Dropbox to Google Drive: Yes
- Sync Google Drive to Dropbox: Yes
- Transfer Existing files between Dropbox and Google Drive: No
- Sync Changes to Existing Files: Yes, only from Google Drive to Dropbox
- Limitations: Only 100 File transfer tasks per month.
Closing Words:
In this tutorial, I have explained how to keep Dropbox and Google Drive in sync using 5 different services. After using all these services, I was able to sync all my Dropbox data with Google Drive with ease. Personally, I like CloudHQ and MultCloud as they support two-way sync making it easier for you to sync data between both Dropbox and Google Drive. Even though Zapier also allows two way sync, but its free plan is very limited, with only 100 free tasks per month.
If you know of some other service to sync Dropbox with Google Drive, do let me know in comments below.