This post explains how to use Microsoft Photos Generative Eraser for background fill. Generative AI has been revolutionizing the way we create and interact with content. There is an abundance of AI tools that use artificial intelligence to create text, images, and videos. There are also tools to edit and manipulate content using generative AI. It can be used to fill in missing or damaged parts of an image or video, create new backgrounds, and even generate new content based on user input. Companies and publishers are trying to integrate some of these capabilities into their existing products.
After the partnership with OpenAI, Microsoft is continuously adding generative AI capabilities to its product line. From Bing Chat to Copilot, Notepad, and now the Photos app. Windows Photos app is also getting new features to level up the photo editing within the app. One of these features is Generative Erase which you can use to remove anything from a photo. The second feature is to remove or replace the background. let’s dive in and explore these features in detail.
Check out our other post to learn How to Enable Copilot in Windows 11 and How to Assign Copilot to Any Keyboard Key on Windows 11.
Microsoft Photos Generative Eraser for Background Fill
These new features are available in the new versions of the Windows Photos app starting in version 2024.11020.21001.0. To get the feature, update the Photos app from the Microsoft Store.
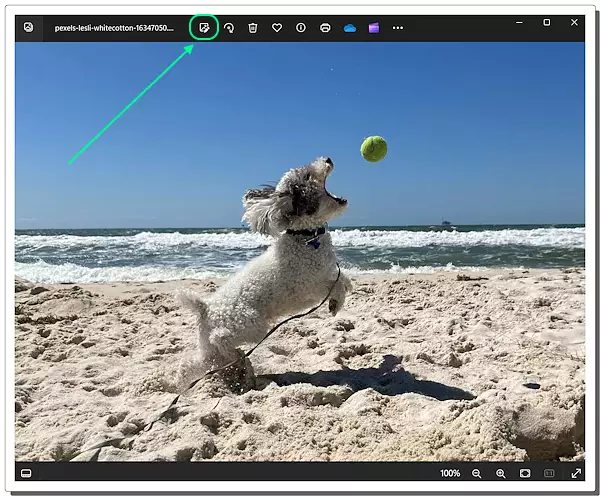
When you open an image in the Photos app, an edit button appears at the top bar. Clicking this button shows all the photo editing features that you can use in the app. The new version adds two new features: Generative Erases and Backgrounds.
Generative Eraser
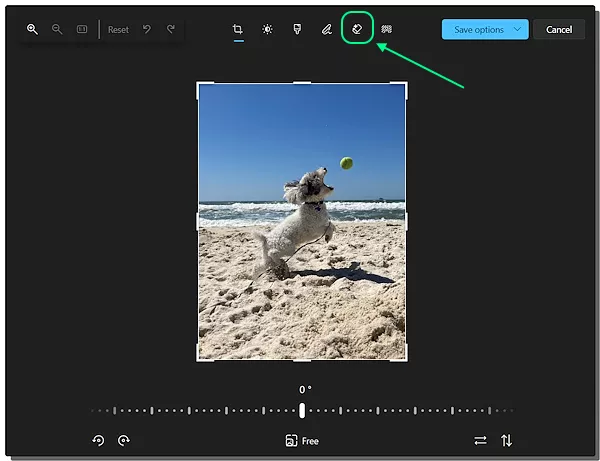
Click the Generative Eraser button open a side pane on the right side and move the image to the left side of the screen. You can change the brush size from the pane and toggle auto-apply mode.
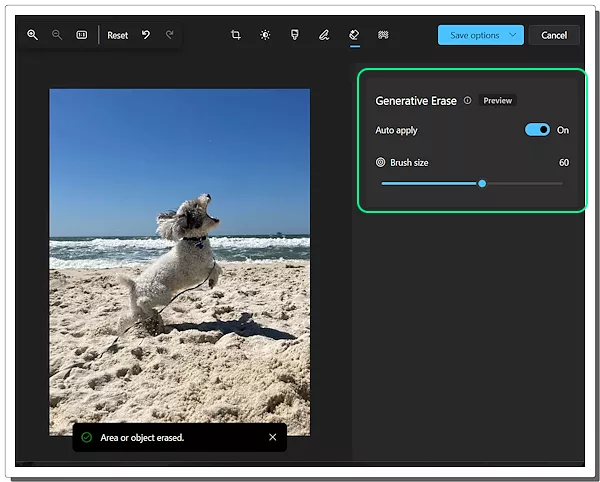
After selecting the Generative Eraser, you can use the mouse cursor to erase the area or object you want to remove. The feature removes the selected area or object and then fills in the background matching with the surroundings. This works well with static backgrounds. With a dynamic background, it might take a few attempts to get the image right.
Backgrounds
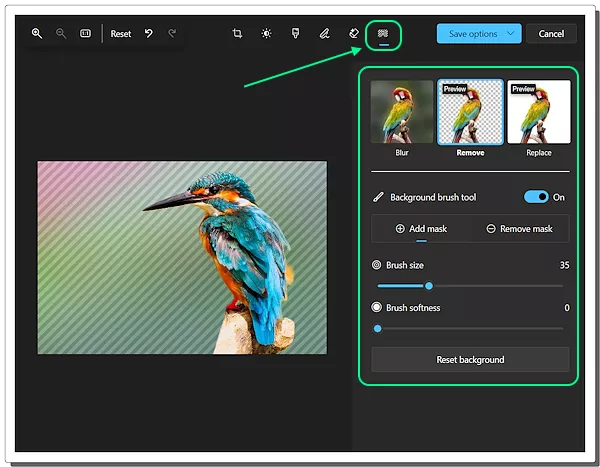
The Backgrounds feature provides three options: Blur, Remove, and Replace. It also comes with a brush tool that you can use to add or remove masking. For example, you replace a background with an image but want to keep one particular area of the original background in the image. In that case, you can use the remove mask tool and brush over that area to reveal the original background. This way, you can use the masking tool with all three background options.
Get the latest version of the Windows Photos app from here.
Closing Comment
This is a welcome addition to the Microsoft Photos app that is freely available on all Windows 10 and 11 devices. With features like Generative Eraser and Backgrounds, users can now effortlessly remove unwanted elements from their photos and transform backgrounds with ease. This not only streamlines the editing process but also opens up creative possibilities for users.