This tutorial demonstrates how to create system settings shortcuts in Windows 10.
Generally, what happens is when you want to quickly access any specific system settings in Windows 10 PC, you’ve to first open up a bunch of parent settings. For example, let’s say you want to access the “Display Settings”, then you’ve to go to Start menu →Settings →System and there you’ll be able to access the “Display Settings”. So, accessing some of the system settings can be a time-consuming task. But not anymore, as in this tutorial I will explain how to create system settings shortcuts in Windows 10 PC in order to access them in a flash.
I will explain how to create system settings shortcuts in Windows 10 PC. Doing so, you’ll be able to access the system settings easily.
Actually, there are two different methods for creating system settings shortcuts which include creating a “Shortcut” file and by adding a system settings shortcut to the context menu. Let’s go over both of them.
How to Create System Settings Shortcuts in Windows 10 with Shortcut Files:
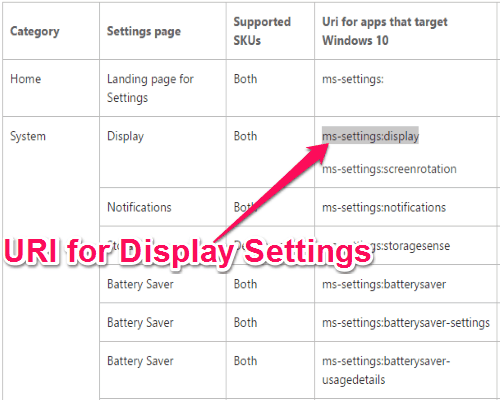
Step 1: In this method, I am going to create a new shortcut file using Windows URIs (Uniform Resource Identifiers) in order to make system settings shortcuts. First, go to the URIs section of Windows website where you’ll be able to see all the supported URIs. From there, you can copy any URI to create a shortcut to the associated system settings. As an example, I am going to copy the URI for “Display Settings”, as shown bellow.
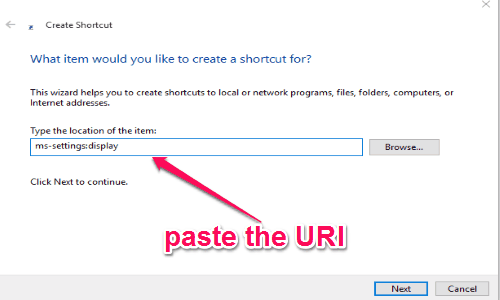
Step 2: When you’re done copying the URI, right-click on your desktop or any other folder and select “New →Shorcut” to create a new shortcut file. After that, a popup window will appear where you need to paste the copied URI in the input field and press “Next”.
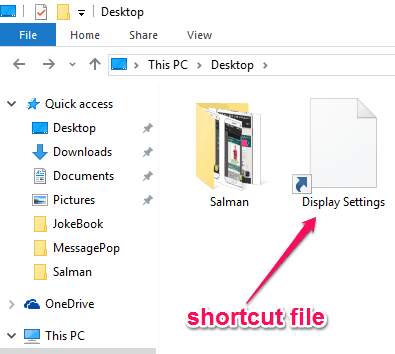
Step 3: Then give a name to the shortcut and again click on the “Next” button to proceed. As soon as you do that, the shortcut file will be created and can be used to open up the “Display Settings” with a double-click.
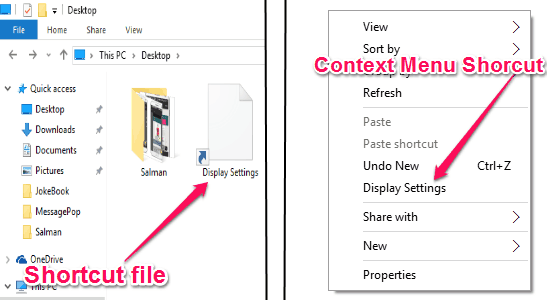
How to Create System Settings Shortcuts in Windows 10 by Adding Shortcuts to the Context Menu:
Step 1: Another method to create system settings shortcuts in Windows 10 is by adding a shortcut item to the context menu. For this, press “Windows Key + R” to open up the run tool and then type “regedit”. After that, press Enter to open the “Registry Editor” and then go to HKEY_CLASSES_ROOT\Directory\Background\shell. Now, right-click on “shell” and click on New →Key to create a new registry sub-key.
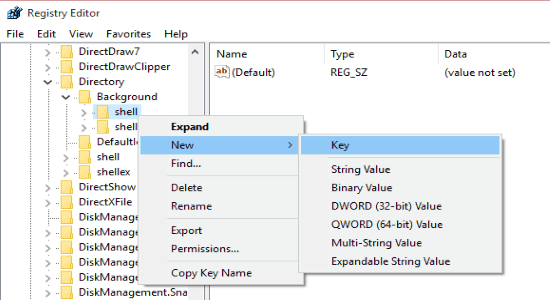
Step 2: After that, give a name to the new sub-key, as in my case I have given the name as “Display Settings”. When you’re entering the name, you need to right-click on the newly created sub-key and then click New →Key again. This time, you’ve to name the sub-key as “command” and then simply press Enter.
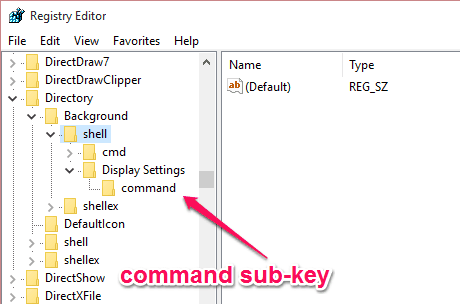
Step 3: As soon as the “command” sub-key is created, you need to change the string value of the sub-key. To do this, double-click on the “Default” string value on the right and paste the value “C:\Windows\explorer.exe” Your System Setting URI. For example, if you’re creating a shortcut for “Display Settings”, then paste the value “C:\Windows\explorer.exe” ms-settings:display in the input field where it says “Value Data” and click “OK”. (you can get the URI corresponding to different settings from this link).

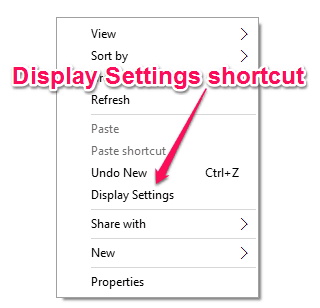
Step 4: That’s all, you can now restart your Windows 10 PC and then you’ll be able to access the system setting shortcut from the context menu.
My Final Verdict:
If you’re looking for a faster way to access any specific Windows 10 system setting and also save your precious time from going through the parent settings first, then go through the simple methods explained in this tutorial. No more going through a bunch of settings windows to access any particular system setting.
I hope you find this tutorial useful.