This tutorial explains how to change the DNS server on Windows 10 PC.
By default, we use DNS addresses provided by our Internet Service Provider (ISP). However, if you are willing to use DNS addresses of some other DNS service provider, like Norton ConnectSafe DNS, Comodo Secure DNS, Google Public DNS, etc., in your Windows 10 PC, then this tutorial will help you for sure.
There are some 3rd-party DNS changer software for Windows 10 also available, but you can also manually change DNS addresses, by following the steps I have covered in this tutorial.
You also don’t have to worry if you face any kind of trouble after changing the DNS addresses because you can revert changes very easily. So, let’s see how to change DNS addresses on Windows 10 PC.
How To Change The DNS Server On Windows 10 PC?
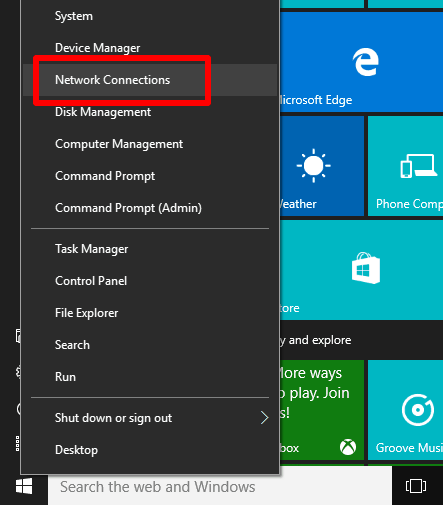
Step 1: Right-click on the Start button to access Win+X menu of Windows 10. In that menu, click on "Network Connections" options.
You can also use Windows 10 Search box to access Network Connections.
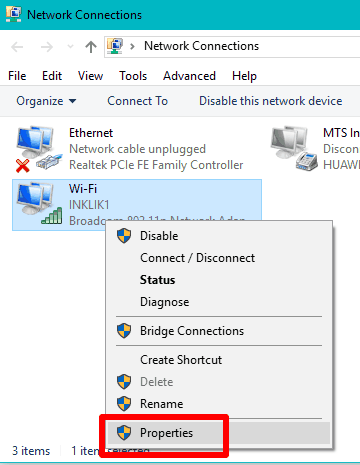
Step 2: After opening the Network Connections window, you need to select Ethernet or Wi-Fi (depends on the connection you are using). Right-click on the selected option and then click on Properties.
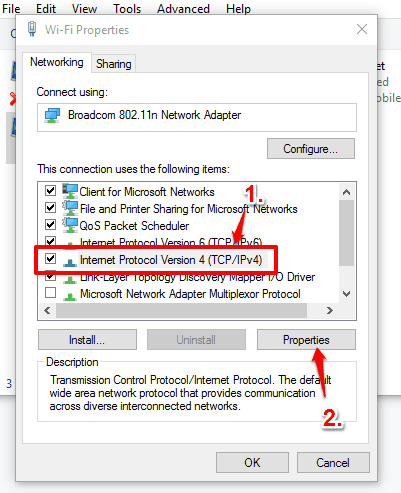
Step 3: Properties window contains Networking tab. Under that tab, you have to find and select Internet Protocol Version 4 (TCP/IPv4). Once you have done that, click on Properties button.
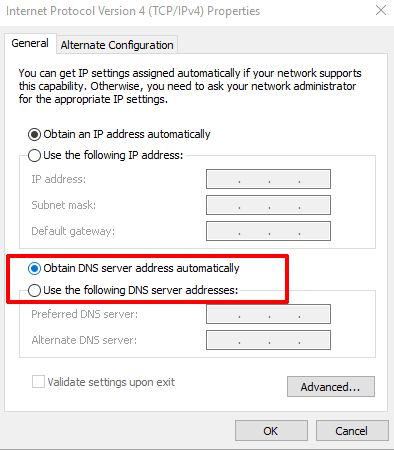
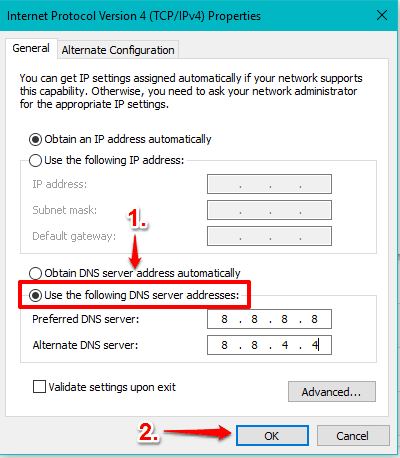
Step 4: IPv4 Properties window will open. In that window, there is a General tab, which has the option to change DNS IP addresses. Select "Use the following DNS server addresses" and then you can add addresses of any DNS service provider.
When you have done that, press OK button to apply new changes.
If you face any trouble, you can revert changes. Just repeat above steps, but this time, you need to select "Obtain DNS server address automatically", and apply the changes.
