This tutorial explains how to apply same default account picture for all users in Windows 8.
As we know, we can set various accounts in Windows 8. Each user account has by default similar account picture except for the Guest account (guest’s default account picture is quite different from that of administrator/standard user). At logon screen, account picture appears with the display name. And when you click on any account, the related email ID of the linked Microsoft account also appears.
If you are using your Windows 8 PC for a specific task and have multiple accounts in the same PC, then you can set the same picture for every account.
You can even use either the Window’s default picture, or can use any photo from gallery, and use it as default for every user.
Using Personal Picture As Default Account Picture For All Accounts In Windows 8:
Step 1: Select the picture from your Windows 8 PC, which you want to set as default account picture. Now, rename the picture as “user.bmp“.
Step 2: Now, navigate to the “Default Account Pictures” folder by using the following path:
This PC > Local Disk(C:) > ProgramData > DefaultAccountPictures
Click on Default Account Pictures folder.
Step 3: In Default Account Pictures, you will see two BMP files: user.bmp and guest.bmp.
user.bmp is the default account picture for various accounts, like: Administrator, Standard User, etc.
Step 4: Now, rename user.bmp as user.bmp.bak, or guest.bmp as guest.bmp.bak.
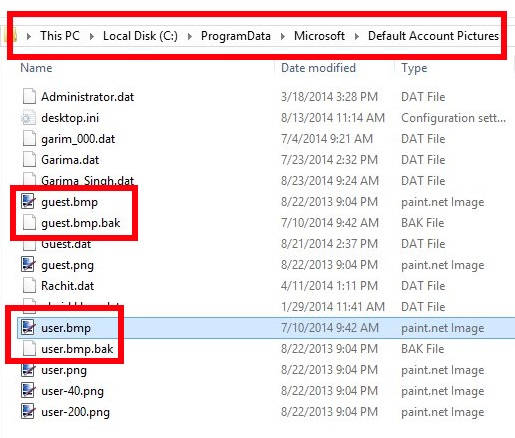
Copy the user.bmp picture that you have renamed in Step 1. And paste that in this Default Account Pictures folder.
That’s it.
Till now, you have changed the Windows default account picture with your own picture. But it is not applied yet.
To apply, follow the steps below:
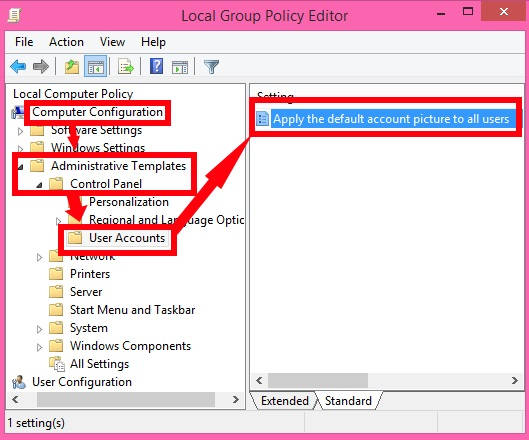
Step 5: You need to open the Group Policy Editor for applying the default picture for every account. To open, use gpedit.msc in the Run command box.
Step 6: In the Editor, navigate to the following path:
Computer Configuration > Administrative Templates > Control Panel > User Accounts
Step 6: In the User Accounts, you will see setting that says “Apply the default account picture to all the users”. Double click on it.
A new window will popup, with Enabled radio button. Click on it, and then on OK.
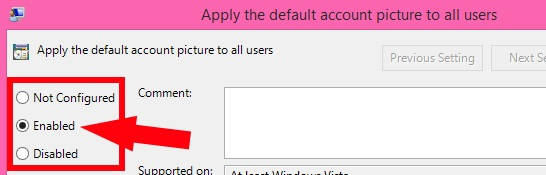
Close the Editor.
Now update the Group Policy by using gpupdate /force in Run Command Box, else restart your PC.
This will apply same default picture to all accounts in Windows 8.
Also learn, how to automatically Sign In to User Account in Windows 8.