Penflip is a pretty nifty free online text editor that comes with version control as well as online collaboration.
Utterly minimalistic and easy to use, Penflip lets you focus on your writing while keeping the obtrusive UI elements and unnecessary features to a minimum. Penflip can be used to create both simple text documents, to full fledged books. It uses markdown for easy formatting of your text. You can easily add chapters to your books, which can be reordered via simple drag and drop. Apart from that, you can also add inline comments and things like footnotes, images etc.
Penflip even features built in version control and revision history. In addition to all of this, Penflip also includes a bunch of handy collaborative features that let you and others easily work on the same document(s) in real-time.
Once you’re done, you can publish/download your work in popular formats like ePub, PDF etc.
Note: A big limitation of free version of Penflip is that all of your created documents are publicly discoverable. If you want to make them private, you need to upgrade to the paid level accounts. If this is a major problem for you (it is, for me), then you can try some worthy alternatives like Zenpen, Writer from BigHugeLabs, and Quabel.
Penflip: Web User Interface
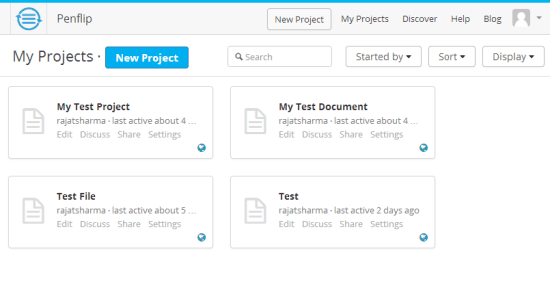
Penflip is based on the freemium service model, however, the free level is more than good enough for most of the users (of course, it comes with the limitation I mentioned above). Typical of most online services, you need to create a free account with Penflip before getting started. Simply click on the signup link at the homepage, provide your details, and you’re good to go. Once that’s done, you’re immediately logged in to your free account. Here’s how the web user interface of Penflip looks like:
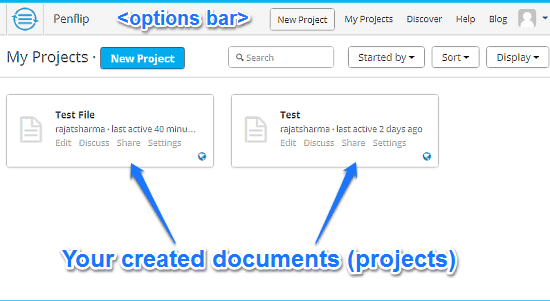
As illustrated by the above screenshot, Penflip features a simple and easy to navigate user interface. Primarily, it consists a list of all of your created documents (called projects). Each project has some options under it, that let you edit your documents, share them with others and change general settings. There’s also a search bar that lets you easily find out the project document that you are looking for. Apart from that, the header consists of a couple of options as well. These are briefly mentioned below:
- New Project: Click this button to start a new document in the online markdown editor.
- My Projects: The default landing page. All of your created documents (or projects) appear under this section.
- Discover: This is quite an interesting section, and lists public projects shared by other Penflip users. You can find anything from poems and guitar lessons, to programming tutorials and blog posts.
- Help & Blog: These two options let you access the online help documentation and blogposts from Penflip staff.
How To Use This Free Online Text Editor?
Using Penflip to create (and share, if you want) documents and even full fledged books online is really simple. Essentially, all you have to do is start a project and get typing. Here’s a step by step process anyway, illustrating how to get started with your first project document.
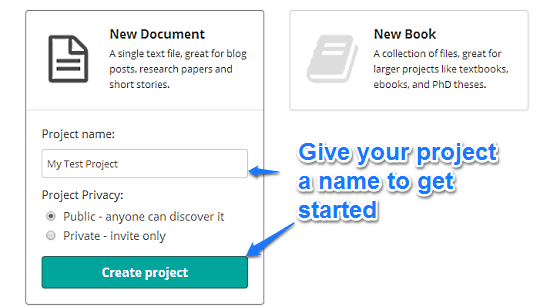
Step 1: Click the New Project button on the header bar. When starting a new project, you’re provided with a choice of either starting a new document (suitable for brief textual matter like blog posts, stories etc.), or a new book (having a collection of files, suitable for big projects like books, research etc.). Select the one you want, give it a name and click Create Project .
Step 2: You’re now directed to Penflip’s online text editor. The editor itself is fairly basic, and easy to use. Here’s how it looks like:
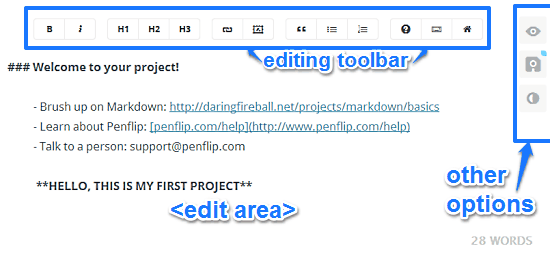
Pretty minimal, don’t you think? Primarily, the editor just consists of the text editing area. Up top, there’s an editing toolbar with a couple of icon based options. These are briefly mentioned below:
- Make text bold or italicized.
- Change the font size based on three standardized heading sizes (H1 to H3).
- Insert elements like links, images, quotes and lists.
- Access help files, keyboard shortcuts and a listing of all your projects.
Apart from that, there’s also three vertical icon based options that let you preview your document, save your changes, and turn on the night (dark) mode of Penflip’s editor.
Step 3: That’s all there’s to it. You can simply start typing away to create your document. Everything that you write on Penflip is automatically saved. However, you can also hit Ctrl+S to manually save your document, whenever you want. Simple as pie!
How To Collaborate On Your Documents With Others?
Collaborative features seem to have become a necessity these days with most of the online text editors, and Penflip is no different. It also allows others to collaborate with you on your documents (and vice versa). However, there’s a difference in how Penflip achieves this. The difference is, that whenever someone is collaborating on a shared document, he/she edits a totally separate copy of the shared document. And when the original owner of the document approves the changes, those changes are copied to the original document. Sounds really awesome, doesn’t it? Let’s see how it’s done:
Step 1: In the My Projects view, find the document (project) that you want to share and collaborate upon. Click on the share button to generate a unique sharing URL for it. This is the URL that you need to share with others, in order for them to be able to collaborate on your document.
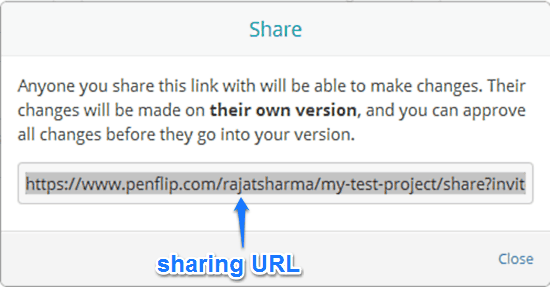
Step 2: Once the other person has accepted the invite (provided they have a Penflip account and are logged in as well!), they will be presented with their own view of the shared document. All of the changes can be viewed by the original owner of the document. You can then explicitly accept or reject specific changes made by the collaborators. Once you accept the changes, they are copied over to the master draft (the original version) of the document.
How To Use Penflip’s Version Control And Revision History?
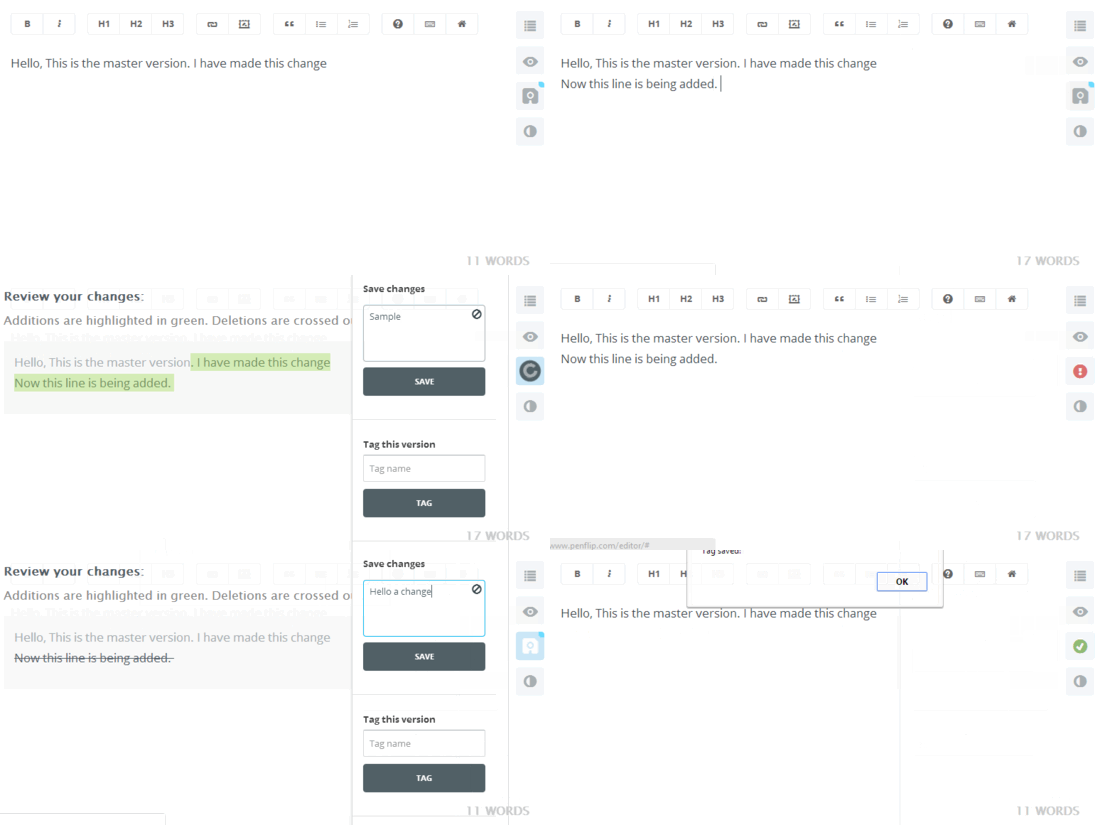
Penflip uses GitHub as a backend to provide robust built in version control and revision history features. This means that every time you make a change (addition, deletion etc.) to the master document, the change is automatically updated in the copies being edited by other users as well. Apart from that, version control lets you tag your document with version numbers after each edit. Any additions made to the document are highlighted in green, whereas any deletions are crossed out. To save the document after making any changes, all you have to do is click the save button on the right, and type in a description and tag.
Check out the following animated graphic, illustrating the above features:
As mentioned before, once the master version of the document is changed, the other collaborators get notified of the change via a popup as well. All they have to do to get the updated version is click the Get Updates button. Here’s a screenshot:
Conclusion
Penflip is quite a useful free online text editor. Apart from that, it has some handy collaborative features as well. The ability to share and collaborate on your documents, and accept/reject changes is great. Then there are powerful features like version control and revision history, which make Penflip a couple notches better than others. Do give this a try, and let me know your thoughts in the comments below
