This tutorial will explain how to make HTML5 banner for free. There are many software available which you can use to create normal banners for free. Apart from that, there are also dozens of applications available out there which you can use to create HTML5 banners, but most of them have limitations in the free version like you can only create a few banners, a watermark will be imprinted, limited number of views, and so on. But, what if you want to create unlimited HTML5 banners for free and also use them without any limitations. Well, then this tutorial will show a simple method to exactly do that.
There is a free software offered by Google called “Google Web Designer” which you can actually use to do that. It lets you easily create HTML5 banners and then use them wherever you want. There is no limit on the number of banners as well as usage. Creating a banner using this software is very easy as all you gotta do is create a blank banner, add objects to it, and then animate them.
How to Make HTML5 Banner for Free:
To explain how Google Web Designer can be used to create HTML5 banners, I will show you an example, with all the necessary steps I have used to create an HTML5 banner.
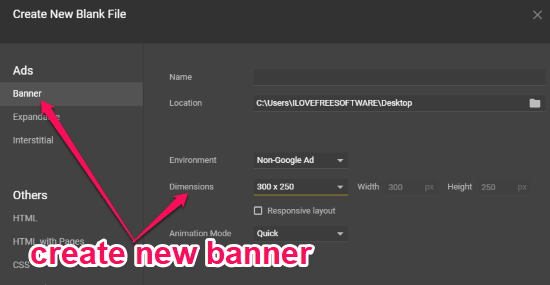
To get started, simply download and install Google Web Designer on your PC. The download link is given at the end of this tutorial. After that, open it up and then select “File → New” from the top menu. Then a popup window will appear and you would need to select “Banner” option on the left. When you do that, you will be able to choose the dimensions of the banner, environment, animation mode, etc.
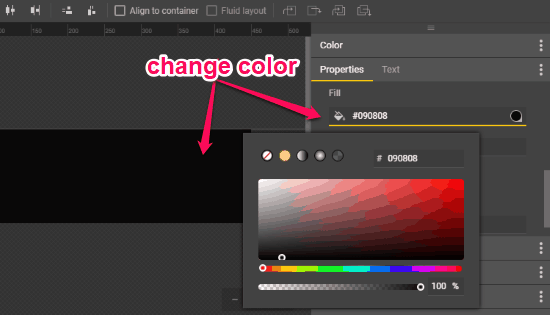
Once done, select “Ok” and the blank banner will open up in the editor. Now, you will see the set of editing tools on the left and other tabs on the right like Color, Properties, Components, CSS, etc. From the “Properties” tab, you will be able to change various aspects of the banner and the objects you add to it like the position, size, background color, etc.
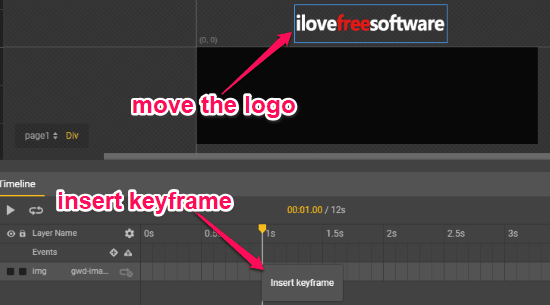
Now, let’s say you want to add your logo to the banner and animate it. For that, simply drag and drop the logo over the blank banner and then place it anywhere you want. If you want it to make an animated entry from the top, then place the logo at the top of the banner just by moving it and do the same for sideways. Then on the timeline, click on any point and insert a keyframe by right-clicking on the selected point.
After adding the keyframe, you would need to click on the starting point of the keyframe and then go to the “Properties” tab on the right. Then scroll down to the “Style” section and set the opacity level as “0”. After that, click on the end point of the keyframe and make sure to set the opacity level as “1”.

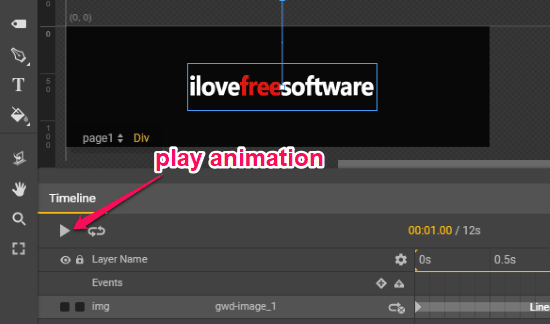
When you’re done with that, simply drag and move the logo to any position on the banner where you would like it to do an animated entry. Once you’re all set with that, the logo will become an animated object of the banner. This way, you can also add other images or text and then animate them. Now, simply click on the “Play” button on the timeline to play it on the editor.
You can also click on the “Preview” button at the top to directly open the HTML file via your browser. Now, you will be able to save the HTML5 banner as an “.HTML” file on your PC. To do that, click on the “File” menu and then use the “Save As” option.
Closing Words:
This is how you can make HTML5 banner using Google Web Designer. It makes it very easy and seamless task for you to create HTML5 banners with putting much effort. Personally, I like this software as it is completely free to use and you can create as many HTML5 banners as you want without any feature limitations.