This tutorial explains how to use Windows Subsystem for Android in Android Studio for app testing. Many people do not use the virtual device that Android Studio comes with due to lack of speed and responsiveness. But since Windows 11 now comes with built-in Android system, then why not use that? The problem is that Android Studio doesn’t recognize the underlying Android System by default. That is why in this post, I will mention steps to configure WSA to be used as debugging device in Android Studio.
In order to use the WSA in Android Studio, you just have to connect it to the host via platforms tools which Android Studio installs already. You just have to make sure that they are set in PATH environment variable and then you can connect WSA to Android Studio. After that, you can run apps directly in the WSA and it supports hot reloading as well. That means, it will automatically refresh the app when you make some changes to the code in the editor.
How to use Windows Subsystem for Android in Android Studio for App Testing?
Follow the steps below to enable WSA to be used as a device in Android Studio.
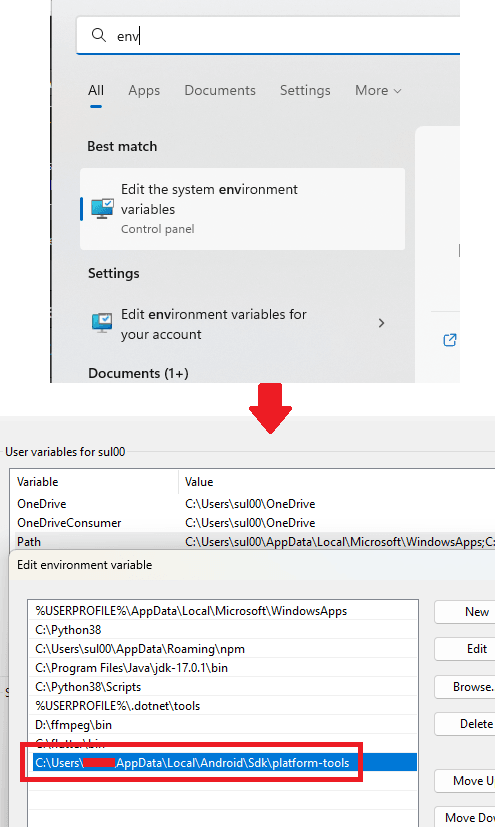
- Open the Environment Variable Editor by searching for it in the Start. And make sure that PATH variable is set to
C:\Users\Your_User_Name\AppData\Local\Android\Sdk\platform-tools.

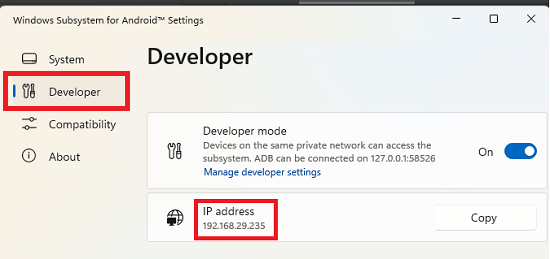
- Now, launch the Windows Subsystem for Android from the Start menu. After it opens, go to the Developer section and then tun on the developer mode. Next, you need to copy down the IP address that it shows there.

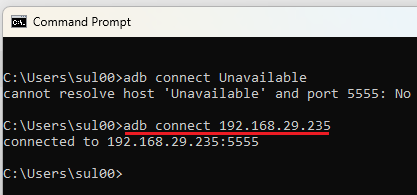
- Open command prompt or PowerShell. Type the command below, following the IP address of the Android system that you copied earlier.
adb connect IP_Address

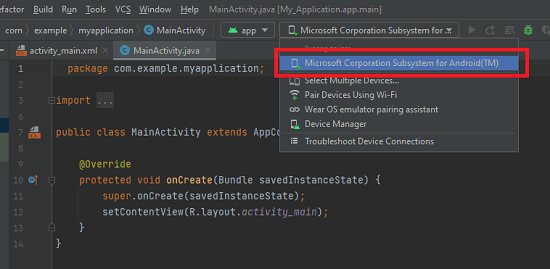
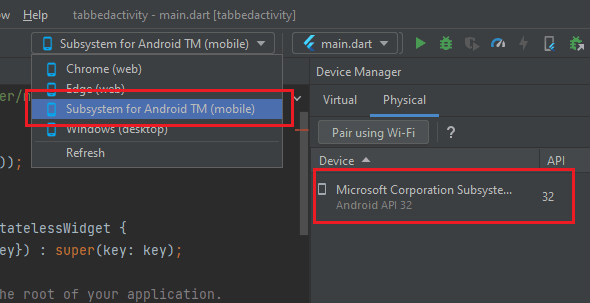
- After successful connection, you can simply open Android Studio. You will now notice that Windows Subsystem for Android will appear as a physical device. You can even select it for launching your app in debug mode for testing.

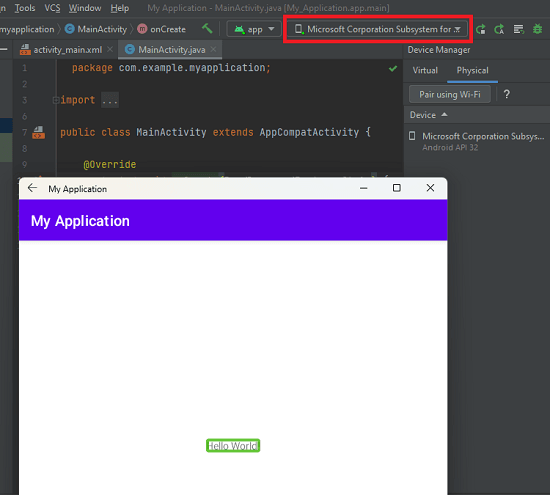
- So, try running the code. It will launch the app and then you can see it in action. It even supports hot reload for even Flutter apps.

In this way, you can use these simple steps to configure Windows Subsystem for Android to be used as a device in Android Studio. The process is simple; however, you will have to run the adb command every time you want to use it. You can even use it for Flutter app development as well.
If not Android Studio, then you can use it directly from the Flutter command line too. When you issue flutter devices command, it will show Windows Subsystem for Android there, given that you have already connected it via adb.
Final thoughts:
If you are struggling to use Android Subsystem of Windows to be used as a debugging device for your app development, then this simple tutorial will help you. All you have to do is just connect it via adb and then Android Studio will detect it automatically. However, you have to make sure that you connect it via adb that ships with the Android SDK that comes with Android Studio. Otherwise, it will not detect the Android Subsystem.