This tutorial details how to mark a file or folder as read only in Windows 10. Almost all of us use our computers for not just working, but also for storing and archiving important digital data. From family photos and assignments, to important projects and business plans, our computers act as a storehouse for anything and everything. Needles to say, there must be method(s) for ensuring not only the security of our files (how and by whom they are accessed), but also their integrity (so that the actual contents of the files are not changed, even mistakenly).
You’re in luck, my friends, as Windows 10 easily lets you mark files and folders as read only, so that no one except their original creator can make any changes to them. And it’s so simple, you won’t believe it. Read on to find out how to mark a file or folder as read only in Windows 10.

How To Mark A File Or Folder As Read Only In Windows 10?
“Read Only” is one of the basic access permissions that can be applied to files and folders in Windows, and this functionality has existed in almost all major previous versions of Windows as well. In the simplest of words, when a file or folder is marked with the “Read Only”, no one can make any changes to them, except for the creating user. Thus, the contents of the “Read Only” files and folders can only be “read”, not “modified.”
Note: Marking a file as read only is straightforward. However, when the same is effected to a folder, the folder itself isn’t made read only, but its contents are. Also, only the files that are currently in the folder are made read only. New files added to the folder after it has been marked as read only won’t have this attribute applied to them.
When it comes to applying the “Read Only” attribute, the process for both files and folders is completely identical. Here’s how to do it:
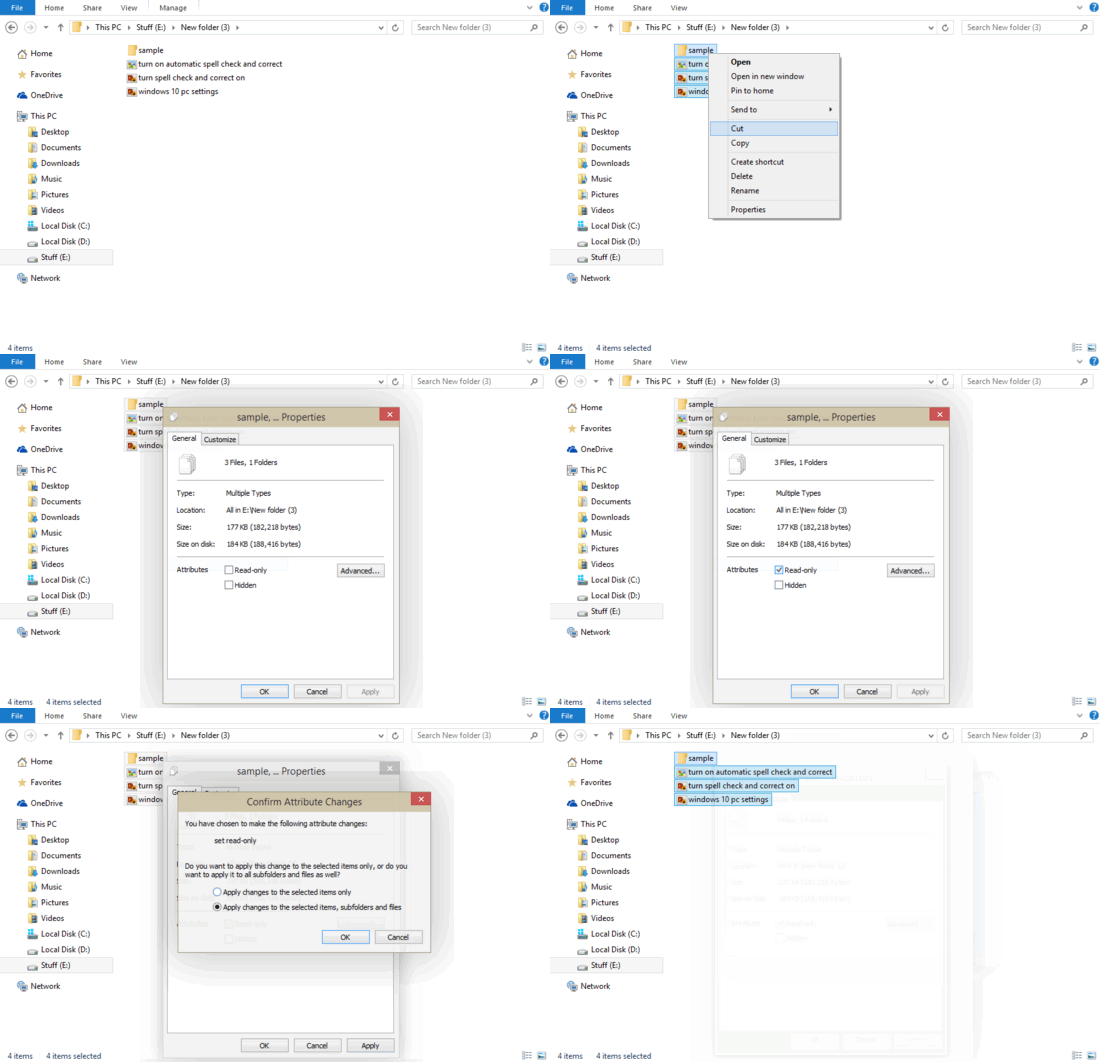
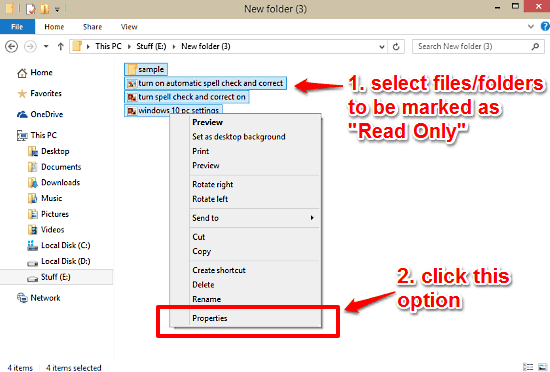
Step 1: Open up Windows Explorer, and navigate to the location files or/and folders that you want to mark as Read Only. Select one or more files/folders (this operation can be applied in batch mode), right click, and select Properties from the context menu.

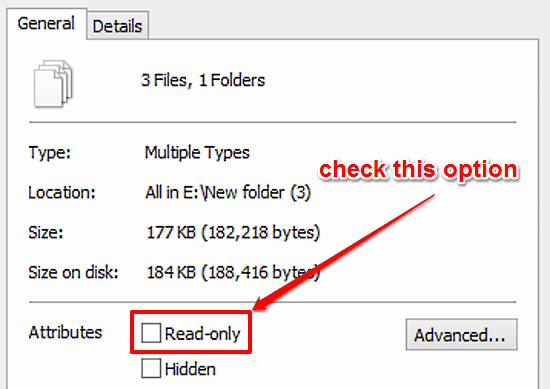
Step 2: From the tabbed Properties dialog box that pops up, click on the General tab, if it’s not activated by default. Under the Attributes section, click the checkmark against Read-only. Click Apply > OK. Check the screenshot below:

That’s it. All of the selected files and/or folders will now be marked as Read Only. Based on their number, this operation can take a while. Simple, right?
Also See: Create A New Music Playlist Directly From Windows Explorer In Windows 10
Conclusion
Our computers these days house so much important and valuable information, that ensuring its security and integrity becomes even more paramount. That’s because even an accidental modification to the contents of an important file can lead to data loss. That’s where setting them Read Only can come in really handy. Do give it a shot, and let me know your thoughts in the comments below.