Here is an easy tutorial that explains how to change screenshot output folder in Windows 8.
Windows 8 has added many new features to enhance the productivity. One of the useful feature of Windows 8 is that you can take screenshots and automatically saves it into the built-in Pictures folder of Windows 8. To take screenshot and automatically save it in the Pictures folder, you need to press “Windows Key + Prt Scr” from your keyboard. If you have created any folder named “Screenshots” in the Pictures folder, then by default the screenshot is saved in the that folder only.
However, you can change the output folder of the screenshot as per your preference. You can easily do that using Registry Editor. You don’t need to install any additional software for this.
Changing Windows 8 Screenshot Output Folder Using Registry:
To change the Windows 8 screenshot output folder, follow the instructions mentioned below:
Step 1: The very first thing that you need to do is open the Registry Editor. To open Registry Editor, open Run, by pressing Windows Key + R. Type regedit in the Run box and press Enter from the keyboard.

Step 2: In the registry editor, navigate to the FolderDescriptions by using the path mentioned below:
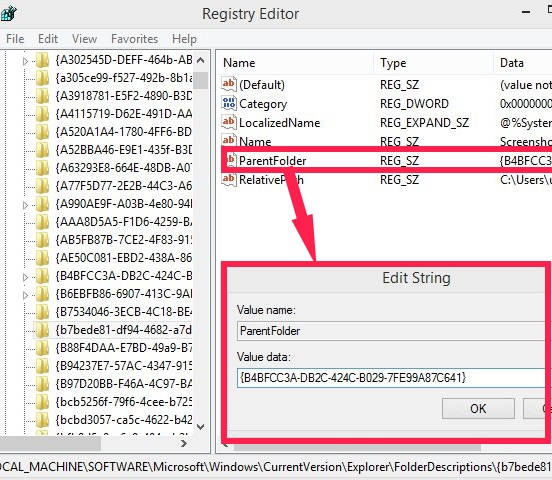
HKEY_LOCAL_MACHINE\SOFTWARE\Microsoft\Windows\CurrentVersion\Explorer\FolderDescriptions\{b7bede81-df94-4682-a7d8-57a52620b86f}
Click on the {b7bede81-df94-4682-a7d8-57a52620b86f} folder. This folder contains key and DWORD for Windows 8 Screenshot folder. On the right panel, you will find different Strings: Name, ParentFolder, RelativePath, etc.
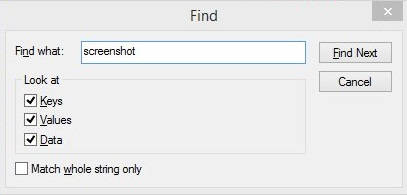
If you find it difficult to look for the above mentioned folder, then you can even search for it in Registry. To search, press F3 button from your keyboard, and type “Screenshot” in the search box. In few seconds, it will lead you to the same folder.
Step 3: Now you can change the output folder in two different ways:
- By adding the folder GUID String of that destination folder, in the ParentFolder.
- By adding custom path in RelativePath.
Let me explain both of these:
Changing Windows 8 Screenshot Output Folder By Adding Folder GUID String In ParentFolder:
Click on the ParentFolder. By default, it contains the GUID of Pictures folder. Add the GUID String of any folder you want as per your preference.
For example: If you want to save the picture to the Desktop, use the GUID “{B4BFCC3A-DB2C-424C-B029-7FE99A87C641}” (without quotes) in “Value data” box and then click on OK.
A list of some common folder path GUID is given below, copy and paste any of them to save the screenshot in the same folder.
- Desktop:
{B4BFCC3A-DB2C-424C-B029-7FE99A87C641} - Favorites:
{1777F761-68AD-4D8A-87BD-30B759FA33DD} - Music:
{4BD8D571-6D19-48D3-BE97-422220080E43} - Downloads:
{374DE290-123F-4565-9164-39C4925E467B} - Documents:
{7B0DB17D-9CD2-4A93-9733-46CC89022E7C}
Unfortunately, I wasn’t able to find any easy way to find GUID path of any folder.. be assured that I am working hard to find one :)
Changing Windows 8 Screenshot Output Folder By Adding Custom Path In Relative Folder:
As finding GUID for specific folder is not that so easy. You can add custom path of the folder in which you want to save the screenshot.
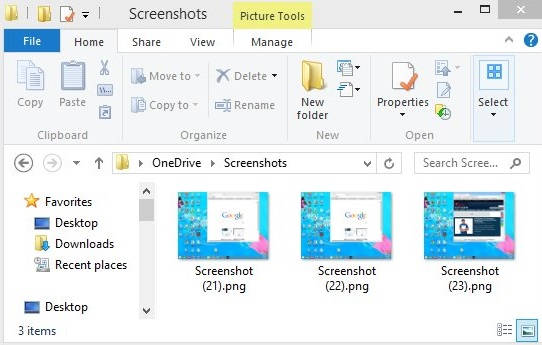
The best thing I like is that, you can even add the OneDrive or Dropbox path and the screenshot will be saved directly on the specified folder on the OneDrive.
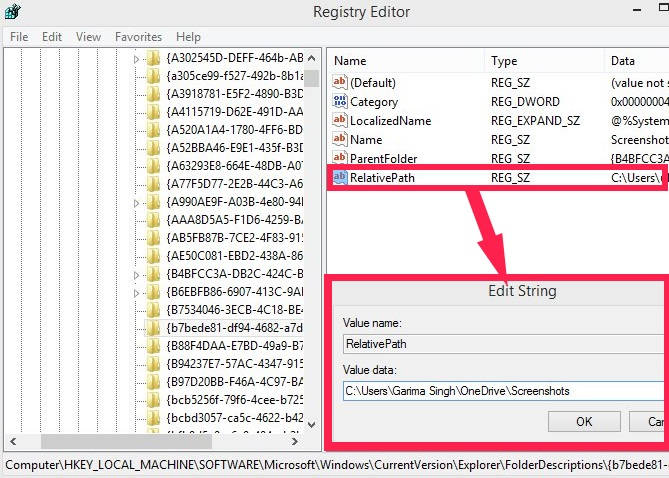
To add custom path, click on the RelativePath, and in value data, type the full path of the folder.
For Example: If you want to save the screenshots on the OneDrive, type the full path of the folder:
C:\Users\User_Name\OneDrive\Screenshots
Instead of User_Name, type the User Name of your PC. And manually create a Screenshots (or any other name) folder to save the screenshots in that folder only.
Change the path to any other folder path as per your preference.
From now onwards, the screenshots capture by Windows Key + Prt Scr will be saved in the specified folder only. The screenshots are saved in PNG format.