This tutorial explains how to write protect USB drive.
Making your USB drive (flash drive or Pendrive) write protected has multiple benefits. Other people can’t modify or edit the file contents, delete files or folders, move your data, format your USB drive, viruses and malware won’t attack (if you connect your Pendrive to infected PC) and more. So when you have to share your flash drive with someone, it’s better to set write protection to prevent any data loss.
In this tutorial, I have covered 3 different ways to add write protection to your flash drive. First two methods don’t need any third-party tool and the third way to write protect USB drive is by using a free software. You can also disable write protection whenever needed.
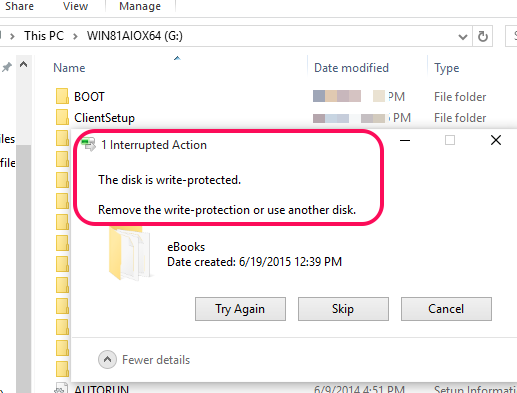
In the screenshot above, you can see the message when someone or you will try to delete or modify data available in a write protected USB drive.
Why Should You Write Protect Your USB Drive?
Although I have already mentioned the benefits of setting up the write protection, but there is an incidence which I want to share with you guys. This morning, one of my colleagues was arguing with another colleague that you have deleted some important data and infected my flash drive. My second colleague was saying “I’m innocent”, but first colleague was blaming him again and again. So, I thought it would be great to help you guys and share an article on how to write protect USB drive. If you don’t want to get stuck in such kind of situation and have to protect your data before sharing your Pendrive, it’s really important to set write protection.
Now let’s start with the very first method to set write protection in USB drive.
1. Write Protect USB Drive using Command Prompt:
In this method, you need to execute some simple commands and your flash drive will write protect. Steps are as follows:
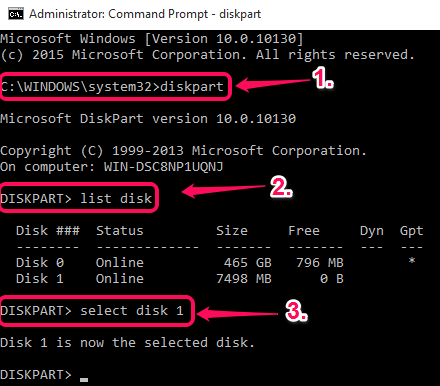
Step 1: Launch Command Prompt window as administrator, type ‘diskpart‘, and press Enter.
Step 2: Now you have to execute ‘list disk‘ command. It will help to show your connected Pendrive. It must be Disk 1. See the screenshot below:
Step 3: Type ‘select disk 1‘ to chose that disk and execute the command. Your disk is now selected.
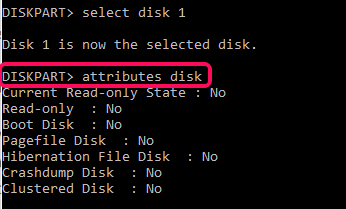
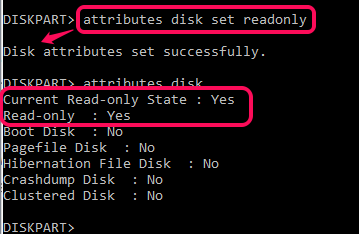
Step 4: This command is used to check the attributes of your flash drive. For this, type ‘attributes disk‘ and press Enter. You will see Read-only status, Boot disk, Current Read-only State, and other properties.
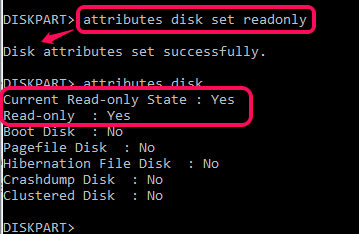
Step 5: This is the most important step which will help you to enable the write protection. Type ‘attributes disk set readonly‘ and execute this command.
Your USB drive is write protected now. You can check the status by executing the attributes disk command. Now, whenever someone will try to modify, add, or remove the data from your USB drive, he/she will get an error.
Step 6: This step is needed to undo the changes. Repeat step 1 to step 3 and then execute attributes disk clear readonly. It will remove the write protection.
2. Write Protect USB Drive using Registry Editor:
Steps are as follows:
Step 1: Open Windows start menu, type Regedit in Run box, and execute it. It will open Registry Editor window.
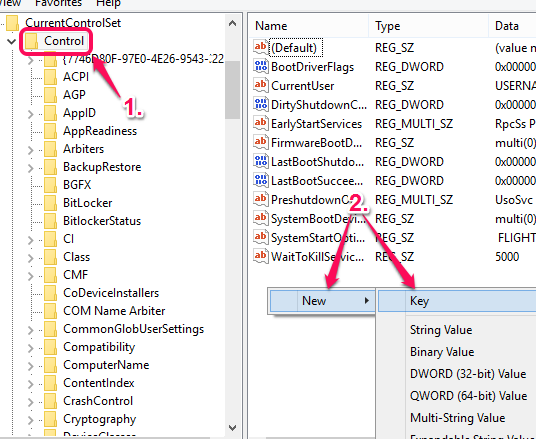
Step 2: Now access Control folder (or say key) using these steps: HKEY_LOCAL_MACHINE–>SYSTEM–>CurrentControlSet–>Control.
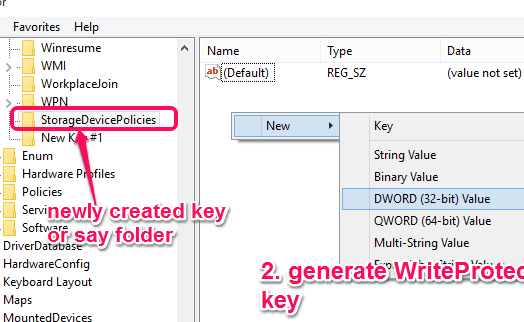
Step 3: After accessing that folder, you need to create a new key with the name ‘StorageDevicePolicies‘. For this, right-click on the right part and click on Key using New option. Now create your folder. See the screenshot mentioned above.
Step 4: Select that folder and generate a new key with the name, WriteProtect, under that folder using the right section. Right click to access New option and select ‘DWORD (32-bit) Value‘. It will help to create WriteProtect key.
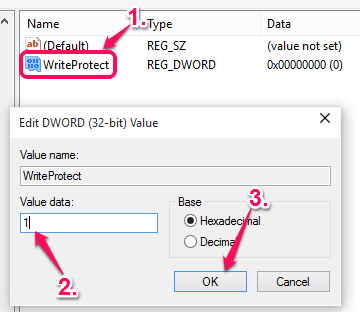
Step 5: When that key is created, double-click on that key, and a pop-up will open. In that pop-up, set Value data to 1 and press OK button.
It will set write protection to your USB drive.
Step 6: This step is handy when you have to disable the write protection. Follow step 1 to step 5 and set Value data to 0.
3. Write Protect USB Drive using Some Free Software:
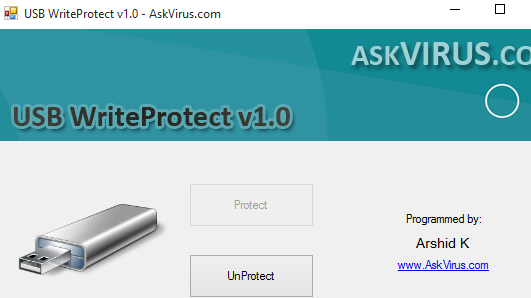
There are many free software which you can use to write protect USB drive. One of those software is USB WriteProtect. Install this software and launch it. After this, you need to follow two basic steps:
Step 1: Insert your flash drive. After this, tap on Protect button available on its interface. It will immediately set write protection to your USB drive. Actually, such software help to skip the manual work you need to create WriteProtect key in Registry Editor.
Step 2: Whenever you need to disable the protection, simply press UnProtect button.
Conclusion:
All the above-mentioned methods are so easy to use and great to set the write protection to your USB drive. It is completely your choice which way you want to use. I will personally prefer as well as recommend Command Prompt method which is the safest way.
