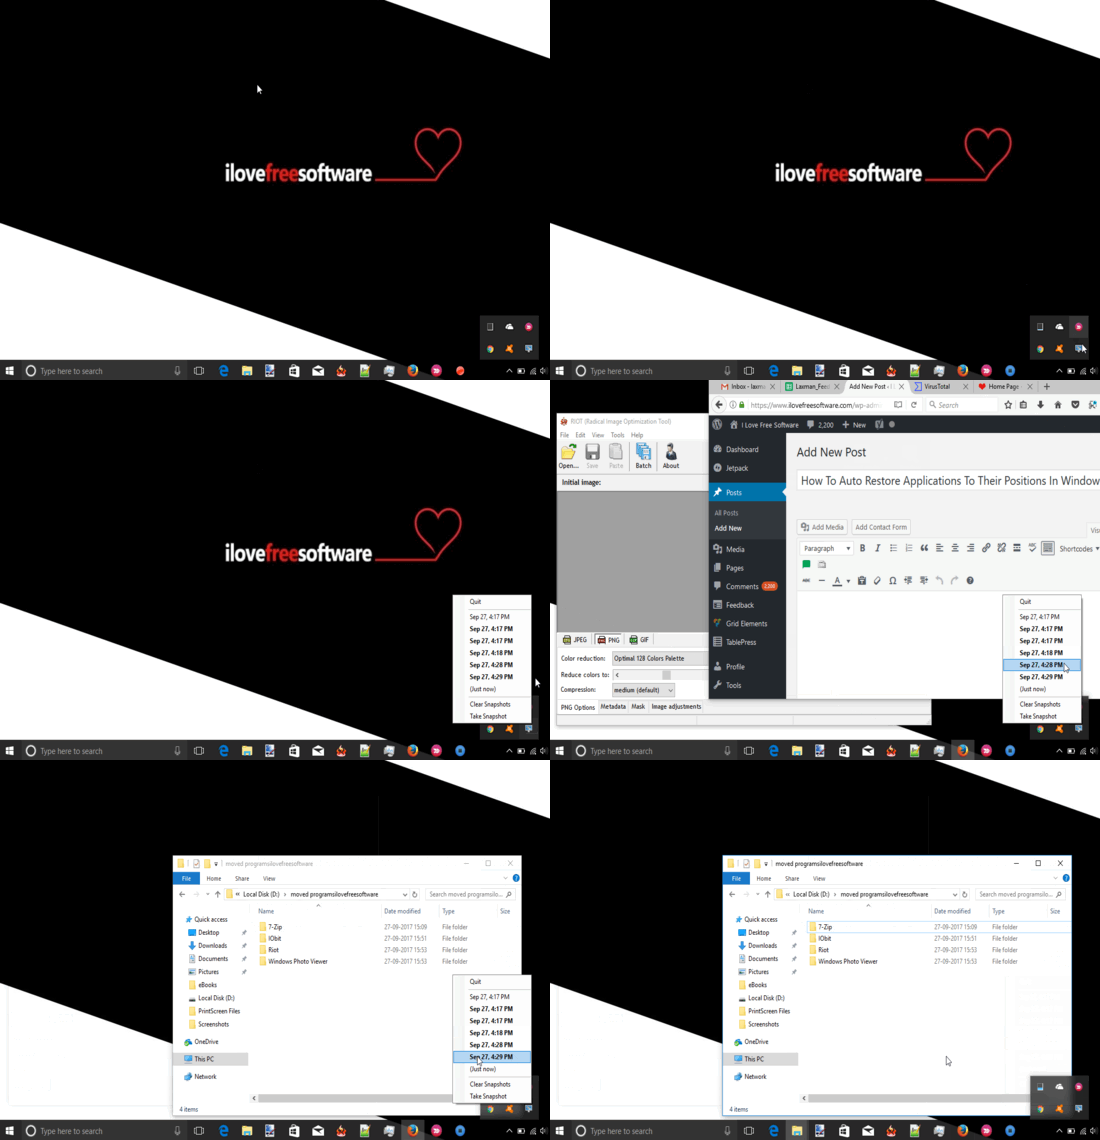
This tutorial covers how to automatically restore applications to their positions in Windows 10. That means when you have minimized, maximized, resized or move an application to some other position on desktop screen, you can bring them back to their original or previous positions automatically. No need to manually restore or resize those applications to fit to the same positions on your Windows 10 desktop.
To automatically restore running applications, folders, and other programs to their positions on Windows 10 desktop screen, I’m using a free software, which is known as “WindowsLayoutSnapshot“. This software lets you take the snapshot of opened windows to remember their positions. After that, you can use that snapshot to automatically restore all those windows to the same layout, whenever needed. You can take multiple snapshots and use any of those snapshots to restore opened applications to their positions. This software also takes snapshots after every 30 minutes by itself, but if you don’t want to wait that much longer, then you can simply take snapshots yourself anytime.

The recording above must have given you a clear idea about this software. As you can see, I have taken multiple snapshots to save layouts of opened applications. And hovering the mouse cursor over a particular snapshot is restoring the opened applications on desktop screen automatically.
Do note this software helps to restore applications as long as they are opened. When you close some application and launch it again, then you need to take the snapshot again to remember the position of that particular application.
How To Automatically Restore Opened Applications To Their Positions In Windows 10?
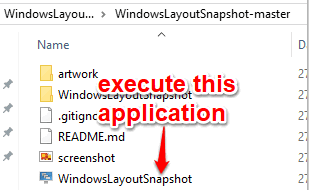
Step 1: Download zip file of WindowsLayoutSnapshot. Extract that zip and then double-click on “WindowsLayoutSnapshot” application. The software will start running in the system tray and automatically take a snapshot of running applications.

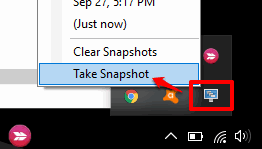
Step 2: To save layout of opened applications manually, you can click on the system tray icon of this software and use “Take snapshot” option. This will immediately take snapshot or save layout of all the opened folders, files, and applications. It would be better, had this software come with hotkey support to take the snapshot, but there is no such feature.

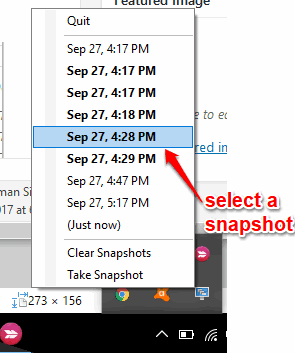
For each snapshot, a timestamp is added automatically to help you remember which snapshot is associated with which layout. The snapshots taken by you are shown in bold and the snapshot taken by software software are visible in normal text.
Step 3: Now whenever you have to restore applications to their positions, you can click on the system tray icon of this software and you will see the list of snapshots. You can place mouse cursor on a particular snapshot option and that particular layout of opened applications will be restored.

I wasn’t able to find out if there is some limit to store snapshots. During my testing, I took 20 snapshots and the list of all those snapshots was visible to me.
Other interesting tutorials for you: Add Specific Store Apps To Launch At Startup and How To Backup and Restore Quick Actions In Windows 10 Action Center.
The Conclusion:
This software is simply awesome when you are working with a lot of applications during a particular Windows session. Instead of manually resizing the applications and adjusting their positions on your Windows 10 desktop screen, again and again, this software comes in handy. It will save your time by remembering the positions of running applications and help you restore them to their respective positions.