This short tutorial explains how to disable network selection UI (that appears on Sign-in window) in your Windows 8 PC.
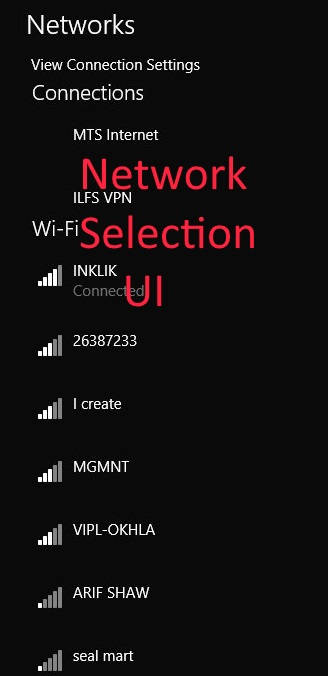
Windows 8 has added many new feature related to Network. One of that is, any user can easily change or disconnect the Network of the Windows 8 PC, from the sign-in interface as well. That means before signing into the PC, the users can change the Network or can even disconnect it.
However, you can easily stop various users from disabling the Network Selection UI from the Sign in window, so that no user can change the Network connection, before signing in. Disabling the network selection will restrict users from connecting and disconnecting from the specified connected network.
There are two different ways to do it.
Method 1: Disable Network Selection UI In Windows 8 Using Registry Editor
Step 1: Open the Registry Editor. Use regedit in the Run box to open it.
Step 2: Now, navigate to System key, by using the below path:
HKEY_LOCAL_MACHINE\SOFTWARE\Policies\Microsoft\Windows\System
Click on System.
Step 3: Right tap on the right side of the Editor, and then click on New, and then on DWORD (32-bit value).
Name the DWORD as “DontDisplayNetworkSelectionUI” (without quotes).
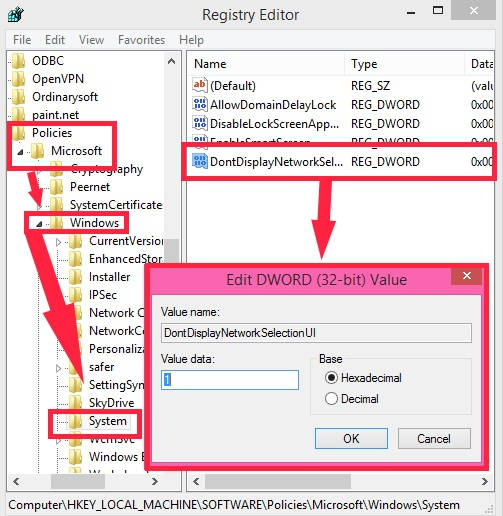
Double tap on DWORD, and then change the Data Value from 0 to 1.
Now, close the Registry Editor. Sign-out, and then sign-in again to apply the changes.
Method 2: Disable Network Selection UI In Windows 8 Using Group Policy
The second option is using Group Policy Editor.
Step 1: Firstly, open Group Policy Editor by using gpedit in the Run Box.
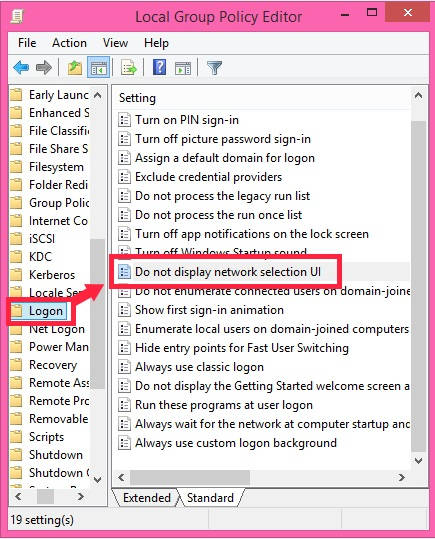
Step 2: In the Editor, navigate to Logon by using below path:
Local Computer Policy > Computer Configuration > Administrative Templates > System > Logon

Click on Logon. You will see a list of settings on the right panel of the Editor.
Step 3: Double tap on the setting that says “Do not display network selection UI”.
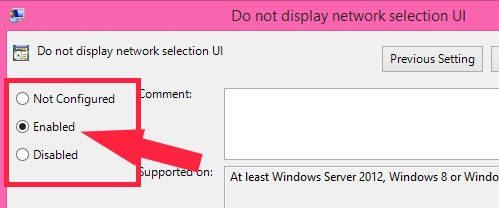
Step 4: In the appeared window, click on the radio button that says “Enabled”. Click on Apply button, and then on OK.
Step 5: Close the Editor. Now, to update the changes that you have done in the Group Policy Editor, use gpupdate /force in the Run box.
From now onwards, no user will be able to change the current status of the network, as the Network icon is no longer available.
Also learn, how to make Windows 8 PC a Wifi Hotspot to Share Internet.