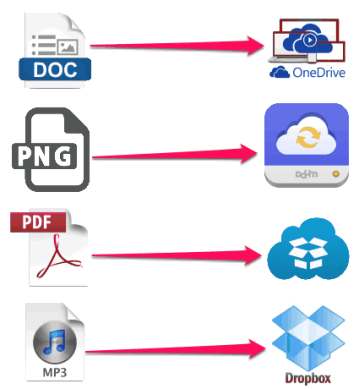
LetMeSync is a free software that lets you selectively sync files on your PC with different cloud services. Using this software, you can specify that your photos should be synced using a particular cloud service, documents with another, music with yet another cloud service, and rest of the files with a fourth one. Based on those rules, it will automatically sync relevant files with the respective cloud storage services.
LetMeSync supports many of the popular cloud storage services, like: OneDrive, Dropbox, Box, SugarSync, etc. It does not supports Amazon Drive and Google Drive at the moment (but it does have a feature that lets you sync files using those services as well).
Sounds pretty interesting? Keep reading to find more.
How To Sync Different Types of Files with Different Cloud Storage Services:
Nowadays, there are too many free cloud storage services available out there. All of them come with a limited amount of free storage, that is good enough for casual use, but you quickly run out of space if you try to store a lot of files.
Also, each cloud service is suitable for different type of files. For example, I personally prefer to store my documents using Google Drive, photos and videos using Flickr, and rest of the files using OneDrive.
I personally always feel a need to have a software that can automatically control that which cloud storage service is used for which type of file, so that I don’t have to manually copy relevant files to different folders of all the cloud storage services that I use.
That is where LetMeSync comes into picture.
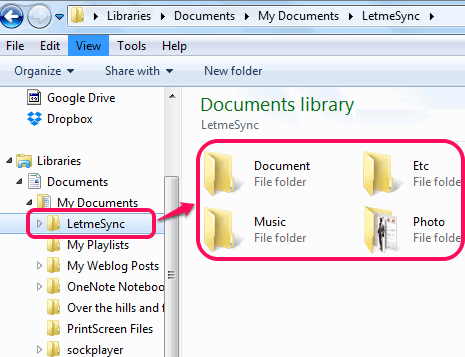
When you install LetMeSync on your PC, it create four folders: Documents, Photo, Music, Etc.
Going ahead, you need to use all these folders to store all the files that you want to sync with different cloud storage services. Best part is that you can even use these folders to store those files as well that you do not want to sync with any cloud storage service.
Now, what you do with LetMeSync is specify that which cloud service should be used for syncing which type of file. For example, if you want files in your Document folder to be synced using Google Drive, you can do that. Further, you can specify Photo folder to by synced with another cloud storage service, and so on. In all, you can specify a different cloud storage service for each of the folders that LetMeSync created (of course, you can specify same cloud service to be used for all as well).
Another interesting thing that LetMeSync does is it lets you specify which file types should be synced. For example, you might use your music folder to store both music as well as video files, but you want only your music files to be backed up. In that case, you can specify that only files of extension mp3 should be synced, and all other files should be completely ignored. This will ensure that whenever you create a MP3 file in Music folder of LetMeSync, it will be synced with cloud storage service that you specified, while all other file types would be ignored.
This is how you can sync different type of files with different cloud storage services, without a need to separately copy files to folder of each cloud service.
Do note that LetMeSync requires you to have desktop clients of all the cloud services to be installed on your PC to work. Why? Next section will make it clear.
How Exactly LetMeSync works:
The way LetMeSync achieves all that is mentioned above is pretty simple. As I mentioned above, it requires you to install desktop clients of all the cloud services that you want to use. So, if you want to sync files with Dropbox and OneDrive, you need to have both installed.
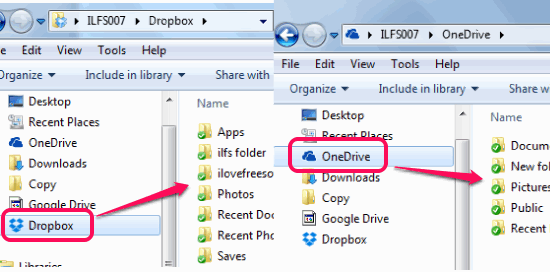
The way these cloud services work is that they create their folders on your PC. Anything that is copied to those folders is automatically synced.
So, if you have both Dropbox and OneDrive installed, there will be separate folders created for each.
LetMeSync makes use of this feature. When you tell LetMeSync that all MP3 files should be synced to Dropbox, it keeps monitoring its own Music folder for any MP3 file that is created or modified. Whenever it detects any activity, it will simply copy that file to a Music folder (that it creates) in Dropbox, from where Dropbox will sync that file to cloud.
So, all LetMeSync does is it monitors folders for file types that you specified and then move those files to relevant folders of the cloud storage service that you chose.
The premise is definitely pretty simple, and you can actually use any other clever folder syncing software as well for this, but LetMeSync makes the process pretty intuitive and easy to handle.
Now that you know how it works, let’s go into bit more details about its installation and setup.
How to Install and Configure LetMeSync:
Its pretty easy to use LetMeSync. Just use the download link that I have provided at the end of the review to download this software. Install it as you would install any other software. Once installation is done, you will notice that it creates a new folder called “LetMeSync” in your “My Documents” folder. Under this folder, there are four sub-folders: Document, Etc, Photo, Music. These are the folders that LetMeSync monitors for any new files or file changes, so make sure you use these folders to store all the files that you want to be synced with your cloud storage services.
After installation, it asks you to create an account, to be able to use this software. You need to provide your email address to create the account.
Once done, you can start setting it up.
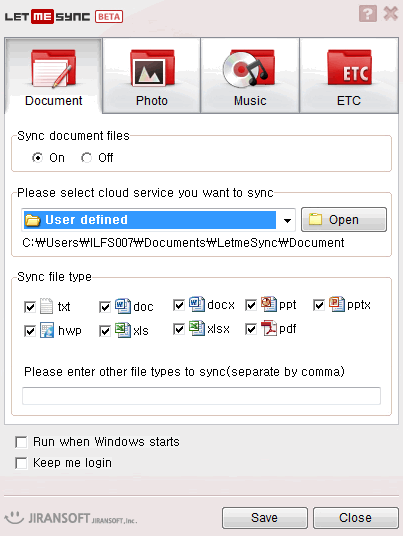
LetMeSync creates an icon in system tray. Just right-click on that icon and click “Open” to open the main interface of LetMeSync.
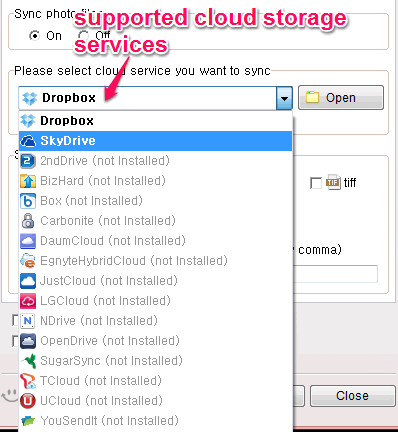
In this, you will see there are four tabs; each corresponding to a folder of LetMeSync. When you click on any tab, it gives a drop-down from where you can select the cloud storage service that you want to use to backup files of that folder. Only those cloud storage services will be enabled that you have installed on your PC. Choose any of those cloud storage service.
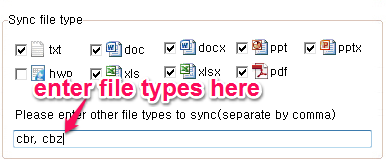
Below that, it shows common file types. You can select any of the file types that you want to sync. For example, if you want to sync only doc and docx files and don’t want to sync any other file, then you can select just those file types, and unselect others.
In addition to that, if you want to sync a file type that is not mentioned in the list, you can manually specify that in text box that appears below.
Do these settings for all the folders and click on Save.
That is it. Now you have configured LetMeSync to selectively sync files with different cloud storage services. When you create or modify any file in any folder of LetMeSync, it will automatically sync that to the folder of cloud storage service that you specified.
Pretty easy, isn’t it?
List of Cloud Storage Services Supported by LetMeSync:
At the time of writing this review, LetMeSync supports following cloud storage services:
Dropbox, OneDrive, 2ndDrive, BizHard, Box, Carbonite, DaumCloud, EgnyteHybridCloud, JustCloud, LGCloud, NDrive, OpenDrive, SugarSync, TCloud, UCloud, YouSendIt, ZipCloud.
In addition to this, it also lets you specify your own folder where any file should be synced. This feature lets you use it with other cloud storage services as well. For example, if you want to use it with Google Drive, you can specify Google Drive’s folder as the location to which your documents should be synced.
Drawbacks / Limitations of LetMeSync:
LetMeSync does comes with its fair share of limitations as well:
- You cannot specify different multiple cloud storage services to use for different file types in same folder. For example, if you store both music and video files in Music folder and want Music files to sync with Dropbox and Video files to sync with OneDrive, then that cannot be done. This is because LetMeSync lets you choose only one cloud storage service for each folder.
- The syncing is one way only. So, if you create or modify any file in LetMeSync folder, it will be synced with the relevant folder of the cloud service. However, if you make any file directly in the folder of cloud storage service, then that file will not be synced back with the folder of LetMeSync. This limitation will become particularly important if you often access your cloud storage files from some other PC, modify them, and upload them back to cloud storage service (this is what the cloud service is for, isn’t it?), then those files will by synced to your local folder of that cloud storage service by that service automatically; but LetMeSync will not sync that to its own folder. So, the file that you have in LetMeSync folder will be different than the one that you have in cloud storage or even your local folder of that cloud storage.
- And I really don’t like the fact that I need to have desktop clients of all the cloud services that I want to use to be installed on my PC. I really wish it could directly upload to cloud of those services (though, I am not sure if that is technically even possible or not).
My Opinion of LetMeSync:
I really like the purpose that LetMeSync tries to achieve, and the interface is also pretty easy to use. However, I am pretty disappointed with the limitations that I noted above, especially the absence of two-way sync. Just because of that limitation, it is not a viable solution for me. But in case you do not really edit the files once they have moved to cloud, then you can definitely try LetMeSync.
What do you think of LetMeSync? Let me know in comments below.
