This tutorial explains how to remove background from a photo in MS PowerPoint. This is a built-in feature of Microsoft PowerPoint. It’s gonna help you a lot when you want to remove image background present in an already saved presentation or when you are creating a new presentation and want to insert some picture but don’t want to keep its background. You will be able to remove photo background in PowerPoint by adding marks or points to the desired area in that particular photo. After that, you can keep and remove those marks and the rest of the items will remain in the photo. As a result, you are able to remove photo background within PowerPoint directly. No need to use some add-in or follow complicated steps.
This tutorial with step by step process will help you remove background from an image in Microsoft PowerPoint with ease. There are some very good photo background remover websites and software also present but if you want to do the same directly in PowerPoint, then this tutorial is helpful.

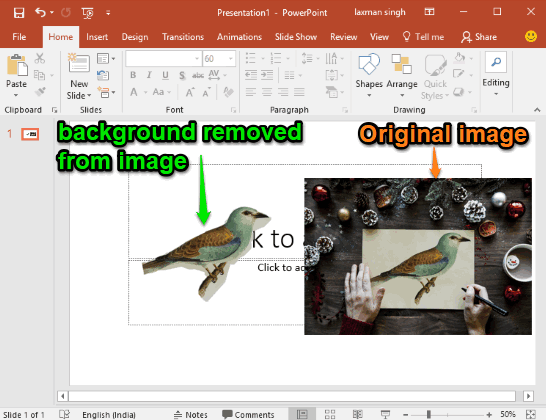
In the image above, you can see the background removed from a photo in Microsoft PowerPoint. If the output doesn’t come as expected, then you can do further changes and add points to keep and remove them from the photo. You can make the output as good as you want but it will need a bit time.
Note: I have tested this feature in MS PowerPoint 2016. It is also available in PowerPoint 2013 and perhaps lower version also. The same feature is available in Microsoft Word as well.
How To Remove Background from A Photo In Microsoft PowerPoint?
Step 1: Open MS PowerPoint and a presentation. Add some image or select a photo available in the presentation. You can also use free Pixabay add-in for PowerPoint to search and add images from Pixabay directly within PowerPoint presentation.

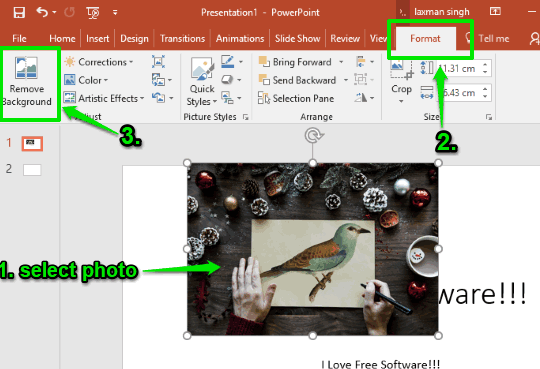
Step 2: After selecting the image, access “Format” menu available in the Ribbon menu of PowerPoint. There you will see “Remove Background” option. Select that option.

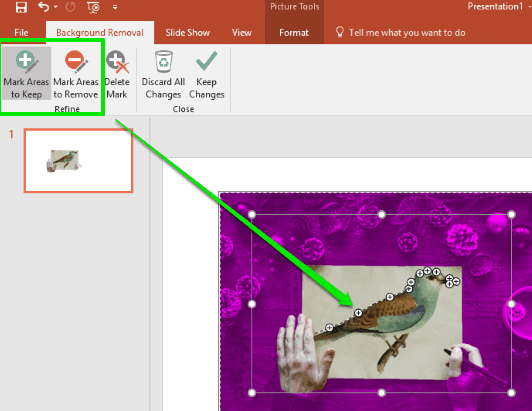
Step 3: Now you will see two main options “Mark Areas To Keep” and “Mark Areas To Remove“. Using the first option, you can add points with “+” buttons to keep the selected areas in the image and using the second option you can add points with “–” buttons to remove such areas from the image.

You can also delete a mark if added by mistake and delete all the added marks.
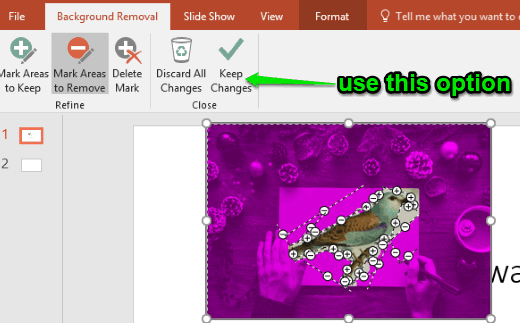
Step 4: When you have marked the areas, click the “Keep changes” option. It will process the image and then remove those areas.

If the output looks nice, it’s well and good. Otherwise, you can again select the image and mark areas to get the output as expected.
The Conclusion:
This is an interesting feature of Microsoft PowerPoint to remove background from a photo. During my testing, the output came satisfactory with little efforts. And I believe it will also help you do the same. Try this native feature of Microsoft PowerPoint and remove background from images.