Windows systems typically display a list of the Wi-Fi networks accessible in your vicinity. If there are numerous access points nearby, your available wireless network list may be populated with many SSIDs. In such instances, it can take some time to locate the specific target Wi-Fi network and establish a connection with it. Furthermore, network administrators might wish to restrict users from connecting to particular SSIDs. This ensures that devices within a company’s premises connect exclusively to the official network.
Deleting specific or all available networks from your network profiles can be achieved by executing specific commands in the administrator command prompt. However, this method can be intricate and difficult. Windows lacks a graphical user interface to enable you to hide selected Wi-Fi networks.
In this article we will be exploring a very simple portable freeware for Windows called Wi-Fi Filter Tool to simplify this process and create a whitelist of the Wi-Fi connections that you want.
How it Works:
1. Click on this link to download this Wi-Fi Filter Tool. After downloading the zip file you will have to unzip the archive and run the correct version (x96 or x64) depending on your operating system.
2. Click on the ‘down arrow’ next to the drop-down list, select the required SSID and then click on the ‘+’ sign towards the right. Alternatively, you can enter the required SSID in the textbox. You must remember that the drop-down list only appears when you are connected to a Wi-Fi network.

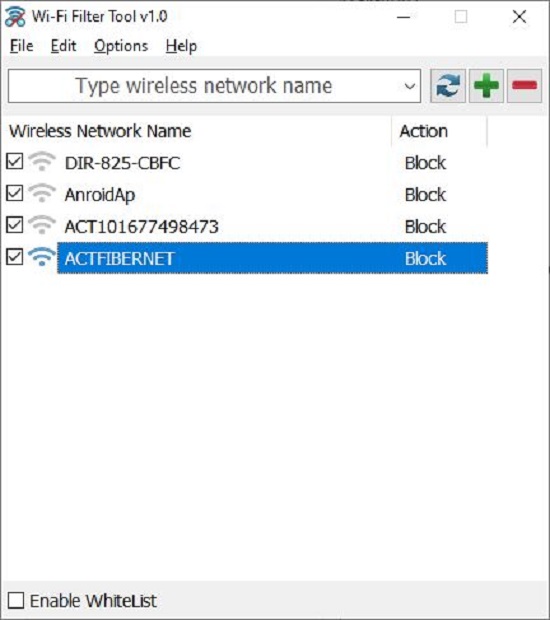
3. This will remove the SSID from the list of available Wi-Fi networks. Repeat the same process to remove all the SSIDs that you do not want to appear in the available wireless network list.
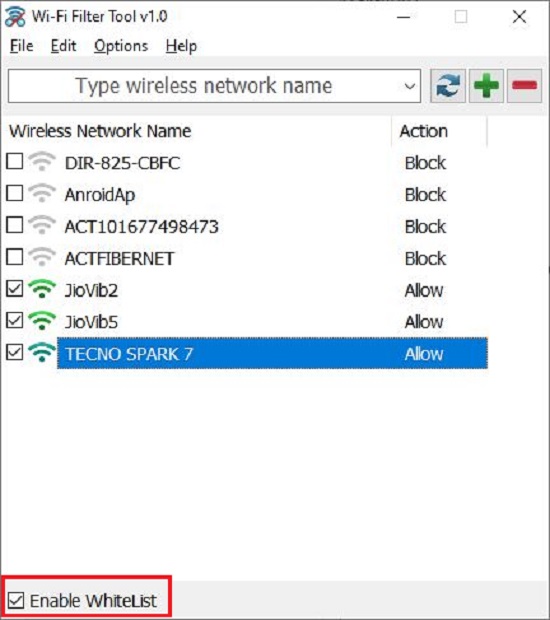
4. If you activate the ‘Enable Whitelist’ checkbox at the bottom left, only the SSID names which you have allowed will appear in the available wireless network list.
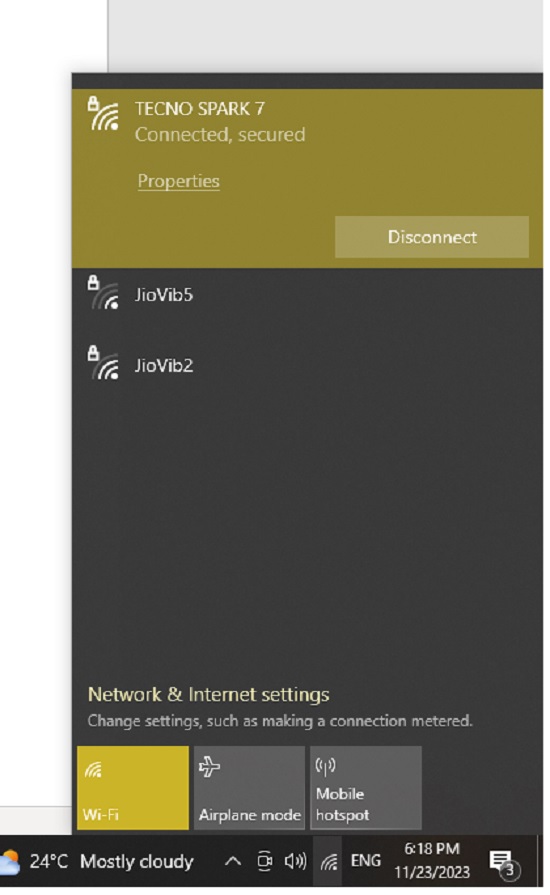
5. Now, examine your list of accessible Wi-Fi networks, and you will observe a clean list showing only the specified networks, without any additional neighboring wireless networks.
6. You can click on File > Save your Setting to save your configuration and avoid reorganizing the list each time. You can also restart the Wi-Fi service from the ‘File’ menu.
Closing Comments:
The Wi-Fi Filter tool allows you to select the SSIDs that appear in the list of available wireless networks on Windows, enabling the exclusion of unnecessary ones. This simplifies the process of choosing your Wi-Fi network and assists companies in compelling their employees to connect solely to the official network within the premises.
Click here to download Wi-Fi Filter Tool.
If you wish to learn how to remove selected SSIDs from the list of available wireless networks in Windows from the command line interface, click here.