GHOST which is short for Generative High-fidelity One Shot Transfer is an open-source project on GitHub that aims to swap faces in photos and videos. In this post, I will show you the face swapper module of this project to replace faces in photos using AI. It is completely free to use and you can run it online in Google Colab and I will show you how.
Basically, after you set it up in Google Colab, you only have to feed it source and target image. It will analyze the face in the source image and replace the face in the target image with it. It is fast and face swapping in photos only takes just a few seconds. Apart from Google Colab, you can also run it offline on your PC, if you know how to run Python ML projects.
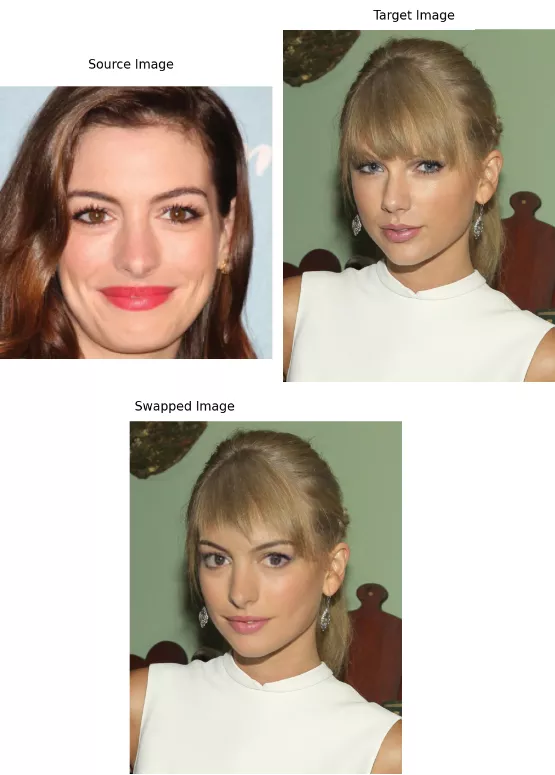
We have covered online face swapper tools before but nothing like GHOST. Those online tools do not produce a very high-quality result for free. Also, they add their own watermark as well. But GHOST project not only generates high quality results but can also generate images in full resolution. Also, there is no watermark in the output image. To see what it can do, just see the result below that it generated my case.
How to Swap Faces in Photos using AI in Google Colab?
Even though there is only codebase on GitHub; you can still easily run it. Even if you have never done coding, you will be able to easily run it in Colab as I have laid out the simple instructions below.
So, follow these instructions to set up GHOST on Google Colab.
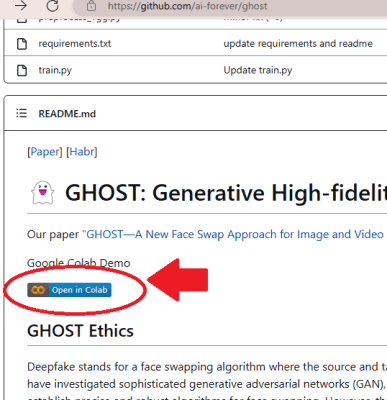
- Go to the GitHub repository of GHOST and then find the link to the Google Colab Notebook. It is right there, and you just click on it to open it. Make sure that you are signed into your Google account.

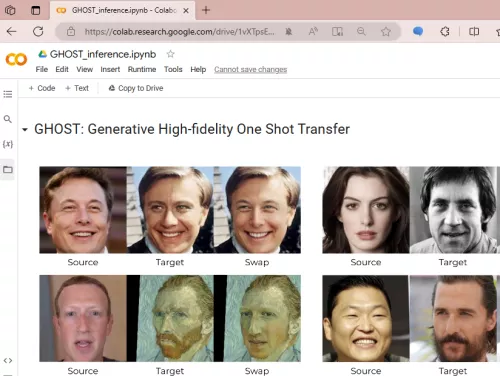
- The GHOST notebook will now open in Google Colab and looks like this.

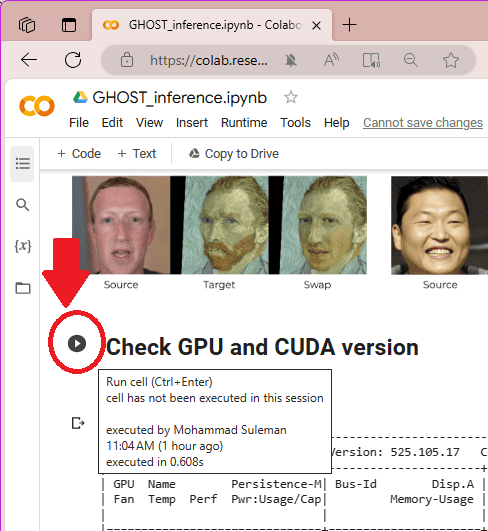
- Now, what you have to do is run each cell of the notebook one by one. There is a play button attached to each cell, so just keep clicking on it. But you have to wait till the code in each cell finishes running.

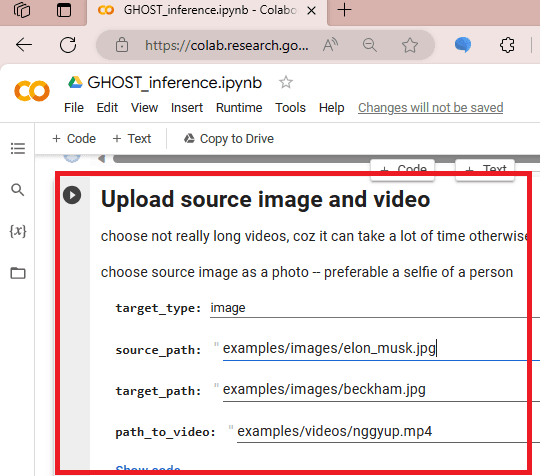
- Stop when you reach the cell where you have to upload the images. Do not run this cell.

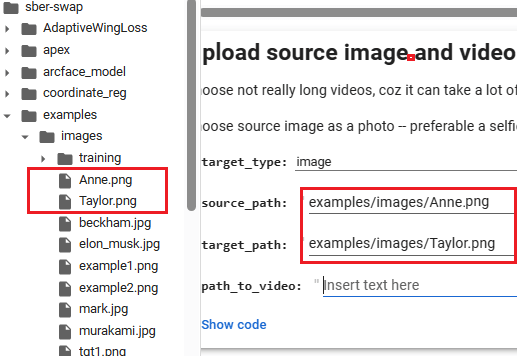
- Expand the left side bar where it will show you the files related to this project. Open the examples folder and then go inside the images folder. Right click on this images folder and then upload the source and target image.

- Replace the name of the uploaded images in the same cell. Make sure that in the target_type, you select “image” and delete everything from the path_to_video feild.

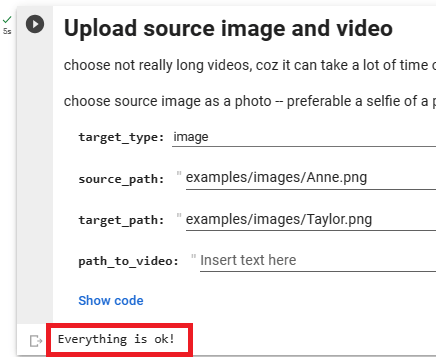
- Now, execute this cell and wait for Everything is ok! status.

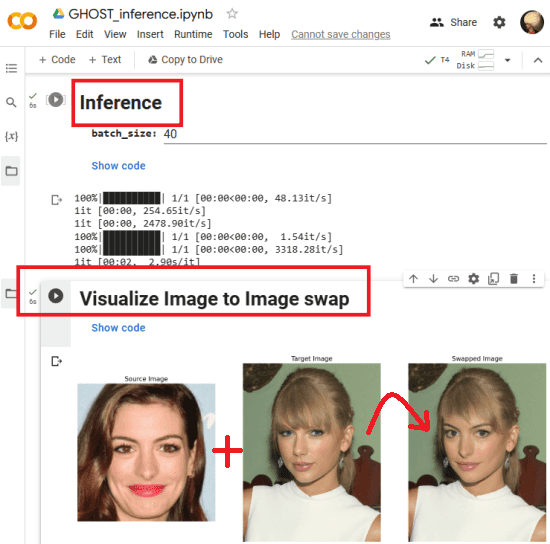
- Finally, run the Inference cell and then run the Visualize Image to Image swap cell. You will see the final output there. Right click on the finally generated image to save it on your PC.

- To swap faces in other images, you don’t have to run the Notebook again from the start. Just go to the cell where you had to upload the images. Upload new images, replace the name in the code, and then start running cells from there.
- Done.

In this way, you can now easily replace the face in any photo using AI for free. The above steps will guide you how to use this amazing open-source project GHOST. Since it is running on Google Colab, you can use it anytime without any coding experience.
Closing thoughts:
If you are looking for a free face swapper without any limits to replace faces in photos online then you are at the right place. GHOST project is perfect for you to run in Colab. Also, here in this post, I have only shown you how to face swap in photos. This project is even capable of face swapping in videos as well.