This tutorial talks about how to switch to a local account in Windows 10. By default, Windows 10 requires you to sign in to your computer via a Microsoft account. And that’s perfectly alright, because doing so enables advanced features such as automatic OneDrive backup, synchronized settings across multiple systems, and things like that.
But what if you don’t want all those advanced features and constant background sync? What if you want an account that is simpler, and easier to manage?
Thanks to the folks at Redmond, you can easily ditch a full blown Microsoft account (that keeps all your ninety nine thousand system settings synchronized to the cloud) in favor of a much more bare bones local account. Keep reading, and find out how you can switch to a local account in Windows 10.
How To Switch To A Local Account In Windows 10?
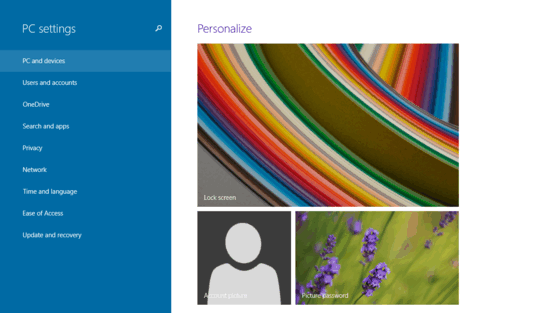
Step 1: Go to the Start Screen (or the Start Menu), and launch the modern style PC Settings app. From the left pane of the app, having a vertical list of all the settings, select Users and accounts.

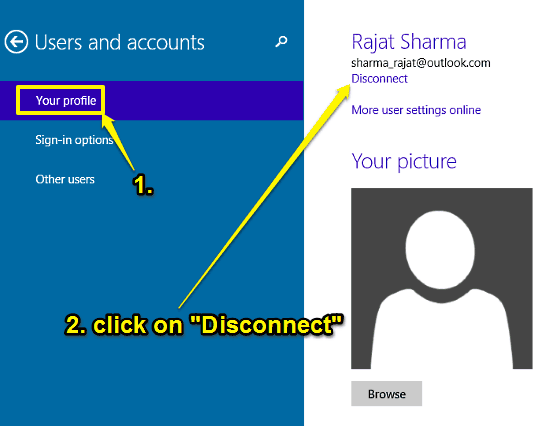
Step 2: The left pane will now display a bunch of sub-options, relevant to account settings. Select Your profile from these sub-options (if it’s not selected by default). Once you do that, the right pane will display the Microsoft account credentials (username, email etc.) of the user currently signed in. Now, click on the Disconnect option.
Step 3: You’ll now be required to confirm the action, by entering the password for the active Microsoft account. Once that’s done, the next screen will ask you to enter some general information (username, password etc.) for the local account that’ll be created for use in place of the currently active Microsoft account.
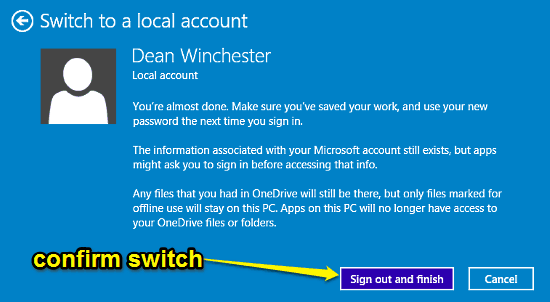
Step 4: Almost there amigos! The last step of the account switch wizard will prompt you to save all your active work, as the process requires you to logging off and then logging back on to the computer (with the local account). To proceed, click the Sign out and finish button.
 And you’ve done it! The currently active Microsoft account will be automatically logged off. You can then easily re-login using credentials of the local account created in the previous step. Whoopie!
Take A Look At: How To Remove Saved Wi-Fi Networks In Windows 10?
Conclusion
Although using a Microsoft account is pretty important in order to have a seamless and uniform Window 10 user experience across multiple devices, there are users who just want simple and easy to use local accounts, just like in olden times. And as you now know, switching to a local account in Windows 10 is as simple as 1-2-3. So give it a try, and let me know what you think in the comments below.