ExtraSpy Employee Monitor is an extremely amazing and useful free surveillance software that can be used to keep an eye on the online activities of the employees of an organization. It is really versatile, and has a laundry list of features. Apart from that, it is quite scalable too, and works equally well, regardless of the size of the organization it’s deployed on. ExtraSpy’s fundamental working is based on the client-server model. It can be used to remotely monitor the computer systems of employees to know what applications they are using, which websites they are visiting, and much more, all in real-time. ExtraSpy can also log keystrokes and screenshots at regular intervals, which are stored in a secure database. You can also use it to send important messages to employees. To top it all off, ExtraSpy features a built-in statistics analyzer with charts and graphs, that gives you a visual estimate of the performance of employees relative to the time spent by them on online activities. Sounds just like what you need for your organization? Head past the break to find out in more.
Update (25th Jan 2018): This software doesn’t exist anymore. In place of that, you may check this list which cover best free employee monitoring software.
ExtraSpy: Installation and Initial Set-up
Since ExtraSpy is an employee surveillance software that basically works on the client-server model, its installation and set-up is also a two stage process. This means that ExtraSpy has to be installed and setup on both the server (the computer system that will be used for monitoring), and the clients(the computer systems that will be monitored). For this reason, ExtraSpy is available for download as a two-module application. One of them is the server, and the other is the client. Both of these can be downloaded from ExtraSpy’s download page.
Note 1: It goes without saying, that all of the client computer systems and the system used for administration need to be connected to a common LAN (Wired or Wireless). You also need to know the IP address of each of the client systems.
Note 2: The installation/set up of ExtraSpy requires you to have the full administrator rights for all of the target computer systems that need to be monitored, and of course of the system that will be used for administration.
Note 3: ExtraSpy can be remotely and automatically installed on all the target client computer systems. However, for this article, I’ll be using the manual method, as the automatic method is a little clunky.
Stage 1: Installation and UI of ExtraSpy’s client module
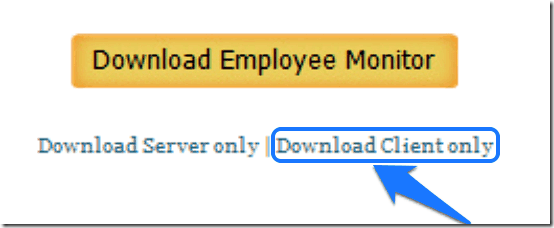
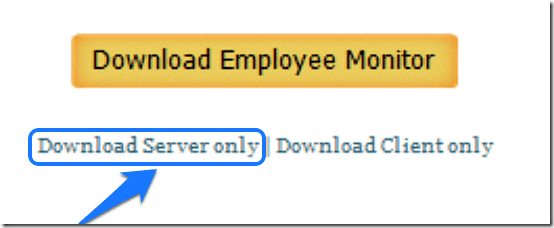
Step 1: Download the client module of ExtraSpy Employee Monitor from its download page and install it (You can also download both modules with the Download Employee Monitor link). The installation is a pretty standard affair.
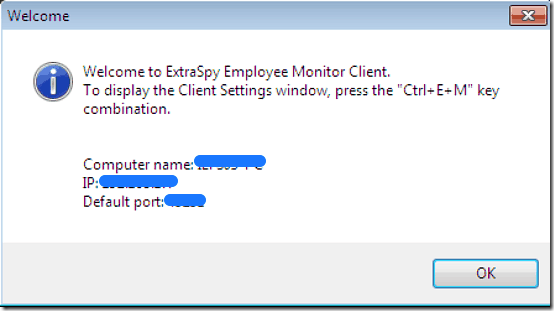
Step 2: Once the installation finishes, a pop-up window notifies you of some important information regarding the client system, such as IP address, port number etc. Keep note of this, as this will be needed while adding this client system to the monitoring list of the ExtraSpy’s server module (detailed later in the article). Also, this pop-up window also tells you about a keyboard shortcut to invoke the client module (Ctrl+E+M). This is the only way to bring up the client module’s user interface, as it doesn’t show up in the Start Menu listing. It can’t be even found in its Program Files folder (Pretty cool, ain’t it?)
Once you click OK, the primary interface of ExtraSpy’s client module shows up. The interface is a pretty Spartan one, and contains nothing, save for a few buttons and checkboxes. Here’s a screenshot:
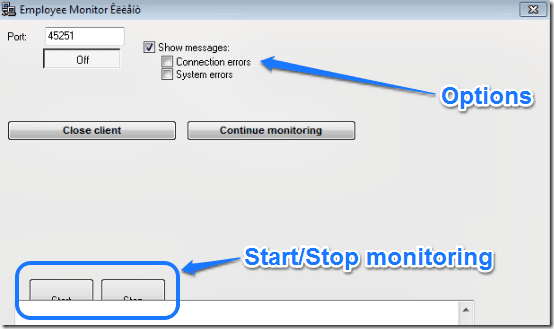
As illustrated by the above screenshot, the client module just consists of options to close the module, as well as continue monitoring it (which also closes it anyway). Once closed, it can only be invoked using the Ctrl+E+M hotkey combination.
Stage 2: Installation and Primary UI of ExtraSpy’s server module
Step 1: Download the server module of ExtraSpy Employee Monitor from its webpage and install it (You can also download both modules with the Download Employee Monitor link). The installation is the regular next .. next and finish sequence.
Step 2: Once the installation finishes, launch the program. Here’s how the main user interface of Employee Monitor’s server module (the one which the server administrator will see and work with) looks like:
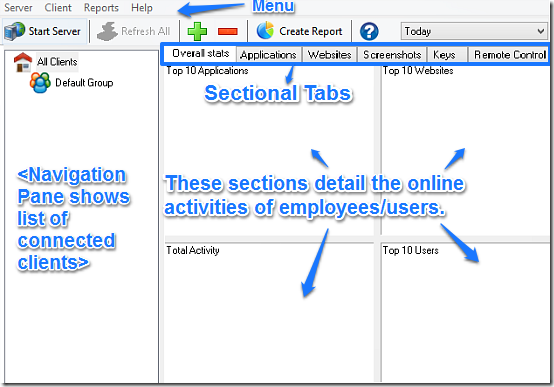
As illustrated by the above screenshot, the server module of ExtraSpy Employee Monitor features quite a busy user-interface. It’s basically divided into two panes: The left pane shows a list of all the client computer systems that are connected to the server module for monitoring, while the right pane (by default) shows the overall online activities of the client computers (and thus, their users, employees etc.). However, the right pane is further divided into six sections, accessed by their respective tabs. These tabs let you access individual surveillance components of Employee Monitor. These are briefly discussed below:
- Overall Stats: This is the default section, and lists the overall usage statistics of the client computer systems.
- Applications: The applications that are used most frequently by the users of client computer systems are listed here.
- Websites: This section lists the most frequently websites accessed on the client computer systems.
- Screenshots: As mentioned in the article before, ExtraSpy takes screenshots of the client systems at regular intervals. All those screenshots are logged under this section.
- Keys: This section logs the keystrokes made on the client systems.
- Remote Control: This section is probably the most important and powerful of all, and lets the server administrator remotely monitor and control the client systems (More on this later).
How to add a client computer system to the server module and start monitoring.
Note: For the process detailed below, both the client and server systems need to be actively connected to the same LAN (Wired or Wireless), at the same time. And this process has to be repeated for all the client systems that need to be added to the server module’s monitoring list.
Once the installation part is complete on both client and server computer systems, the next step is to add the configured client computer system to the monitoring list of ExtraSpy’s server module. The following process details how to do it:
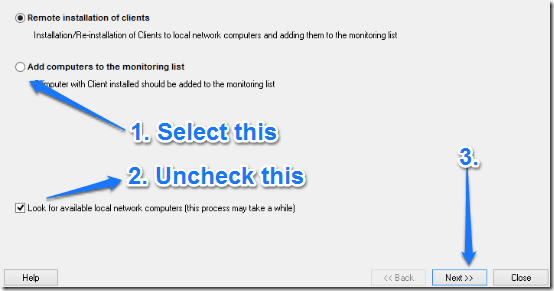
Step 1: Click either the green Plus icon on the options toolbar, or go to Client > Add Client. Once you do that, a window pops up. First, select the radio button that says Add computers to the monitoring list (The other option of Remote Installation is used only when the client module is installed remotely). Also, uncheck the box that asks you whether you want to look for available local network computers or not (This step is not required as you already know the IP address of the client computer to be added to the monitoring list, from the first stage of this process. And besides, this process can be time consuming, especially if your organizational LAN consists of a large number of connected systems). Click next to proceed.
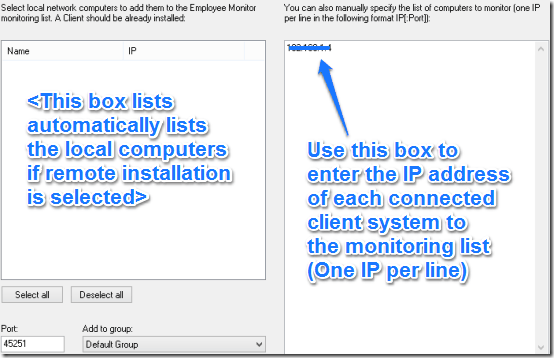
Step 2: The next window consists of two sections. The left section shows up a list of all the local computers that are found connected to the LAN. However, this is only relevant in case of remote installation. We are more concerned about the right section, which lets you manually add the client computer(s) to ExtraSpy’s server module by entering the IP address of each of them (from Stage 1). Note that each line can consist of a single IP address only. Once you’ve added the client system to the monitoring list, click Next.
That’s it. Once the client computer system is added to the monitoring list (provided that it’s connected to the same LAN as the server system, and is online), ExtraSpy’s server module notifies you of the same via a confirmation dialog box.
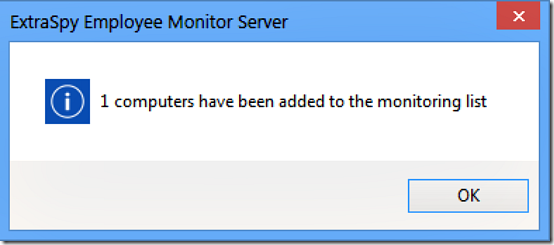
You can add as many client computer systems to the monitoring list manually, using the above detailed process. Now that’s not hard, right?
How to view different usage statistics of a connected client using the server module?
Now that the client computer system has been added to ExtraSpy’s monitoring list, all you have to do to start its monitoring is click Start Server from the options toolbar. Once that’s done, the server module (and thus, the system on which it’s deployed) starts monitoring the connected client(s). We’ll now see how different usage statistics and activities are mapped and visualized on ExtraSpy’s server module’s individual components (discussed earlier in the article). Let’s jump in.
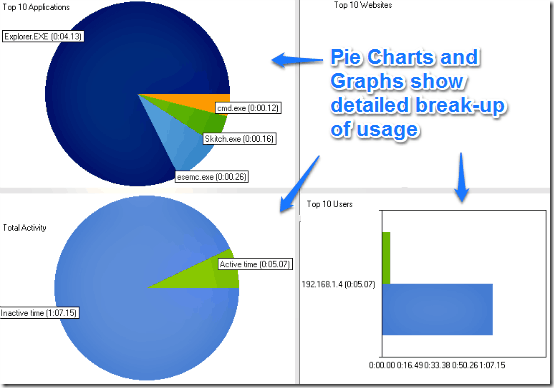
Overall Statistics: This section shows the detailed break-up of usage statistics of a client computer system (and its users), visualized through colored pie charts and graphs. There are four different sub-sections:
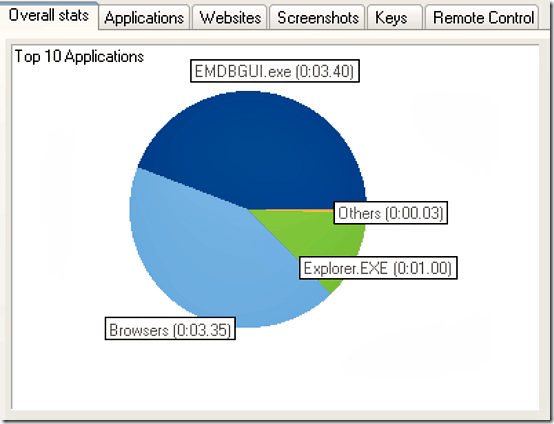
- Top 10 Applications: This shows the top 10 (or less, if the total number of applications accessed are less than 10) most accessed applications by a pie chart that shows their individual access times (in H:M:S format).
- Top 10 Websites: This section lists the 10 websites that are most frequently accessed on the client computer system, no matter which browser they are accessed from.
- Total Activity: The total active time (time spent actually using the client system) as well as the inactive time (the time when the system is idle) is visualized through a pie chart in this section.
- Top 10 users: If the target client system is having multiple user profiles, this section shows the the individual usage time through a horizontal bar graph.
Applications: This tab gives a list of all the applications that are accessed on the client computer system, with their individual active and inactive time.

Websites: This subsection provides a list of all the websites that are accessed from the client computer system, regardless of the browser they are accessed from.
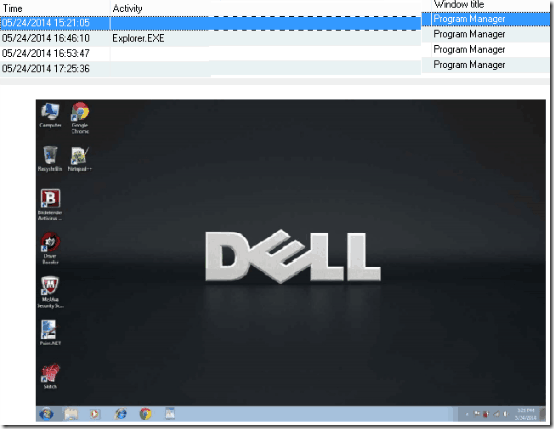
Screenshots: All of the logged screenshots, taken at regular intervals can be seen under this section. Each screenshot also lists the application that was active when it was logged.
Keys: This is the key logger sub-section, and lists all the active applications, and the key presses made while accessing each of them.

Remote Control: As it should be, the best has been saved for the last. Remote control is probably the most powerful sub-module of ExtraSpy server program. It features a pretty handy selection of options that let you do exactly what it says, i.e., remotely control the client computer system.
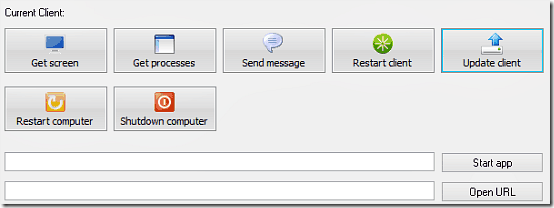
As illustrated by the above screenshot, Remote Control lets you do a lot of cool things with the client computer system. Here’s a lowdown:
- Get screen: Use this button to get an instant screenshot of the client computer system, at any time.
- Get processes: This gives you a list of all the processes (programs) that are actively running on the client system at that given instant.
- Send message: Use this option to flash a pop-up message on the client computer system’s screen. Messages can consist of questions, critical notifications and things like that.
- Restart client: This can be used to terminate and restart the ExtraSpy client module on the target computer system.
- Update client: If there’s a version update available for the client module, use this option to update it remotely.
- Restart computer: Self explanatory. Restart the client computer system remotely at the press of a button.
- Shutdown computer: The big nuke. Use this to instantly shut down the client computer system.
- Start app: Enter the complete path of any application installed on the client system, and click the Start app button to run it.
- Open URL: Enter a URL to launch it in the default web browser of the client computer system.
How to generate usage reports?
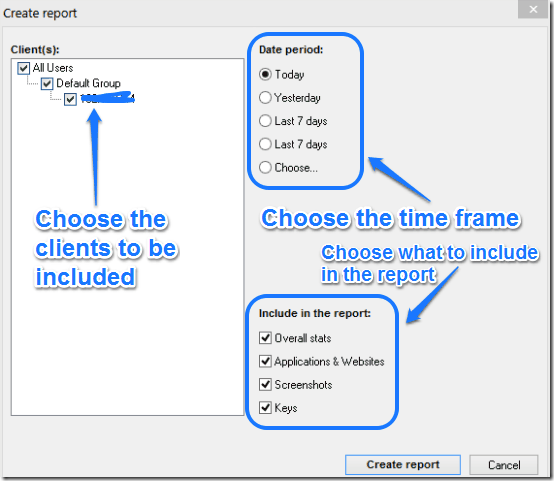
ExtraSpy Employee Monitor can also generate time-based reports of the usage statistics of the connected client computer systems. You can selectively choose the time frame for which you want the report to be generated, as well as the statistics to be included or excluded from the report. Apart from that, you can also choose to include only a selected number of monitored clients, or all of them, in the generated report. To generate a report, click Report > Generate Report (or press F4).
Some points to be taken into consideration
- The administrator needs to have total control over the client systems. The user accounts on the client systems need to be standard user level accounts, and not administrators.
- Standard restrictions on basic installation/uninstallation of applications on the client systems by non-administrator users (for example: requiring an administrator password for installation/uninstallation) need to be in place.
Conclusion
ExtraSpy Employee Monitor is an amazing and really powerful piece of software. It’s filled with features to such an extent, that it’s hard to believe that this thing is a freeware. Simple and easy to setup and use, ExtraSpy Employee monitor puts network administrators in total control of the way the computer systems of their organization are used, thereby contributing towards maximizing the productivity of the organization as a whole. If you’re looking for an efficient and powerful method of monitoring your employees, ExtraSpy Employee Monitor is something you should definitely try. You’ll love this thing.