This tutorial shows how to add classic personalization menu in Windows 10 Context Menu. By adding classic personalization menu, you can access Screen Saver settings, Sound Settings, Color and Appearance, Desktop Icon Settings, etc., using desktop context menu of Windows 10. So all those options that are part of Windows 7 personalization menu can be accessed using Windows 10 context menu. For this, you need to add some tweaks in the Registry of Windows 10. I have explained every step here using which you can easily add Windows 7 personalization menu in Windows 10 context menu.
You will be able to use both modern personalization menu and classic personalization menu, using Windows 10 context menu. Also note that classic personalization menu options are still available in Windows 10, but those are hidden and can’t be accessed directly. So adding classic personalization menu in Windows 10 context menu will help you access any of those options in just two clicks.
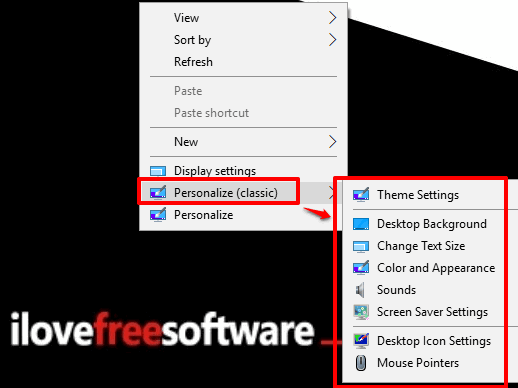
In the screenshot above, you can see classic personalization menu is visible in Windows 10 context menu.
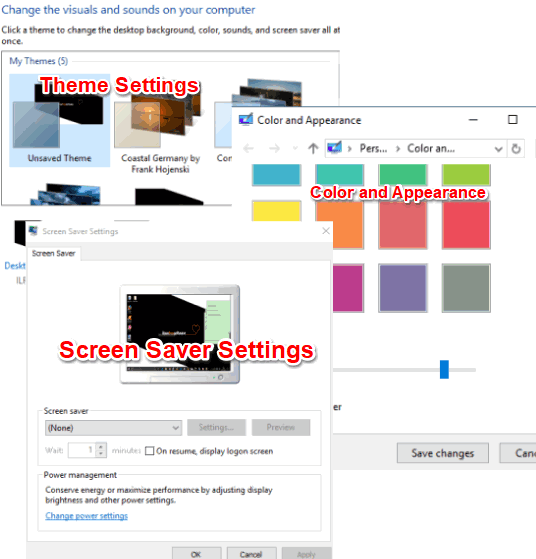
In the screenshot below, you can see some of the options that are part of the classic personalization. You can see Theme Settings, Color and Appearance, and Screen Saver Settings, that can be accessed using Windows 10 context menu after applying this trick.
Before you start the customization, it is good to create a system restore point or backup your PC. This will be helpful to overcome
How To Add Classic Personalization Menu In Windows 10 Context Menu?
Step 1: First of all, you have to create Personalization key under the Shell key. You need to explore HKEY_CLASSES_ROOT, then DesktopBackground key, and access Shell key. After that, you can right-click on that Shell key→New→Key. After creating this new key, set its name as “Personalization” key.
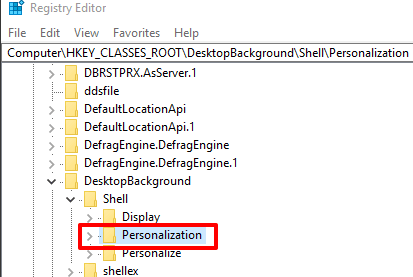
Step 2: This is one of the important steps. Here, you have to create four string values. After that, for each of those String values, you have to enter Value data:
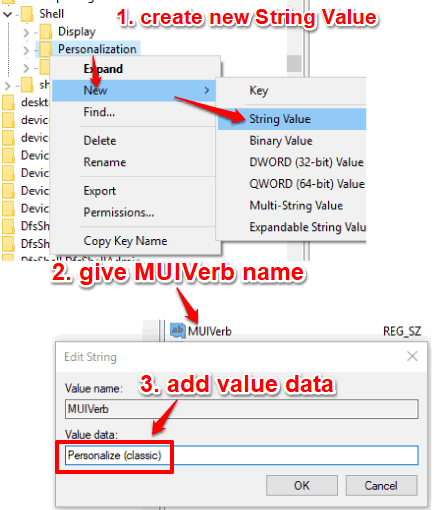
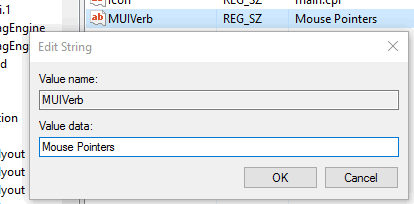
- Right-click on Personalization key, then New key, and click on String Value option. By doing this, you will create new String value. When you have created that new value, give the name “MUIVerb“. Double-click or execute this value and its Edit String window will open. That window has a Value data box. In that box, write “Personalize (classic)“, and save it. By doing all this, you will be able to show “Personalize (classic)” text in Windows 10 context menu.

- Create SubCommands String value. In this value, you don’t have to enter any data.

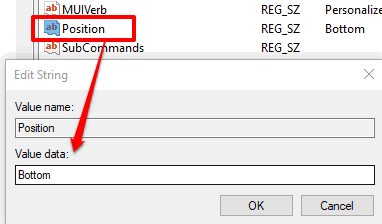
- Generate Position value and in its value data, you can enter Middle/Bottom/Top. Basically, it helps to set the position of the Personalize (classic) in Windows 10 Context menu.

- Create Icon String and add “themecpl.dll” in the Value data box.

Now one part is done. After this, we have to add options that are the part of classic personalization menu, in Windows 10 context menu. We have to create 8 different keys under the shell key, create multiple String Values under those keys and set their value data, create sub-keys under those 8 keys, add data in their Default String values, and create a few DWORD values.
So, follow the next steps very carefully.
Step 3: I have already explained how a new key and String value can be created and how to add value data for a particular String value. So, let’s start the process:
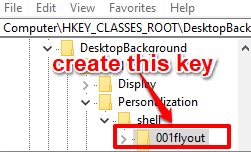
- Create a new key in Shell key and name it as “001flyout” key.

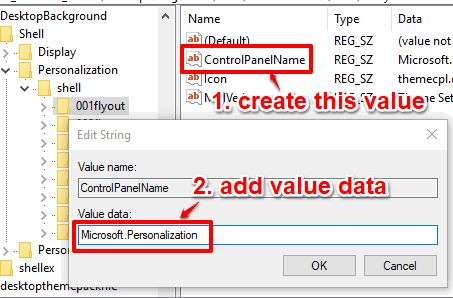
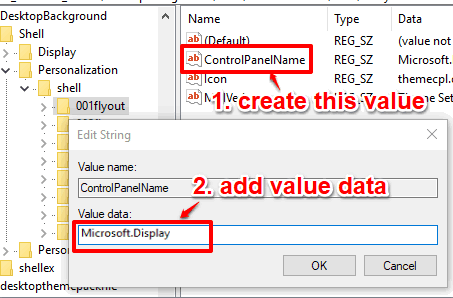
When this key is created, create 3 String values, and add their value data. - Create ControlPanelName String value and add “Microsoft.Personalization” in value data.

- Create Icon String and then add “themecpl.dll” in its Value data.

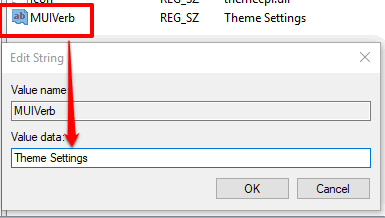
- Create MUIVerb String and add “Theme Settings” in value data.

Step 4: Under 001flyout key, create a “command” name sub-key. After that, under command key, you will find Default String. Edit that string and add “explorer shell:::{ED834ED6-4B5A-4bfe-8F11-A626DCB6A921}” in its Value data.
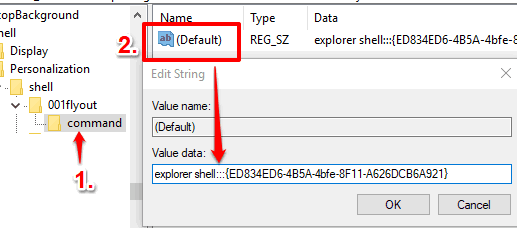
By doing this, when you access classic personalization menu in Windows 10 context menu, you will see Theme Settings option and clicking that option will open classic themes window.
We need to repeat the above steps to add other options and commands to execute those options.
Step 5: Create a new key in Shell key and name it as “002flyout” key.
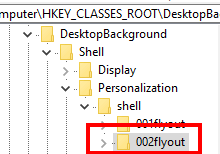
When this key is created, create 2 String values, 1 DWORD value, and add their value data.
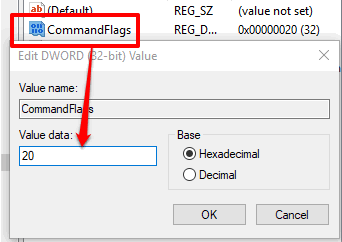
- Create CommandFlags DWORD value (right-click→New→DWORD (32-bit) Value). Rename the DWORD value with CommandFlags. After that, add “20” in value data of this DWORD value.

- Create Icon String and then add “imageres.dll,-110” in its Value data.

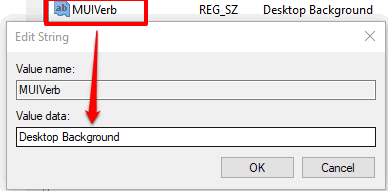
- Create MUIVerb String and add “Desktop Background” in value data.

Step 6: In 002flyout key, create a “command” name sub-key. After that, under command key, you will find Default String. Edit that string and add “explorer shell:::{ED834ED6-4B5A-4bfe-8F11-A626DCB6A921} -Microsoft.Personalization\pageWallpaper” in its Value data.
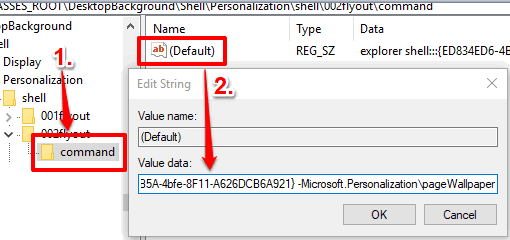
Step 7: Create a new key in Shell key and name it as “003flyout” key.
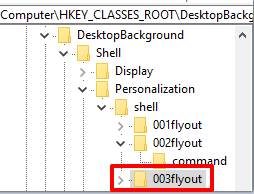
After this key is created, create 3 String values, and add their value data.
- Create ControlPanelName String value and add “Microsoft.Display” in value data.

- Create Icon String and then add “display.dll,-1” in its Value data.

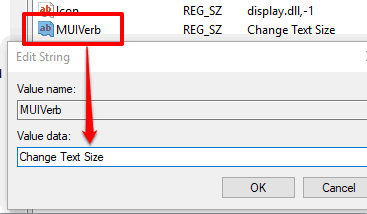
- Create MUIVerb String and add “Change Text Size” in value data.

Step 8: Under 003flyout key, create a “command” name sub-key. After that, under command key, you will find Default String. Edit that string and add “explorer shell:::{C555438B-3C23-4769-A71F-B6D3D9B6053A}” in its Value data.
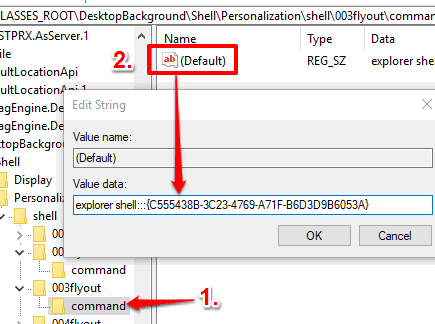
Step 9: Now generate a key in Shell key and name it as “004flyout” key.
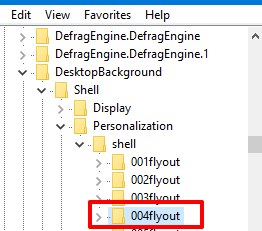 Under this key, create 2 String values, and add their value data.
- Create Icon String and then add “themecpl.dll” in its Value data.

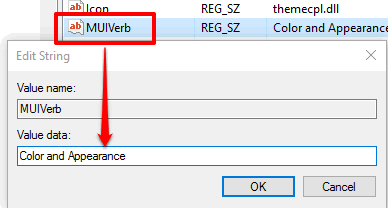
- Create MUIVerb String and add “Color and Appearance” in value data.

Step 10: Under the 004flyout key, create “command” key. Under command key, you will see Default String. Edit that string and add “explorer shell:::{ED834ED6-4B5A-4bfe-8F11-A626DCB6A921} -Microsoft.Personalization\pageColorization” in its Value data.
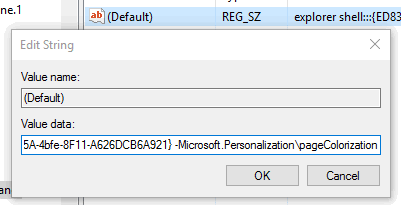
Step 11: This time, you have to create “005flyout” key in shell key.
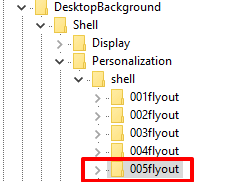
Under this key, create 2 String values, and add their value data.
- Create Icon String and then add “SndVol.exe,-101” in its Value data.

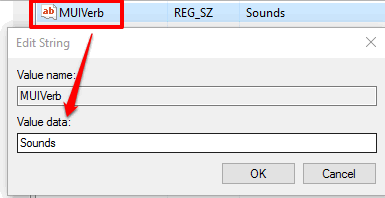
- After that, create MUIVerb String and add “Sounds” in value data.

Step 12: In 005flyout key, create “command” key. Under command key, you will see Default String. Edit that string and add “rundll32.exe shell32.dll,Control_RunDLL mmsys.cpl,,2” in its Value data.
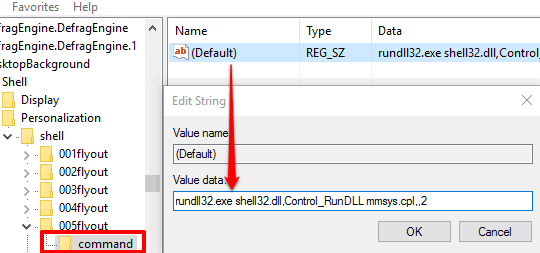
Step 13: Moving forward, you need to create “006flyout” key under the shell key.
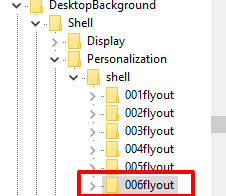
In that key, create 2 new String values, and add their value data.
- Create an Icon String value and then add “PhotoScreensaver.scr” in the Value data box.

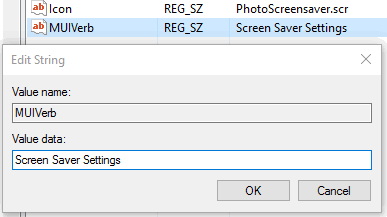
- Now, create another String value and give a name “MUIVerb“. Now add “Screen Saver Settings” in its value data.

Step 14: In 006flyout key, create “command” key. Under command key, you will see Default String. Edit that string and add “rundll32.exe shell32.dll,Control_RunDLL desk.cpl,,1” in its Value data.
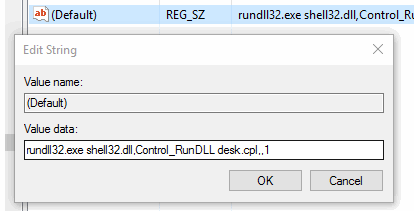
Step 15: We’re getting close. Now, you have to create a “007flyout” key.
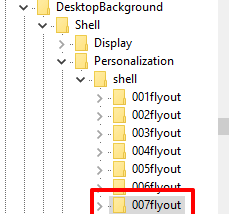
After this key is created, you have to generate 2 String values, 1 DWORD value, and add their value data.
- Create CommandFlags DWORD value. After that, add “20” in value data of this DWORD value.

- Create Icon String and then add “desk.cpl” in its Value data.

- Create MUIVerb String and add “Desktop Icon Settings” in the value data.

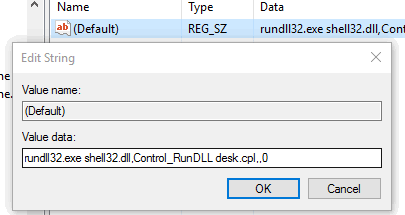
Step 16: In 007flyout key, create a “command” name sub-key. After that, under command key, you will find Default String. Edit that string and add “rundll32.exe shell32.dll,Control_RunDLL desk.cpl,0 in its Value data.
Step 17: We’re in the final stage. Create a “008flyout” key.
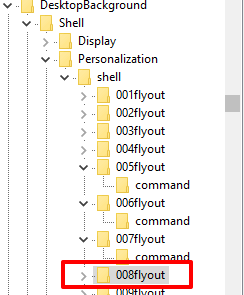
After this key is created, generate 2 String values.
- Create an Icon String and then add “main.cpl” in its Value data.

- Create MUIVerb String and add “Mouse Pointers” in the value data.

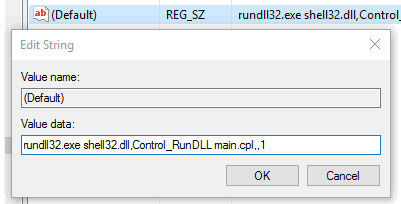
Step 18: In 008flyout key, create a “command” name sub-key. After that, under command key, you will find Default String. Edit that string and add “rundll32.exe shell32.dll,Control_RunDLL main.cpl,,1” in its Value data.
That’s it! Everything is done.
Now whenever you will right-click on desktop in Windows 10 PC, you will see that classic personalization menu is visible and under that option, all its sub-options are present that you can open in a click.
The Verdict:
Many of us still like and use Windows 7 personalization menu in Windows 10, but accessing them is a bit lengthy as we can’t access them right away. So if you are also among those users who use classic personalization menu regularly in Windows 10, then adding classic personalization menu in Windows 10 context menu is really good. It does involves lot of steps, but once done, all the Classic Personalization menu options are just a click away.
