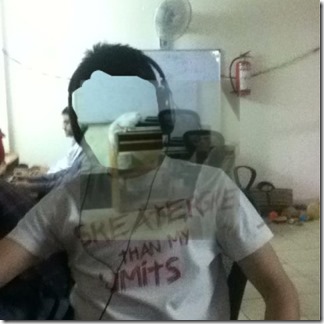
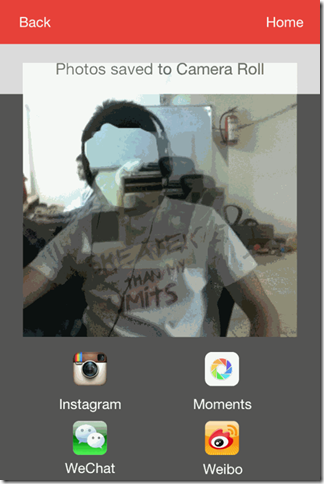
HollowCam is a free iPhone camera app which lets you click the photos and make any of its part invisible. The part of the photo selected by you is made invisible in such a way that the photo looks realistic when you finish the editing. To make the photo look more realistic, you can make different changes to the photo like adjusting Contrast, Saturation, Brightness, and Transparency.
The app also offers various props which you can add to your photo like Head, Frames, Cloak, Legs, and Magic. These props not only let you make the selected part look invisible but also make the photo look attractive and real. When you have finished doing the editing work, you can save the photo to your iPhone’s photo album. You can also share the photo on Instagram, Moments, WeChat, and Weibo from within the app.
Using The HollowCam iPhone Camera App:
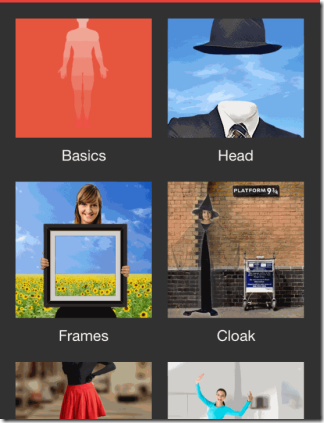
You can get HollowCam iPhone camera app either by searching on iTunes App Store or by clicking the link given at the end of this review. When you will launch the app, you will see the following options on home screen: Basics, Head, Frames, Cloak, Legs, and Magic.
Before you can start making the photos invisible, you need to click the photo as this app doesn’t support uploading photos from any external source. To open the camera, tap on Basics option. When the camera gets opened, you have to click two photos. The first is to be of the person or object (with background) whose part you want to make invisible while the second photo should be of the same background but without the person/object. The first photo clicked by you is known as the Foreground and the second one as the Background. I will use the terms Foreground and Background to describe the steps, so don’t get confused.
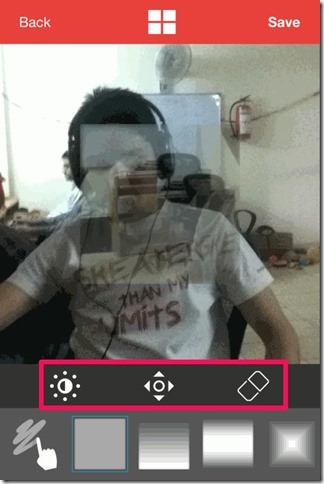
When both the photos are clicked, you will see the screen similar to the one shown in screenshot below. Here, you can see that there are three icons at the bottom. I am explaining them in the order of their appearance which is from left to right.
- Adjustment: This option lets you adjust the Contrast, Saturation, and Brightness of foreground photo so that you can match it with the background photo. You can adjust the values using the slider and as per your preference. Actually, the right combination will help you in making both the photos look similar.
- Move: The Move option lets you move the foreground photo in any of the four directions: Left, Right, Up, and Down. This option helps you in placing the foreground photo at the correct place so that the final photo doesn’t look that it has been edited.
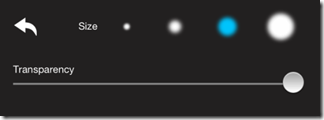
- Transparency: This option lets you adjust the transparency level of your foreground photo. It is the option which lets you set the intensity of invisibility in the final photo. You can choose that to what extent you want to make the photo to look invisible. You can also choose the brush size from here which you will use to select the part of the photo which you want to make invisible.
Now, if you want to make any part of photo invisible then you need to select the shape of the area which you want make invisible. You can choose from the given 4 shapes. The app also lets you place the shape anywhere by dragging it and you can even change the area by using pinch and zoom technique.
After this, tap on the option at bottom left dock to select the brush and to make Transparency option visible. If you want to make any changes then you can do so otherwise simply swipe on the photo to make it invisible. You can also undo the steps using the Undo icon. This way, you can make any part of any photo look invisible with ease.
Customizing Options In HollowCam iPhone Camera App:
When you have made the photo invisible, then you can add many props to the photo to make it look real and unique. You can also add these props while you are still making the photo invisible. To go to the props, tap on the 4-square icon at the top center of the editing screen. It will open the following options:
- Head: This options lets you add different caps, hats, and masks to your photo. You can use them to make your photo look scary as well as attractive. Its all up to you.
- Frames: You can add any of the available frames to the photo and the portion covered by the selected frame will become invisible.
- Cloak: It lets you add ghost costumes to the photo. You can make your photos look scarier using these props.
- Legs: You can add legs to your photo to change the real style of photo and ultimately making the photo look completely changed.
- Magic: This prop lets you add various magic things to your photo like Smoke, Flames, fireworks, etc.
A little bad thing is that you can add only one prop from any one category of props but the good part is that you can resize the prop to any size by using pinch and zoom feature.
When you are ready with the final output, then you can save it and share it on Instagram, Moments, WeChat, and Weibo.
Final Verdict:
HollowCam is a very good camera app for iPhone for creating realistic looking invisible photos. The photos created by the app are so realistic that other person will not be able to figure out that it has been edited. The only thing to remember is that the quality of output image completely depends upon how well can you use the tools and props offered by the app.
