Windscribe is a free VPN client for Windows to access restricted websites, secure Wifi networks, and protect all your browsing activities from various Internet threats. Using this tool, you will be able to access the Internet without any restrictions and free from location-based censorship. It simply connects you to a VPN server and its Firewall feature helps you shield your browser traffic, IP address, location, and more. In the free version, you can connect to the VPN server of the United States East, United States West, HongKong, Canada, United Kingdom, Germany, and Netherlands.
You can use 10GB of monthly bandwidth absolutely free. However, you can upgrade to the paid version of Windscribe to use unlimited bandwidth. Unlike other VPN software, it also allows you to generate secure links, block ads, and trackers. To use these additional features, you will need to install the Chrome extension of Windscribe.
Note: To use some additional features like unlimited bandwidth, unlimited connections, and servers from all locations, you need to purchase the paid version.
How to Connect to a VPN Server and Protect your Browsing Activities:
Step 1: As soon as you install and open the desktop client of Windscribe, it will ask you to create a new account. After that, you can either install the Chrome extension or proceed without it. With the extension, you can take advantage of features like secure link generator, and to block ads or trackers.
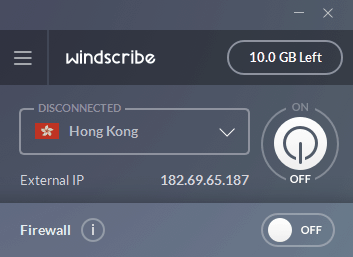
Step 2: The main window will open up with an ON/OFF button for VPN, location selector, and the option to enable or disable the Firewall as shown in the above screenshot. It also shows the amount of bandwidth you’ve already used out of 10GB in the free version.
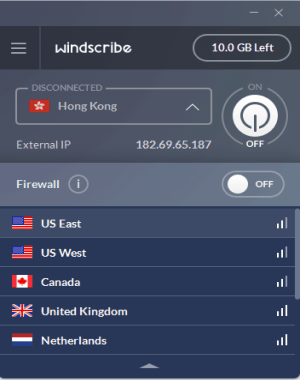
Step 3: To connect your network to a VPN server, the first thing you need to do is select a location. If you are using the free version, then you can connect to the servers of the United States East, United States West, Hongkong, Germany, Netherlands, United Kingdom, and Canada. Click the “Location” drop-down menu and select any of the locations. You will also see the external IP address of the connected VPN server below the menu.
Step 4: When you’re done with selecting a location, click the ON/OFF button once on the right to enable VPN. After that, your network will connect to a VPN server and you can start browsing restricted websites or censored domains.
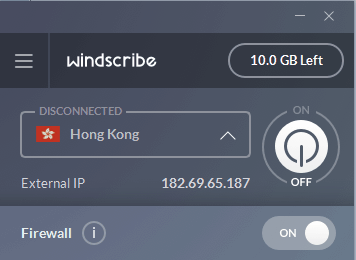
Step 5: If you want to protect and shield your web identity, browser traffic, location, IP address, and more from various Internet threats or hackers, then simply enable the “Firewall” button in the main window of Windscribe. It also disconnects all the Internet connections which are not connected to Windscribe VPN.
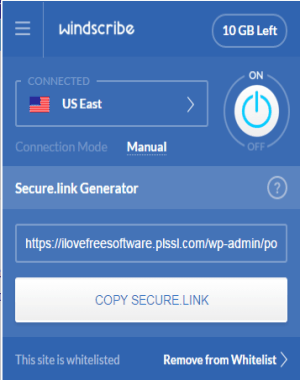
Step 6: In the same manner, you can enable VPN using the Chrome extension. You can simply remove websites from the whitelist of Windscribe extension, to start blocking ads and trackers on those websites. When you click the extension icon, you will also see the secure link generator where you can enter any URL and copy it’s secured version before sharing it.
My Final Verdict:
Windscribe is a very useful VPN tool for everyone out there who uses public Wifi networks or personal data connection. You can use this tool to make your network secure from Internet threats and also access restricted sites. Enabling the Firewall feature can help you hide your IP address, location, web identity, etc. Give it a try and let me know about your experience in the comment box below.
Get “Windscribe” from here and the Chrome extension here.