This tutorial shows how to backup device drivers using PowerShell in Windows 10. You will be able to backup Bluetooth, Display, System, Printer, USB, Media, and other system drivers of your Windows 10 PC using Windows PowerShell. Later, when your Windows 10 drivers are not working well or you need to reinstall any of those drivers, you can use backup folder and then restore any driver using Device Manager window. I have covered separate sections to backup and then restore device drivers.
To backup Windows 10 drivers using PowerShell, you have to run PowerShell with admin rights, and then execute a simple command. Later, you can use Device Manager window and right-click menu option to restore any of the backed up drivers.
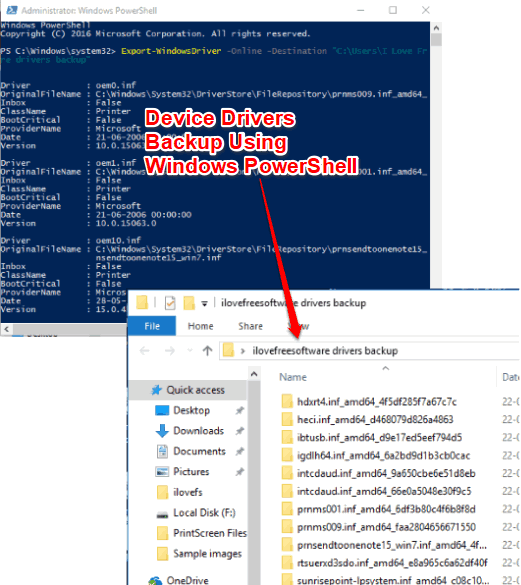
In the screenshot above, you can see device drivers backed up using PowerShell in Windows 10.
There are many third party driver backup software and Command Line option also available to backup drivers, but those who prefer Windows PowerShell, this tutorial is helpful.
How To Backup Device Drivers Using Windows PowerShell In Windows 10?
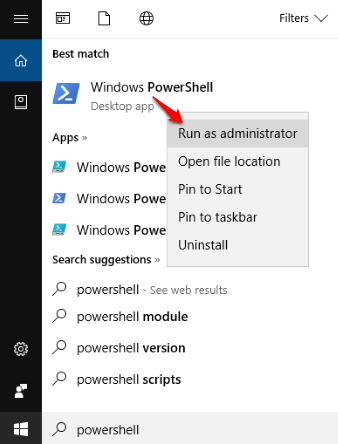
Step 1: Type ‘powershell‘ in Search box and you will see Windows PowerShell in search results. Right-click on Windows PowerShell option and select “Run as administrator” option. This will help you open PowerShell with administrative privileges.
Step 2: Now you need to execute device drivers backup command. The command is: Export-WindowsDriver -Online -Destination "OutputFolderPath". Here, replace OutputFolderPath with the actual path of output folder.
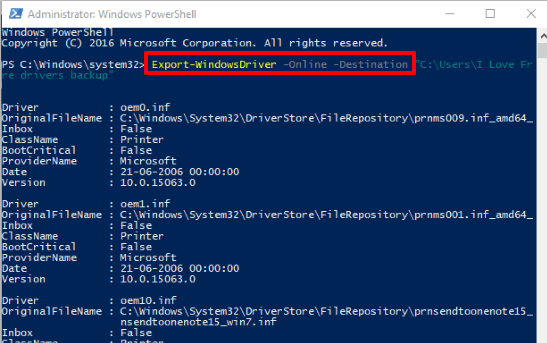
That’s it! Let the command run completely and then it will automatically backup all device drivers and store them in the output folder.
How To Restore Device Drivers In Windows 10?
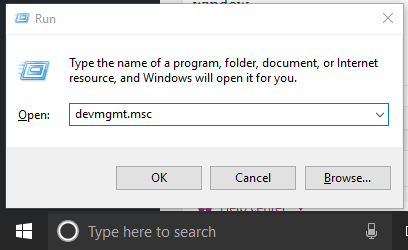
Step 1: Press “Win+R” to open Run Command. Type ‘devmgmt.msc‘, and hit Enter. It will open Device Manager window.
Step 2: When Device Manager window is opened, access a device whose drive you want to restore (say Display driver), right-click on it and then click on “Update driver” option.
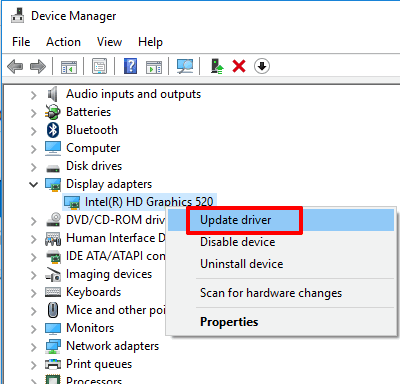
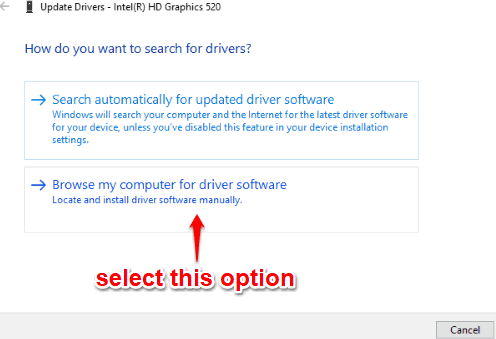
Step 3: Now you will have two options to update the driver: Search automatically for updated driver software and Browse my computer for driver software. Since you have already backed up drivers, you need to select the second option.
Step 4: Add driver backup folder and also select “Include subfolders” option. You should select Include subfolders option so that Windows can automatically find the correct driver.
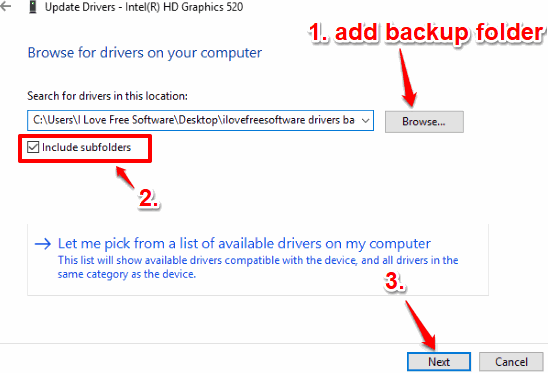
Press Next button.
That’s it! Now Windows will automatically search for the driver and update it. Same way you can restore any other device driver in Windows 10.
The Verdict:
Driver backup is a good habit and it can be a life savior when your Windows drivers are not working well. When you have a driver backup, it becomes super easy to restore them. This option to backup device drivers using PowerShell in Windows 10 is straightforward and that’s why I like it a lot.