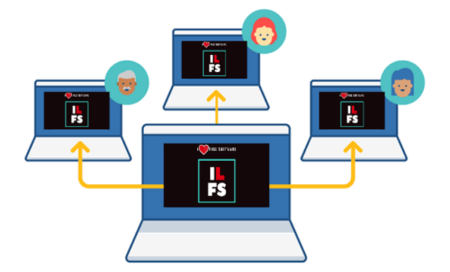
This post lists some best free LAN screen sharing software for Windows. With these software, you can instantly share your PC screen with anyone you want in your local network. You are not required to be connected to the internet in order to share your PC screen. In most of these software, you only get a desktop screen for watching. But I have also added a remote desktop tool in the following post that you can use to access mouse and keyboard on remote LAN PC with ease.
There are many screen sharing options out there but they require internet. Also, there are some online services that do the same but they also require internet. But if you are in an internal network then you don’t really need internet for sharing your screen but tools for that kind of screen sharing are not that popular. Which is why I started doing research and tools that I have found are listed below. Some of these are not dedicated screen sharing software but they offer some functionality to do that with some really nice features that you will like.
5 Free LAN Screen Sharing Software for Windows:
BeeBEEP
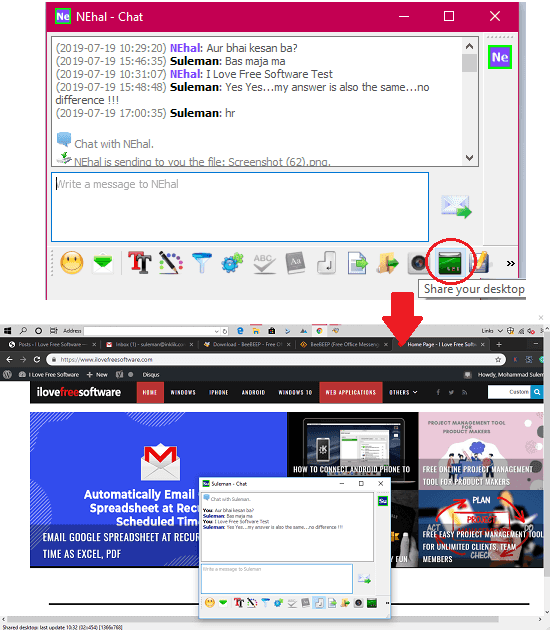
BeeBEEP is basically a LAN messenger software with an option of screen sharing. You will find almost all the features of private and group chat along with the option to share your screen. You can share your screen here every easily in just one click. Also, you can turn off screen sharing whenever you want. Advantage of using this software is that in addition to screen sharing you get a feature like chatting, file sharing, and folder sharing.
This is a portable software and comes with advanced features like offline messages, secure chat, cross-platform, and of course the screen sharing. You can share your screen from the chatting window in just one click. The quality of the video is not that great but it good for internal communications.
Just run it, specify your name there, allow it through Windows Firewall and then you will start seeing your peers. You can initiate a chat with anyone and in the chat window, there is an option to share your screen. You can see that in the screenshot above that I have added.
TeamViewer
TeamViewer doesn’t really need any introduction as it is the first remote desktop tool most people use. It is free for personal use and comes with features to access the remote desktop and do other things. But few people know the fact that TeamViewer can even work in LAN connections. In LAN mode, you can use it in the same way as you use it for remote connections. The only difference is that in place of TeamViewer ID, you will have to use IP of the remote PC in LAN. And the password for the connection is generated by itself.
If you have any two or more PCs in LAN then you can initiate a connect as mentioned in these steps
Step 1: Open TeamViewer and open the Options window from the Extras section and then configure it to accept LAN connections. You can see the screenshot below to understand it.
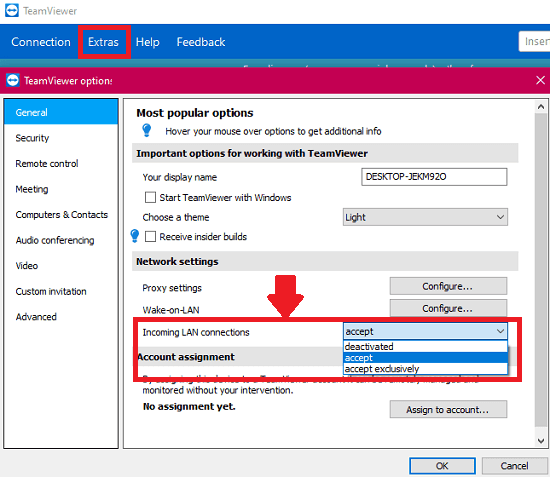
Step 2: After you have enabled the LAN connections, then when the PCs not connected to the internet then they will run in LAN mode. You can see that in the status that they show on the main interface. Also, in LAN mode your ID will change to the IP address of your PC.

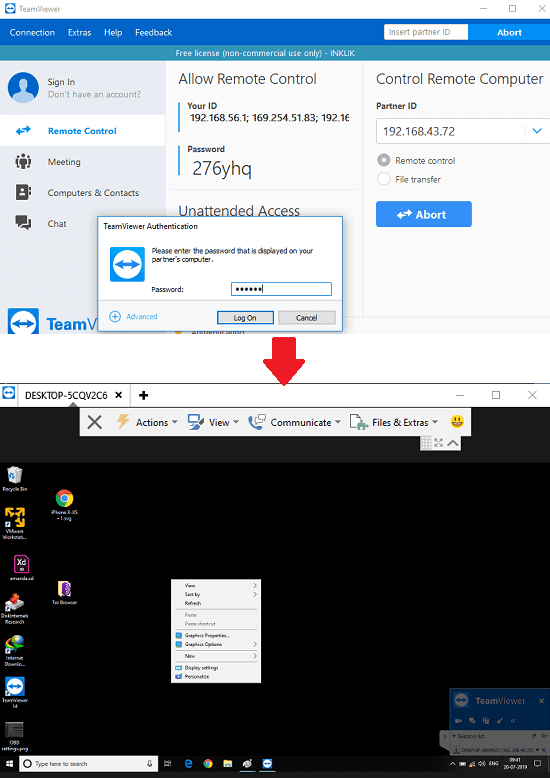
Step 3: To connect to your PC via TeamViewer on other PC in LAN or vice versa, you just enter the IP of the target machine and hit enter. It will ask for the password and after entering that, you will be presented with the desktop of the target. Next, you are free to do anything you want.
In this way, you can use TeamViewer for LAN screen sharing in an easy way. The process of using this software in LAN mode is pretty much similar to using it for remote desktop connections mode. All you have to do is configure it to accept LAN connection and then you are good to go. The steps I have mentioned above will help you understand this whole scenario in more details.
TightVNC
TightVNC, as the name indicates, creates a VNC server on a PC. You can install this server on different nodes in a network and then you can connect to any server from any PC in a network through a VNC viewer. And this software TightVNC has both modules. The best part here is that you can use it to take control of another computer like remote desktop. So, this software can be useful for troubleshooting remote PCs in a LAN.
TightVNC lets you create a password-protected screen sharing and you can opt to disable file sharing and hardware sharing. This tool creates the fastest screen sharing in this list and you just need IP address of a remote LAN PC along with the password. However, the process is not straightforward. Follow these steps to setup screen sharing using TightVNC software.
Step 1: Download TightVNC from above and then install it. Use the “Typical” installation and then you can simply proceed with the installation. Next thing you will notice is the server running the system tray.
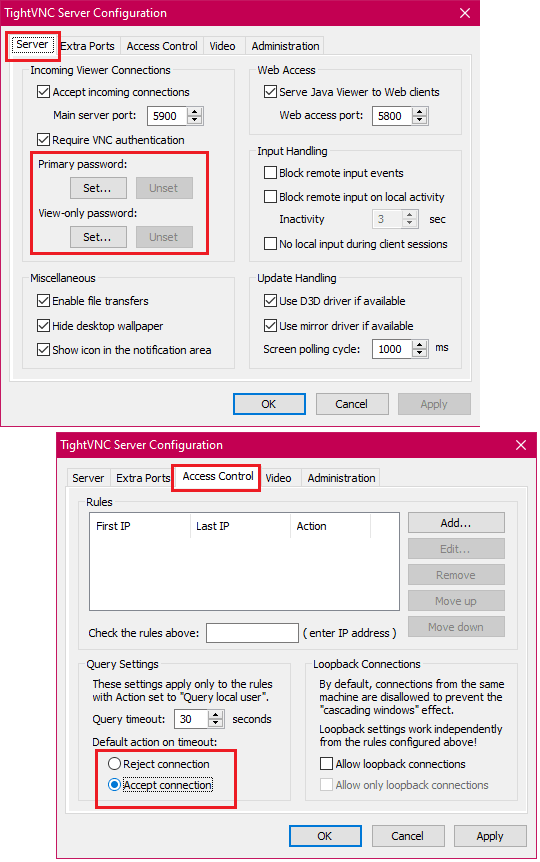
Step 2: Now, you have to modify some settings in the server settings. First thing is that you have to set a password that you can remember. Set a new password in the “Server” tab. After that, you have to allow connections to the PC on which the server is running. Use the “Access Control” tab to do that and you can see this in the screenshot below.
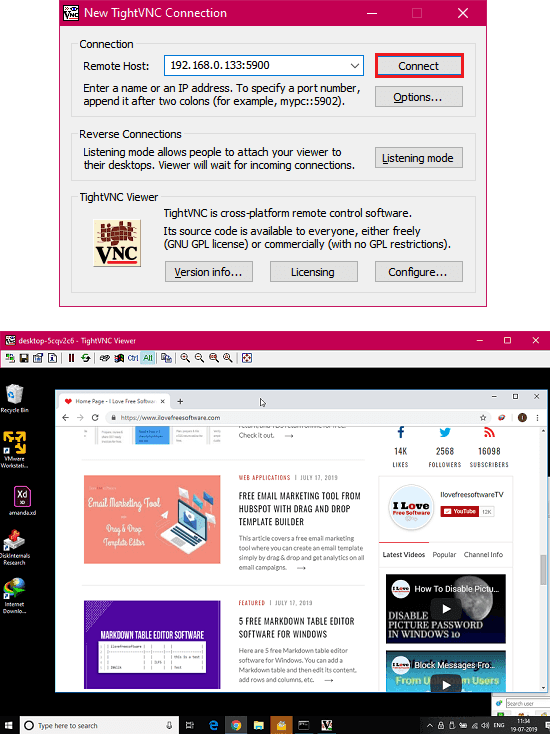
Step 3: Now, the PCs in LAN on which the TightVNC server is running are sharing themselves. You only need a VNC viewer to see that desktop. A VNC viewer is included din TightVNC and then you can open that. Enter the Ip address of the remote LAN PC with default port 5900 and hit enter. It will ask you for the password and after you enter the correct password, it will immediately show you the target desktop.
Similarly, you can connect to other LAN PC through TightVNC and take control of the desktop. You can see what’s going on the PC screen and you can also do an option you like because you have the mouse and keyboard access. There are some other advanced VNC options that you can configure if you have knowledge of virtualization. But for LAN screen sharing and remote desktop, the above steps will be sufficient.
ScreenTask
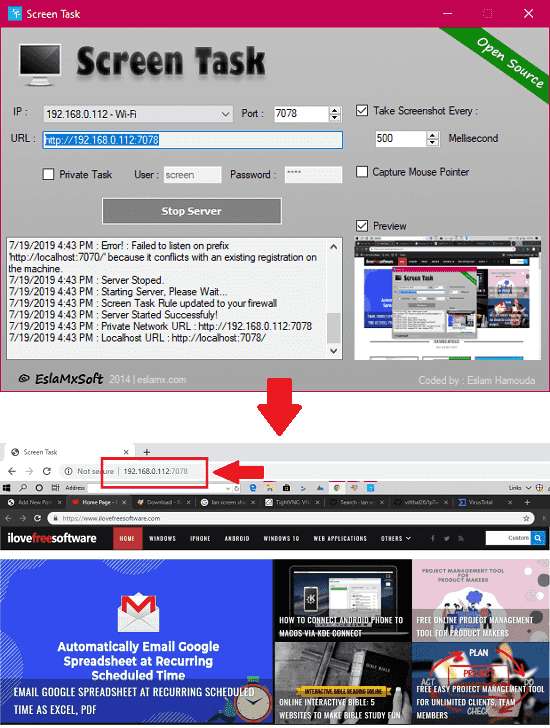
ScreenTask is another free software for LAN screen sharing. Here it is dedicated software to share the screen in LAN and then you can set it up in a few clicks. This is an open-source software which let you share your screen over HTTP. It gives you an HTTP URL that you can use in any local computer in the network. Basically, this software streams your screen on a specified URL and it can be a viewer in any browser. The interface of the software is very simple and you can set it up in a few clicks.
This is an open-source screen sharing software which can be downloaded from GitHub using the given link. After that, you can just extract it and then run it. The main user interface is a bit classic and you can easily get started with it. On the main interface, you can configure the port number and specify the interval for taking screenshots, default is 500 milliseconds. Hit the “Start Server” button and then screen sharing will start. Copy the link from the “URL” box and enter that in any browser of any PC in the LAN. The streaming will start in the browser and you will have an option there to stop it.
Bonus: Use VLC Media Plater for Screen Sharing in Local Network

VLC Media Player is probably is the most used free media player on Linux and Windows machines. It comes with a long list of features that make it one of the best option for video and music player. The network stream option in VLC allows you to steam any media in a network via URL. You can stream movies, audio, and your desktop screen. And that is the features you have to use in order to share your screen. Here VLC lets you specify the frame rate for the live screen sharing and you can even opt to specify the video quality of the desktop stream. You can generate a UDP URL that you enter in other VLC media player to see screen shared by your peer.
There are a few steps involved in the configuring VLC to share your screen in a local network. Ans we covered that in the separate article with the title, how to share PC screen using VLC in local network. You can follow this post to see the steps to share the screen in LAN with the help of VLC. The final URL is UDP protocol based and you can use that in other stream capturing software like MPV.
Final thoughts:
These are the best fee LAN screen sharing software that you can use on Windows. All these work amazingly when it comes to sharing PC screen of any computer in a network. You can use any software that you want from this list but I will recommend you to use TightVNC, and TeamViewer. For simpler options, you can go with BeeBEEP and ScreenTask or even VLC. So, if you often have to share your screen in the network then give a try to these tools and let us know which one you think is best.